If you are reading this post, then you have already figured out that GoPros and similar action cameras, or even mobile phones, are not the best tool for underwater photography (if not, then I have an article coming soon discussing why that is that). So you considering getting into world of underwater photography but are absolutely overwhelmed by the amount of gadgets and options out there, and the prices (especially the prices).
Well, here’s the good news – putting together an underwater photography system that provides good results doesn’t have to be super expensive, and you can put together a system that does a really good job with photography for less than the price of a new iPhone Pro. And in this article, we are going to tell you exactly how to achieve that.
Do note – I am not going to talk about the cheapest way to put together a system, but the most optimal way that tries to find the sweet spot between performance and price, which actually works out more economical in the long run. Also, my emphasis is on building a system that can scale up as your skills and goals as a photographer improve.
This information is also available in the video linked below, but this article has a little more in-depth information, and also specific model recommendations, which I will upgrade periodically.
CAMERA
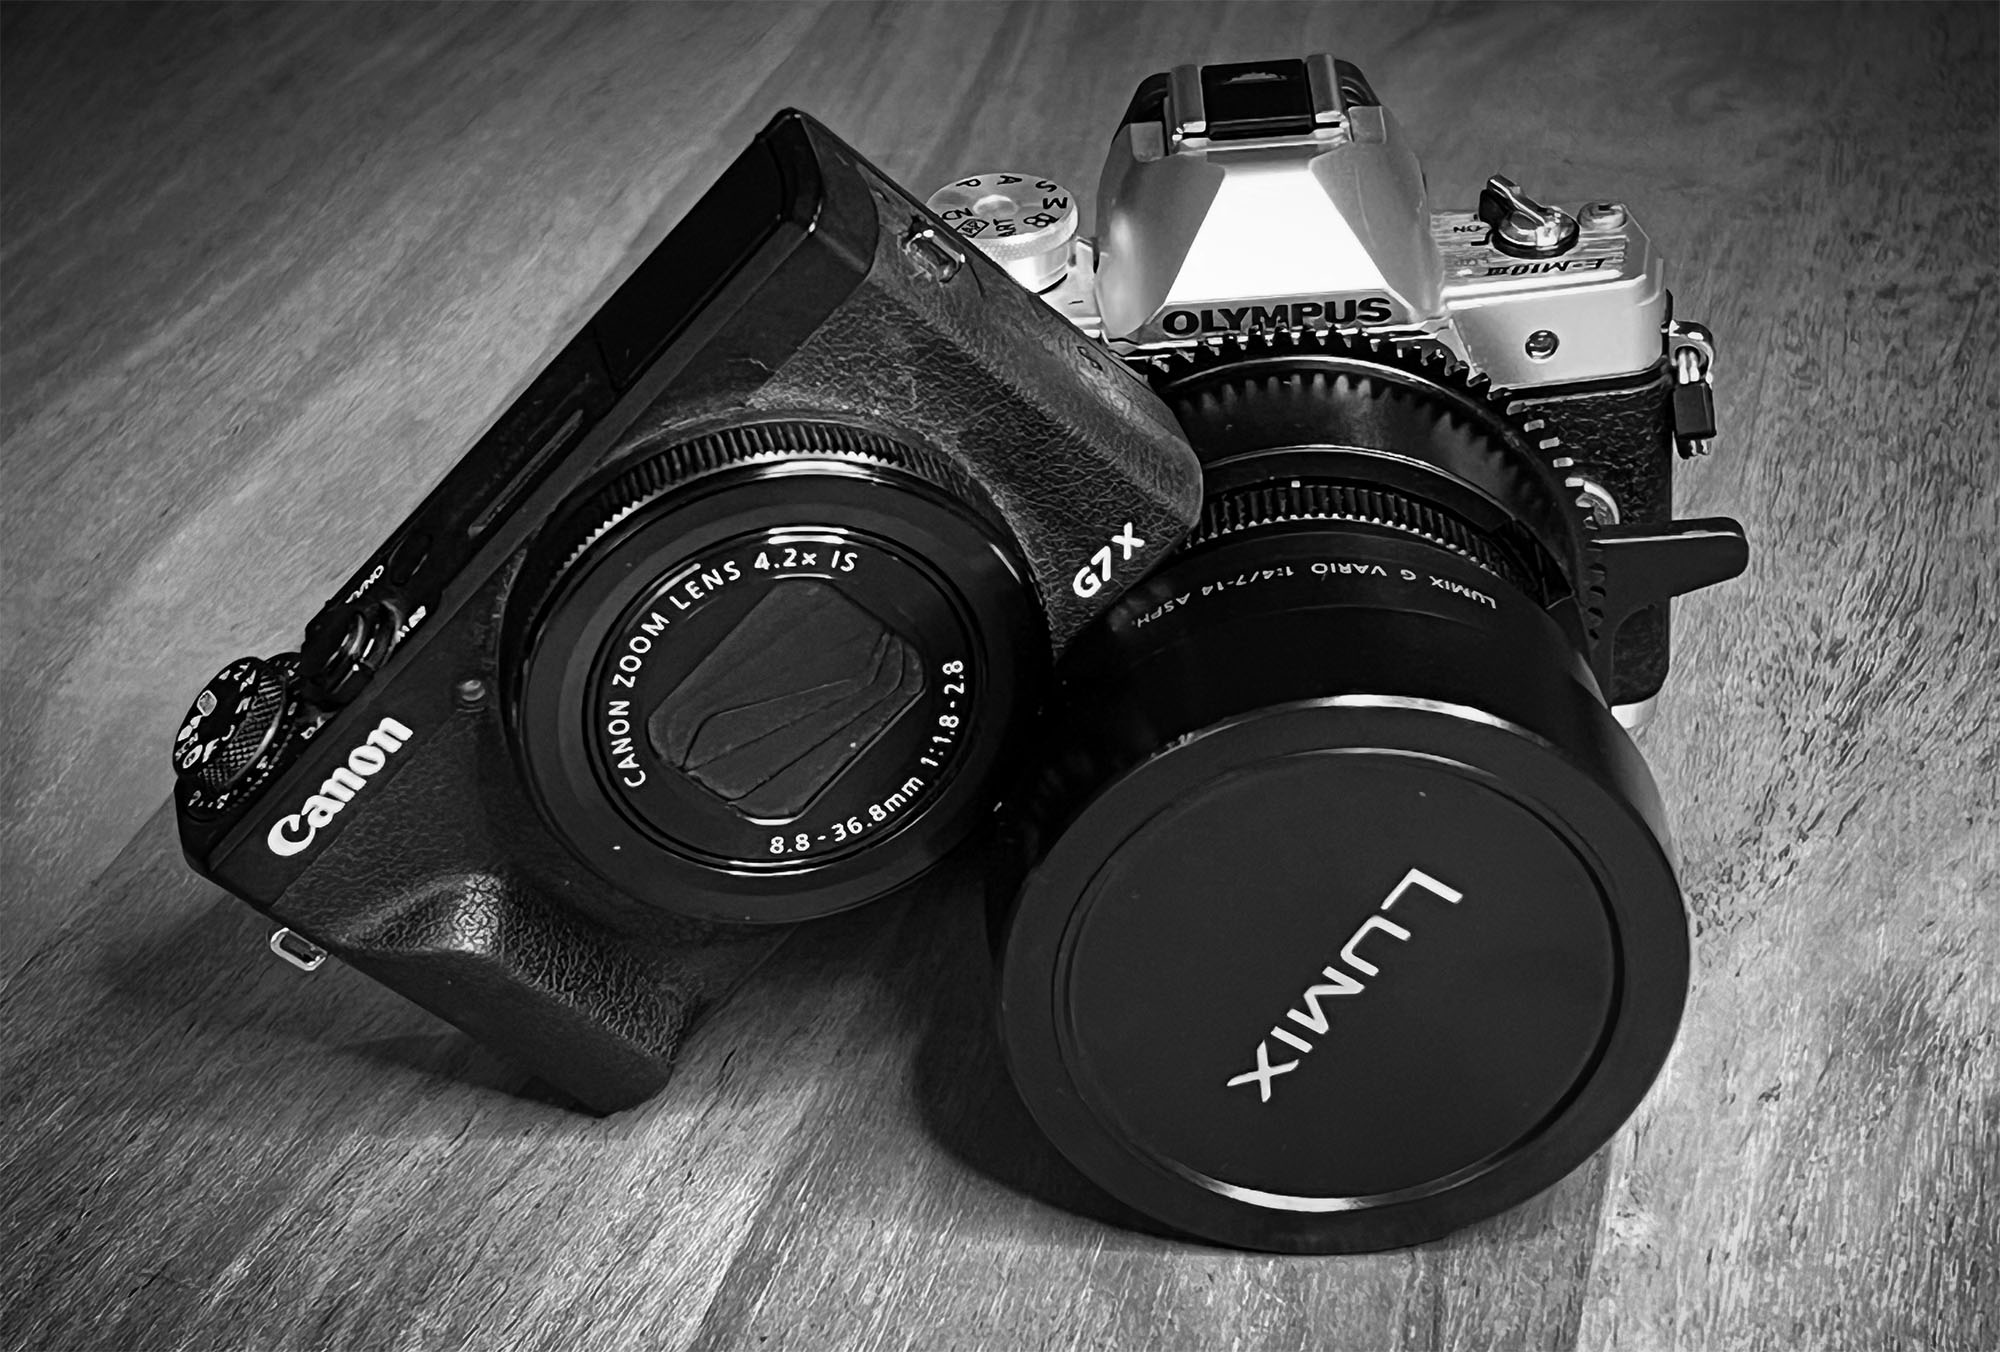
The first thing you need is a camera – yes, you can start out directly with an Interchangeable Lens Camera (ILC) system, but now we are getting into significant money (5 lakhs upwards), and this isn’t always the best option for a lot of divers either. Do check our article on “Compact vs ILC: Which Option is Best For you” for more. detail on this.
So for this article, I am going to assume you are looking at building around a compact camera. With that in mind, here are a few things you should look for:
1). Zoom range: You want a camera with a moderate zoom range (3-4x) with 24/28mm equivalent on the wide end. The wide angle provides a good starting point for photographing reefscapes, and allows you to add wide angle adapters for extending the capabilities of your system.
Avoid the temptation to get a super long zoom range. You cannot zoom into distant subjects underwater, as the water between you and the subject degrades sharpness and contrast – so the zoom is essentially useless. And also, to accommodate the zoom, the port of the housing (the part through which the lens “sees” the world) has to be made longer – and this affects your ability to add a wide angle adapter.
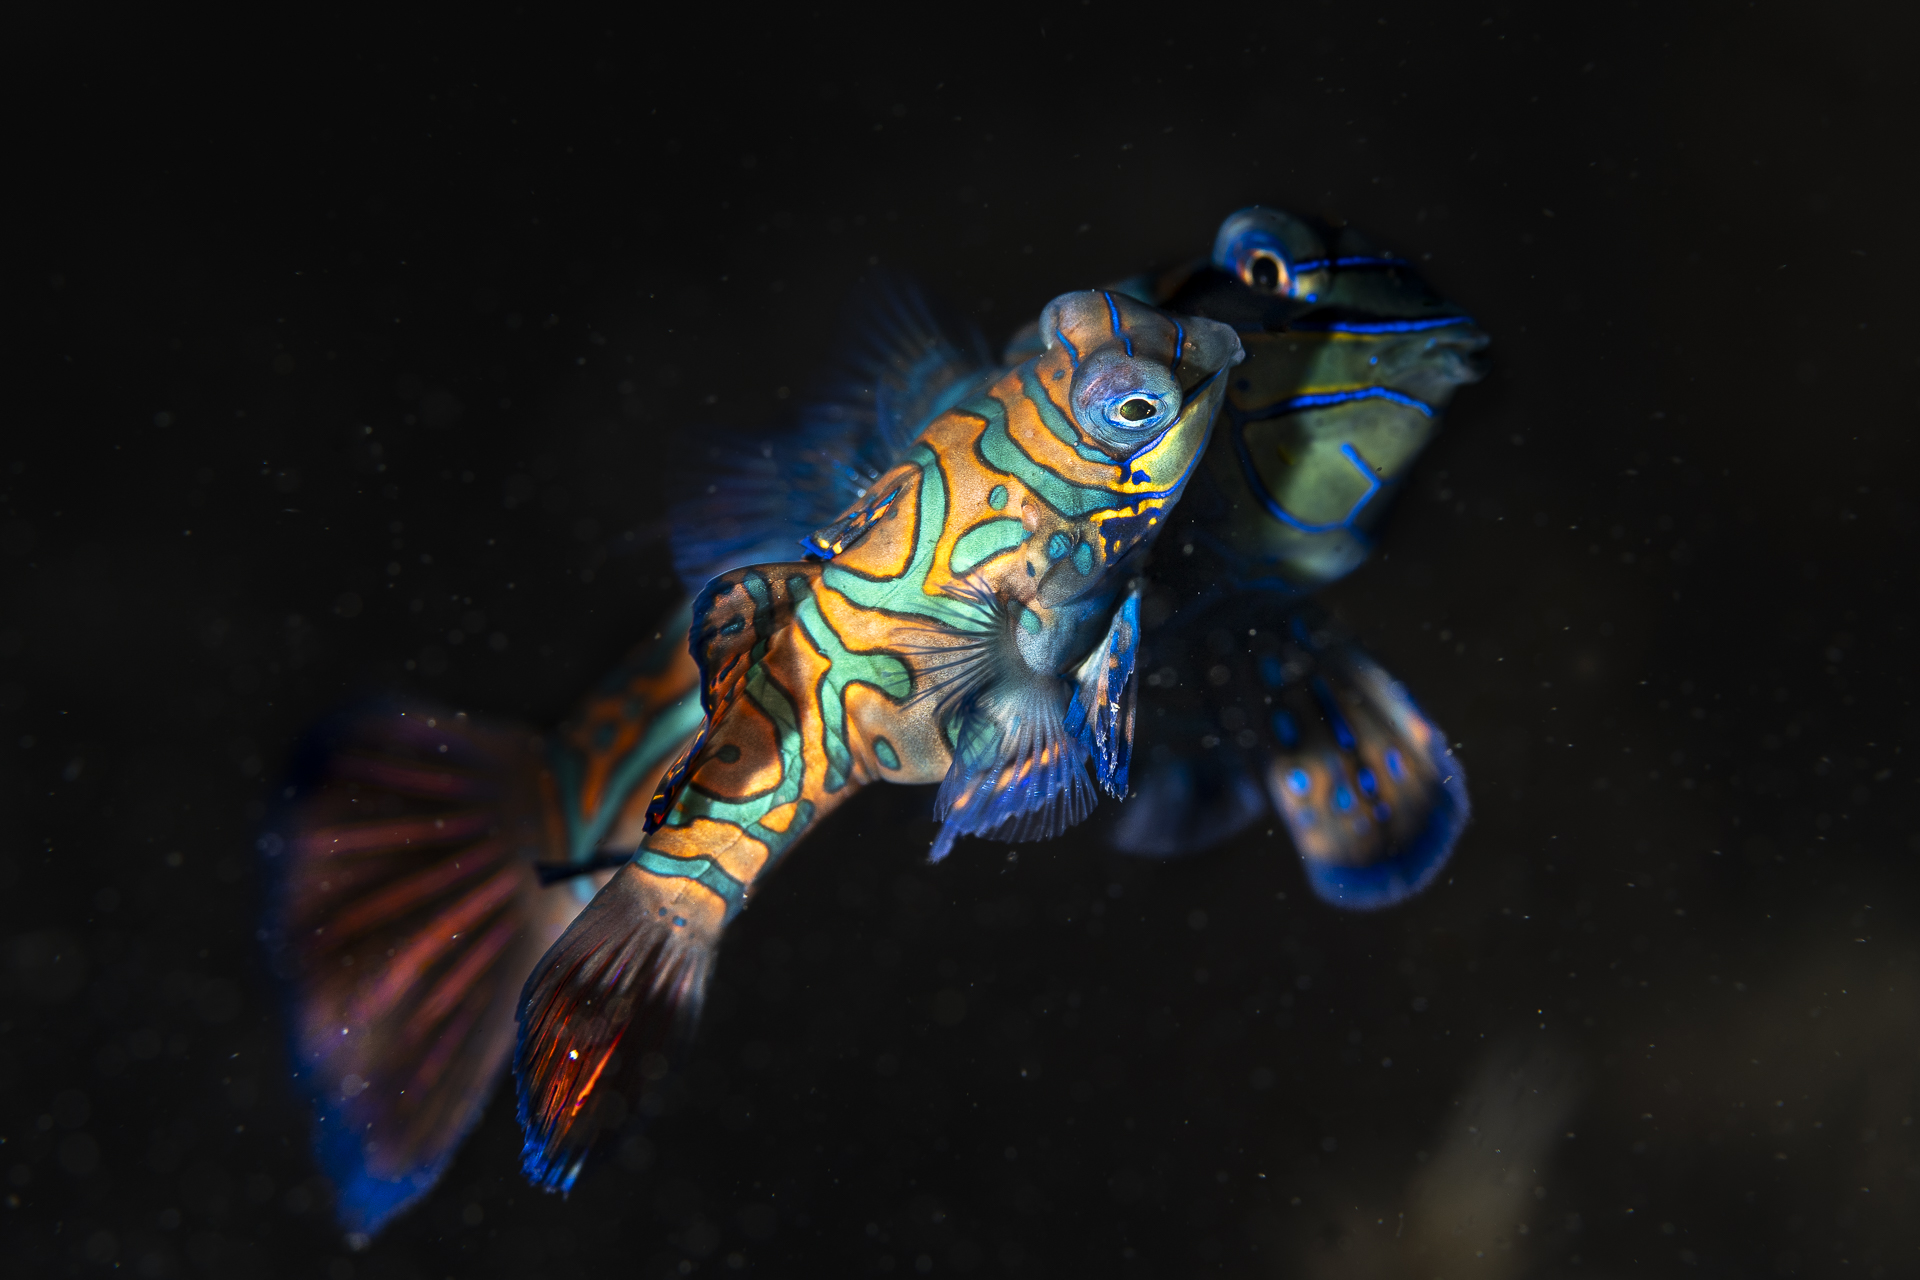
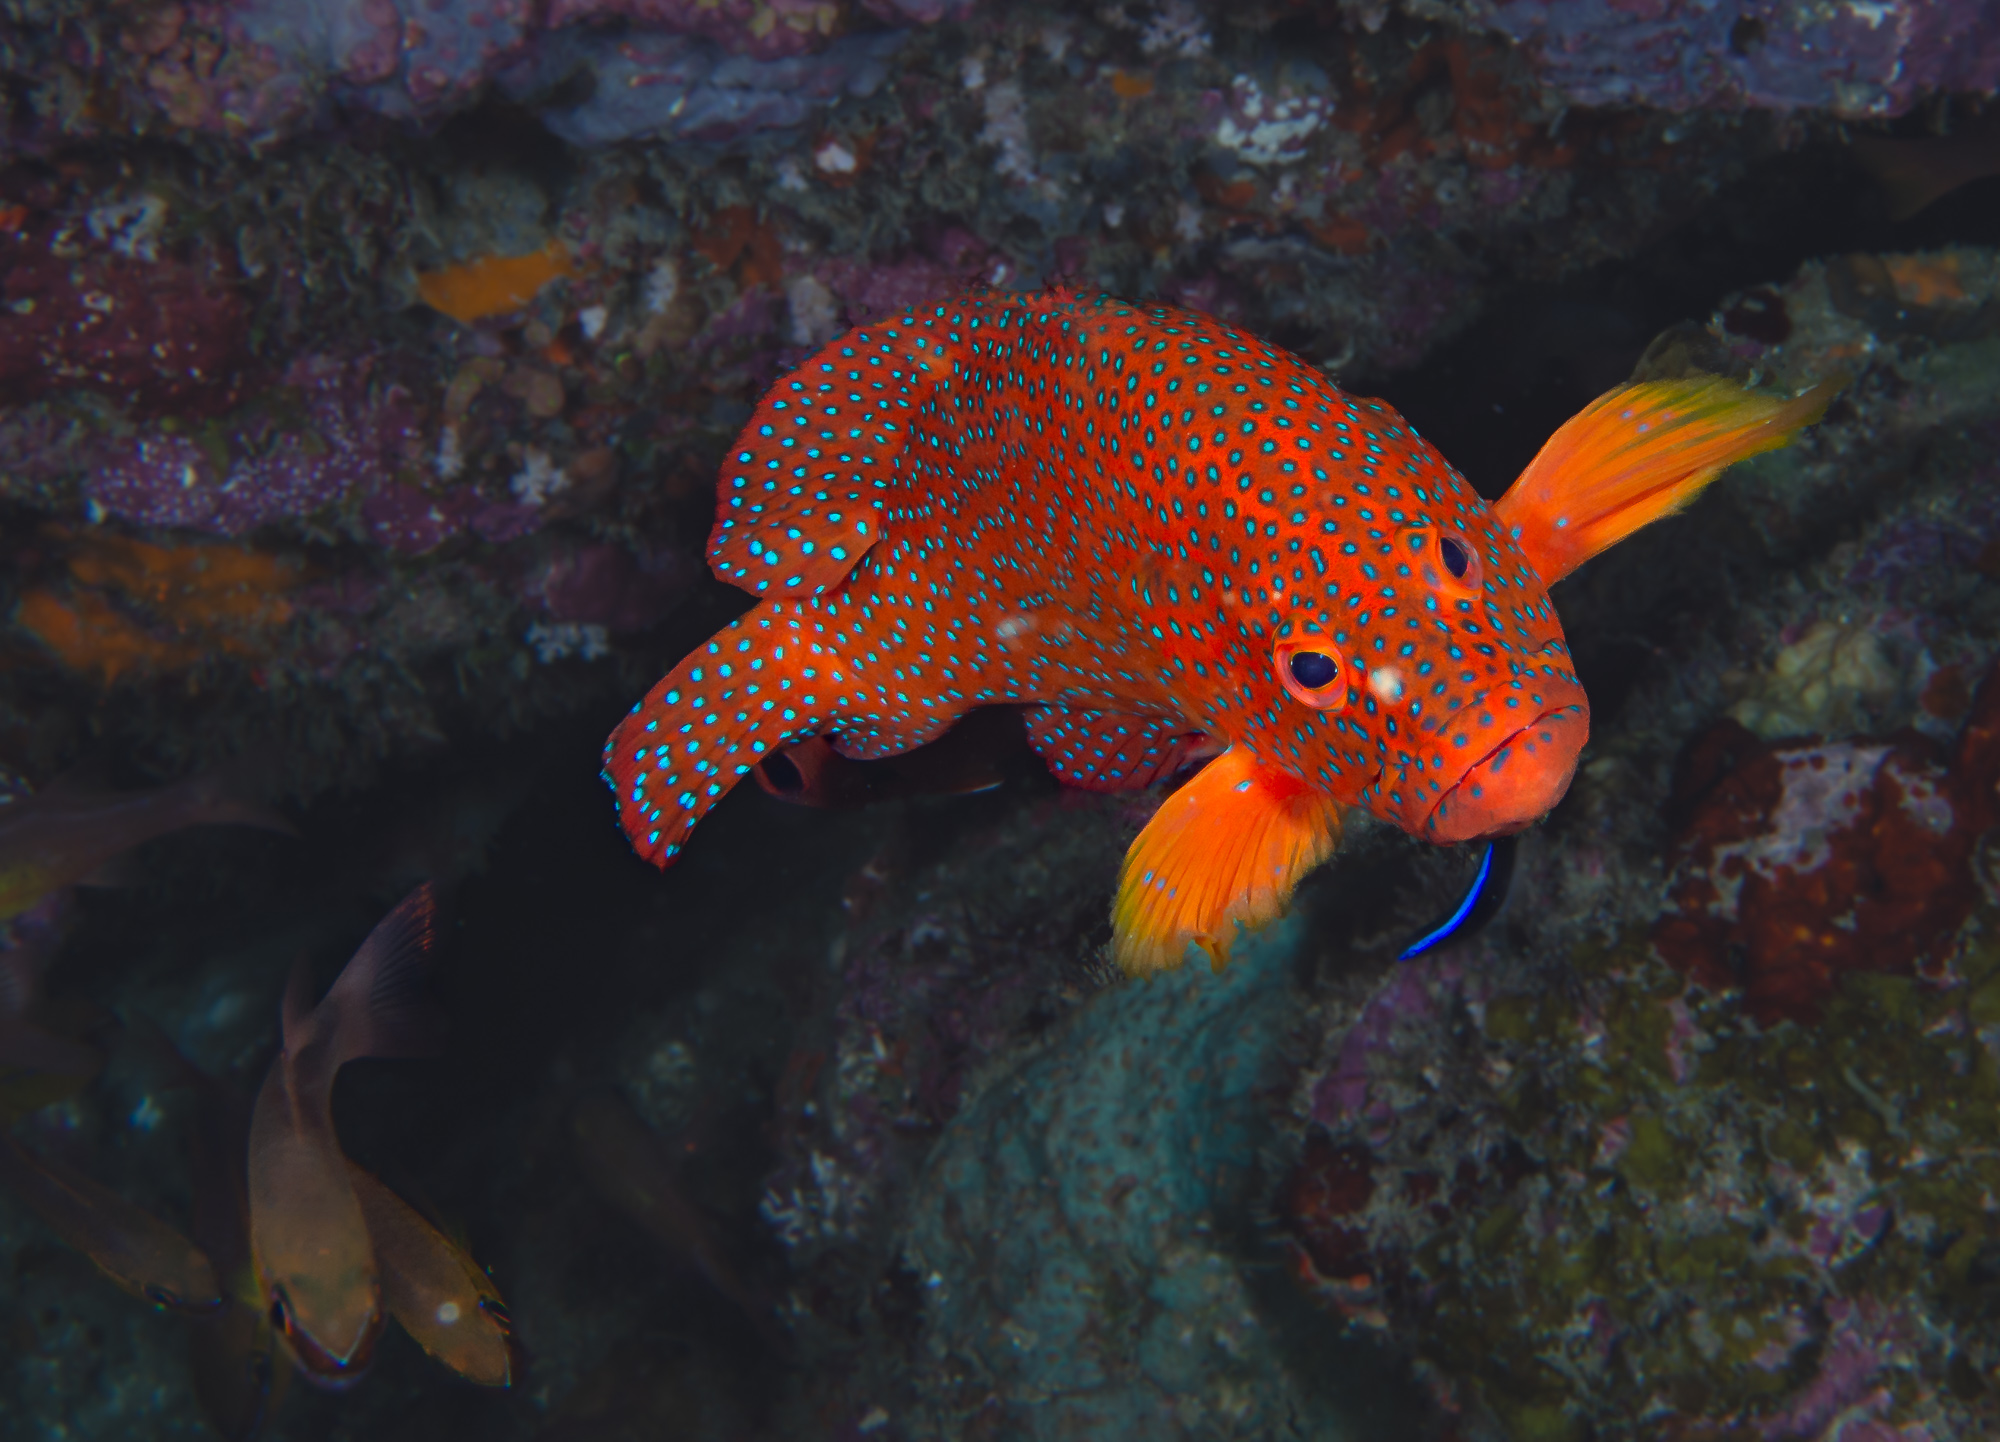 Fish portraits are great subjects when you are starting out
2). Built-in flash: This is essential. The inbuilt flash of your camera is what triggers your external strobe, and it is that external strobe that holds the key to good images. No built-in flash = no ability to trigger a strobe = disappointing images.
3). RAW mode: These days, camera processing is great that a lot of people don’t use RAW anymore. That makes sense on land – underwater, not so much. Even now, camera processing units get fooled significantly by conditions underwater, and you want the ability to adjust white balance and exposure yourself. And that requires RAW. Can you get by without it? Sure – you can do a lot of edits on JPG too. But you have a lot more headroom to work with in RAW, and to me, that is a non-negotiable feature.
 Images shot in tricky lighting benefit significantly from RAW
4). Easy access to key controls: You should be able to control the aperture, exposure, ISO and also select where the camera is focussing without needing to delve into a tree of menus and sub-menus. These are all you need to adjust in the water to take good photographs – but you need to have the ability to make these change these settings quickly is what will help you be prepared for unexpected photo ops.
5) Close-up mode: Macro is one of the most accessible genres of underwater photography and easy to get into – your subject isn’t moving much and you have a lot of time to set up, compose your images and get everything right. But for this, it helps to have a good close-up mode in your camera to begin with – while add-on lenses can help with this, nothing beats having this capability built into the camera
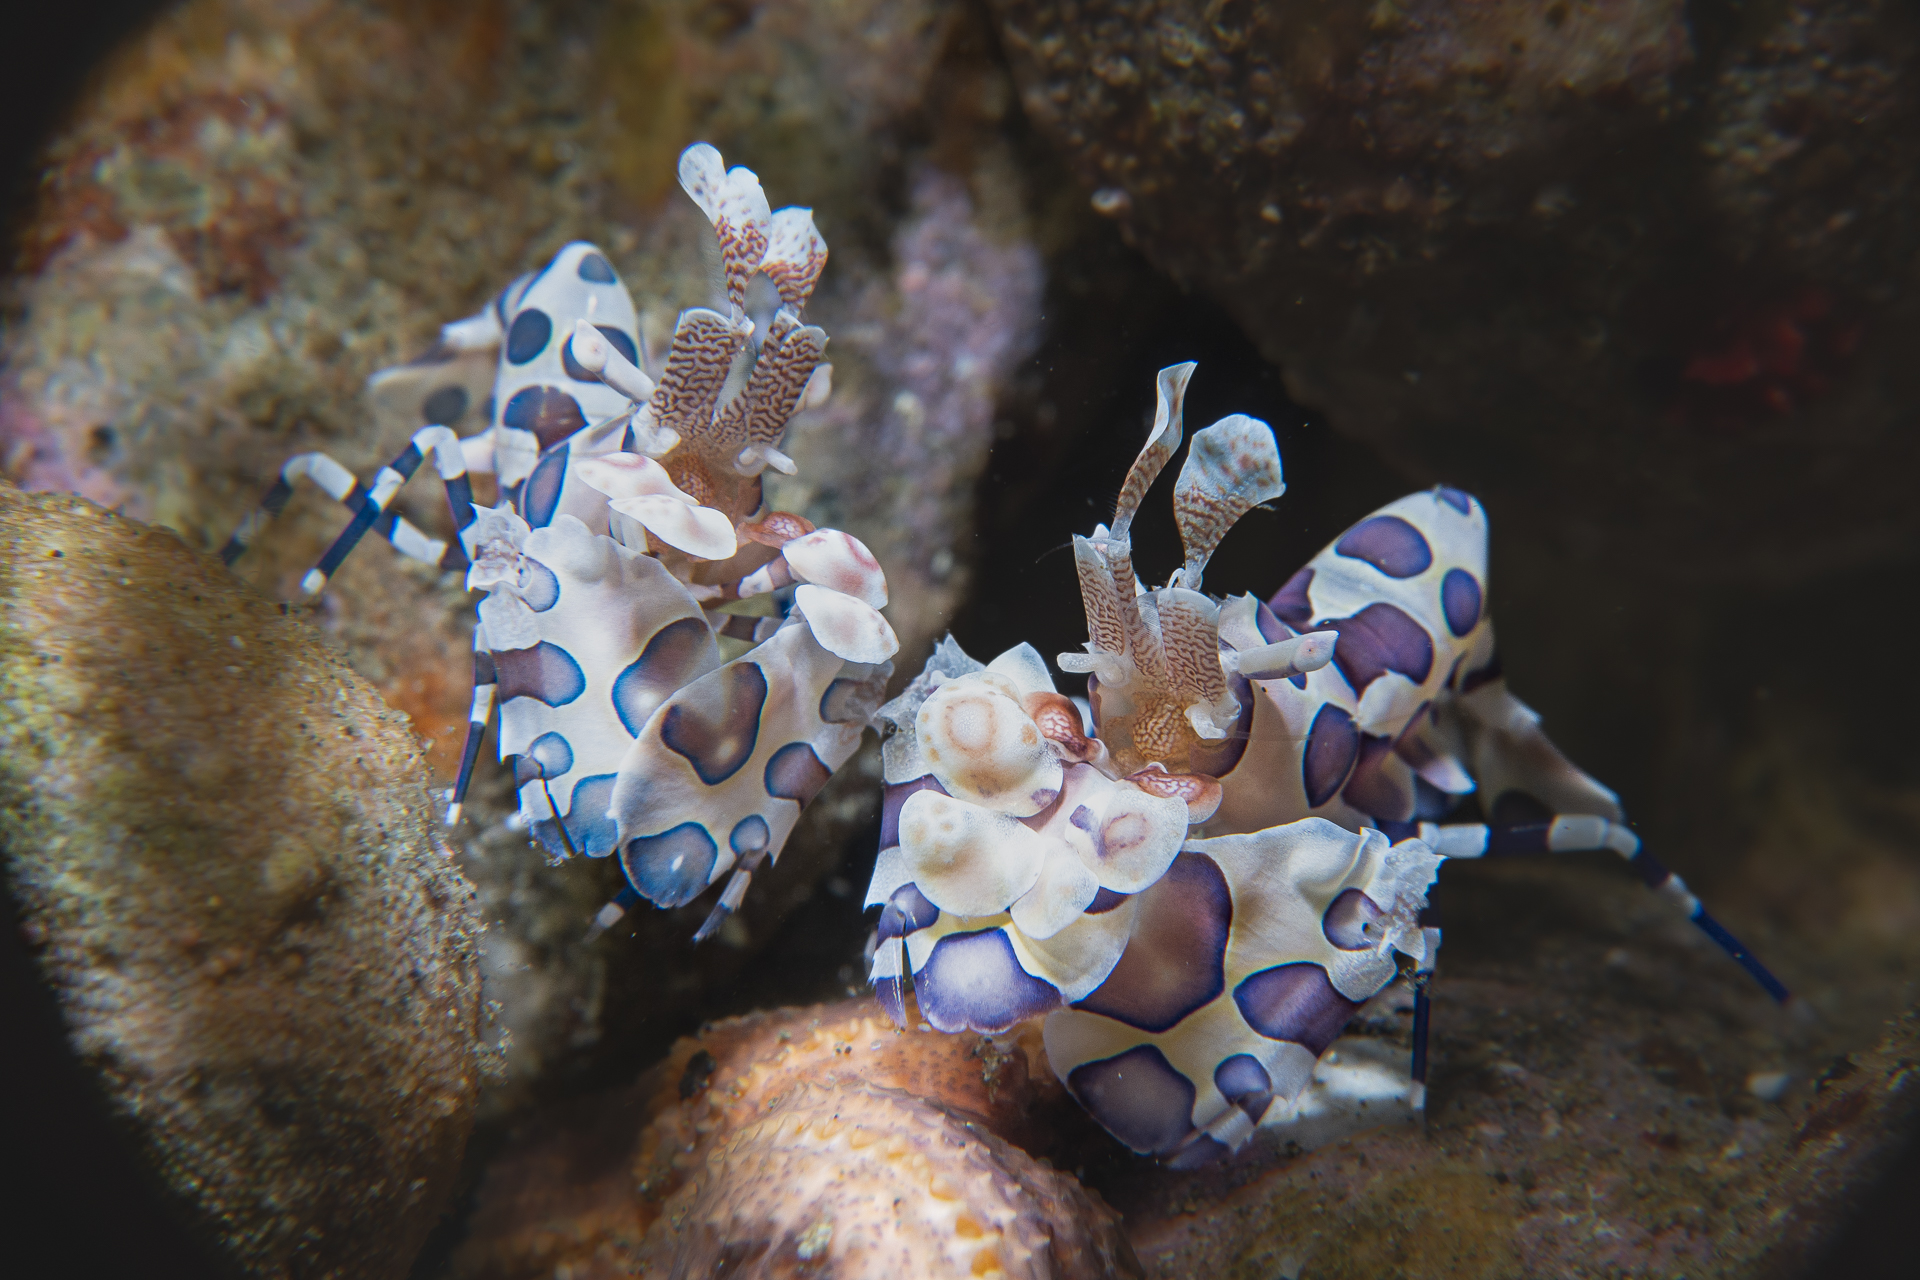 Macro is a very accessible way to get great images. Picture by Joydeep Sarkar, @theflyingbaba
6) Sensor size/low noise capabilities/image quality: Bigger sensors are always better, in terms of providing better image quality. But also keep in mind that you typically don’t need a very high dynamic range in underwater photography, or high ISO capabilities: 99% of the stuff that you shoot will be close by and lit by your strobe. So all else being equal, I’d always pick a camera with a larger sensor, but it would be one of several factors I’d consider – not the main factor. As long as the camera is capable of putting out sharp images with good detail, that’d good enough for me.
Also, I wouldnt obsess about lens/camera sharpness beyond that – to start with, the resolution of water is the limiting factor in underwater photography, and second, most compact cameras these days put out images that are sharp enough for digital use or decent sized prints – and that’s all you care about. If you decide to start photographing test graphs underwater (pro tip – don’t!), then you can start caring – but until then, don’t obsess. If you get the focus and exposure right, any camera can take jaw-dropping images.
7). Battery Life: Good battery life is nice to have, but you can always carry a spare and changing the battery on a compact camera on a boat is relatively easy to do (compared to a mirrorless system), so it isn’t the end of the world one way or the other.
8). Fast autofocus in lower light/low contrast: Back in 2003, I got my first underwater camera, a 3MP Olympus C3030, with a matching housing and a small strobe. And I got the biggest collection of fish tails when shooting with it – between the time I pressed the shutter and the camera actually took the shot, most of my subjects would just leave the frame. Modern day cameras are a lot better at autofocus, and subject recognition makes it even easier – but it is worth doing some research to make sure the autofocus is reliable and fast underwater.
Lastly, it goes without saying, there needs to be a housing available for your camera as well.
HOUSING
This is the underwater case for your camera – and typically, each housing is specific to one camera model only.
Some housings are made by the manufacturer themselves (or more typically, a third party contracted manufacturer who meets their QC requirements) – these tend to be fairly inexpensive and really good value. Others are made by third-part manufacturers, ranging from high-end, like Marelux, Nauticam and Aquatica, to mid-range, like Ikelite, to inexpensive, like Seafrogs and AOI. Most third party brands are actually quite reliable these days, so I would make the decision on what housing to get (assuming you have a choice) based on the other features of the housing.
And those features are:
1) Materials: Do you want polycarbonate or metal? Metal housings generally go deeper – but most polycarbonate housings are good enough to 40m, which is plenty good for recreational use. They are usually more compact, but do weigh more (both on land and in water). But contrary to popular belief, polycarbonate housings aren’t significantly (if at all) more fragile underwater in normal circumstances – polycarbonate housings work well enough and can last for years, so “sturdiness” shouldnt be a factor, unless you plan to play basketball with your housing.
Metal housings DO offer better heat conductivity – so if you are shooting lots of shots with a strobe, they are less prone to fogging due to the housing heating up. Yes, you can use desiccants in your housing to overcome that with polycarbonate housings and they work quite well, but it’s just one less thing to worry about with metal housings. Metal housings are generally on the higher end of the price spectrum and excel in the other features described here as well, so don’t rule them out based on the high initial price tag.
2) Ergonomics: This is a make-or-break feature for me. Remember the key controls we talked about in the previous section? You should be able to make those adjustments simply by moving your fingers, without needing to adjust your grip on the camera or looking down to see where that pesky button is. If you cannot do so, I promise you, you will have a lot of shots where you weren’t able to set the camera properly. Not good – especially for those once-in-a-lifetime moments where you need to react quickly.
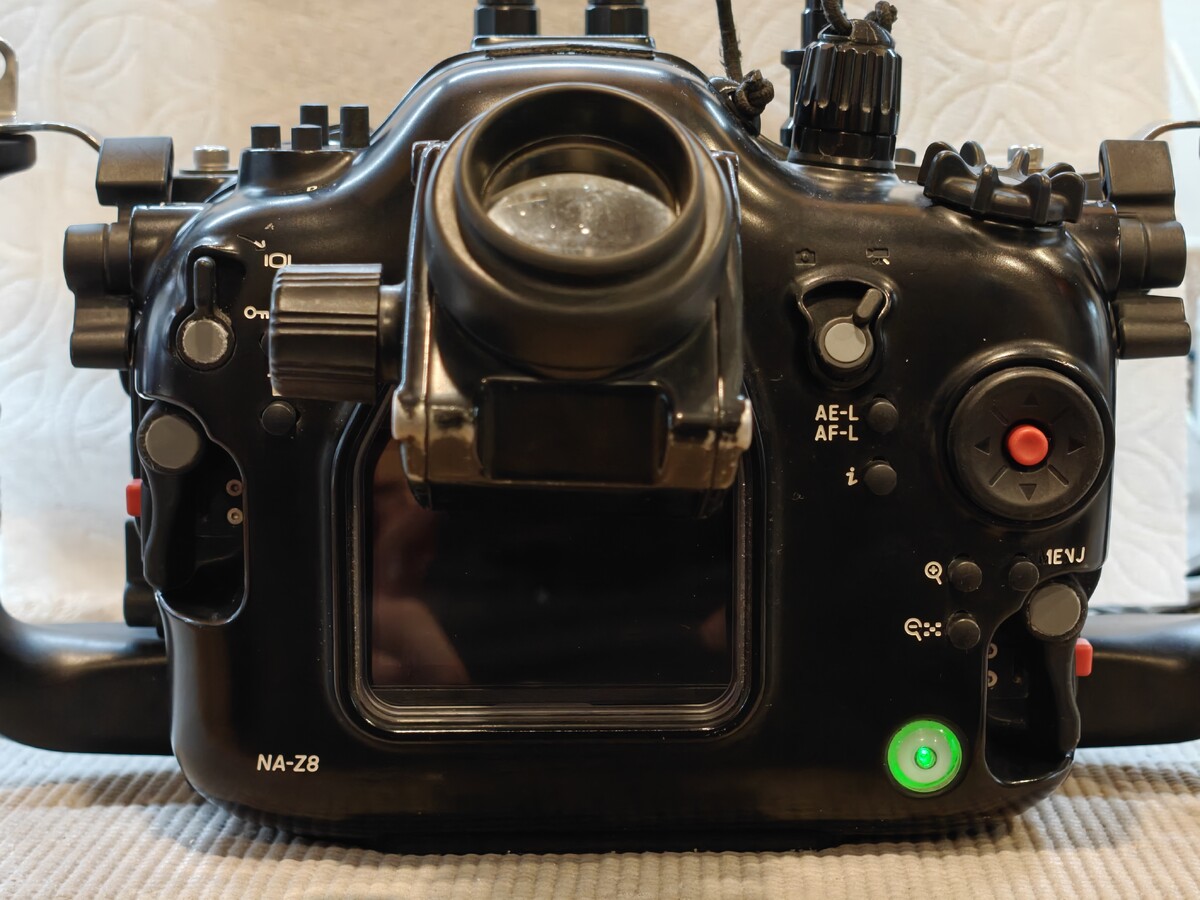
3) Vacuum / Moisture Alarm: A vacuum seal/alarm is a way of testing the integrity of your housing. You remove some of the air from the housing and see if it maintains that partial vacuum – if it can’t, then it has a leak somewhere and now you know not to take it in the water. These days, I will never take an expensive camera underwater without a housing with a vacuum. Most inexpensive polycarbonate housings don’t come with a vacuum alarm – at most, they have a moisture alarm which tells you when water actually enters your housing, which can be helpful for small leaks but not so much for bigger ones. However, higher-end housings do have this feature as well, and if the budget allows, I’d fork over the premium for them.
 Picture by David Hicks @david_hicks_wild_images
4) Filter Thread: As your interest in photography grows, you will want to scale up your system. A closeup lens for macro, a wide angle lens for photos of big stuff. Having a filter thread at the end of your port lets you screw on these adapter lenses easily and simplifies things a lot. Popular thread sizes are 52mm and 67mm – you will find plenty of accessories for these sizes.
In addition, a couple of nice-to-have options are two screw threads at the base of the housing (for a more robust, movement-free connection to the tray – see the next section), a cold shoe mount on top (for adding video or focus lights and even a GoPro for video).
STROBES
Strobes are the single biggest factor in determining the quality of your images. It is the output from the strobe that will be the primary source of light for your photo, and it is that lighting that makes or breaks the image. And good lights will stay with you for a very long time – I still have Inon strobes that I bought over 15 years ago. So don’t skimp out lights. In fact, I would go so far to say that if you don’t plan to add lights, it is not worth starting this journey at all – a smartphone in a housing would be a better option.
I also have a more in-depth article on “Lighting in Underwater Photography” that you can read, for more information on strobes.
With that out of the way, here’s a few things to look at in strobes, when building a first system for underwater photography:
1). Power: The more power your strobe puts out, the better you are able to light a subject. Power is expressed in terms of guide numbers. Without getting into the math behind the number, the greater the guide number, the brighter the light, and that increase in not linear. Leaving the math aside, what power do you need? You can get by with a guide number of 16 or so if you plan to shoot macro and stuff within a couple of feet from you – however, for something you will not outgrow, I recommend a GN of 22/24 or higher. I currently use a strobe with a GN of 32, and I can’t remember the last time I dialled the power up more than about halfway – and I am about to go back to a pair of smaller strobes simply to save weight.
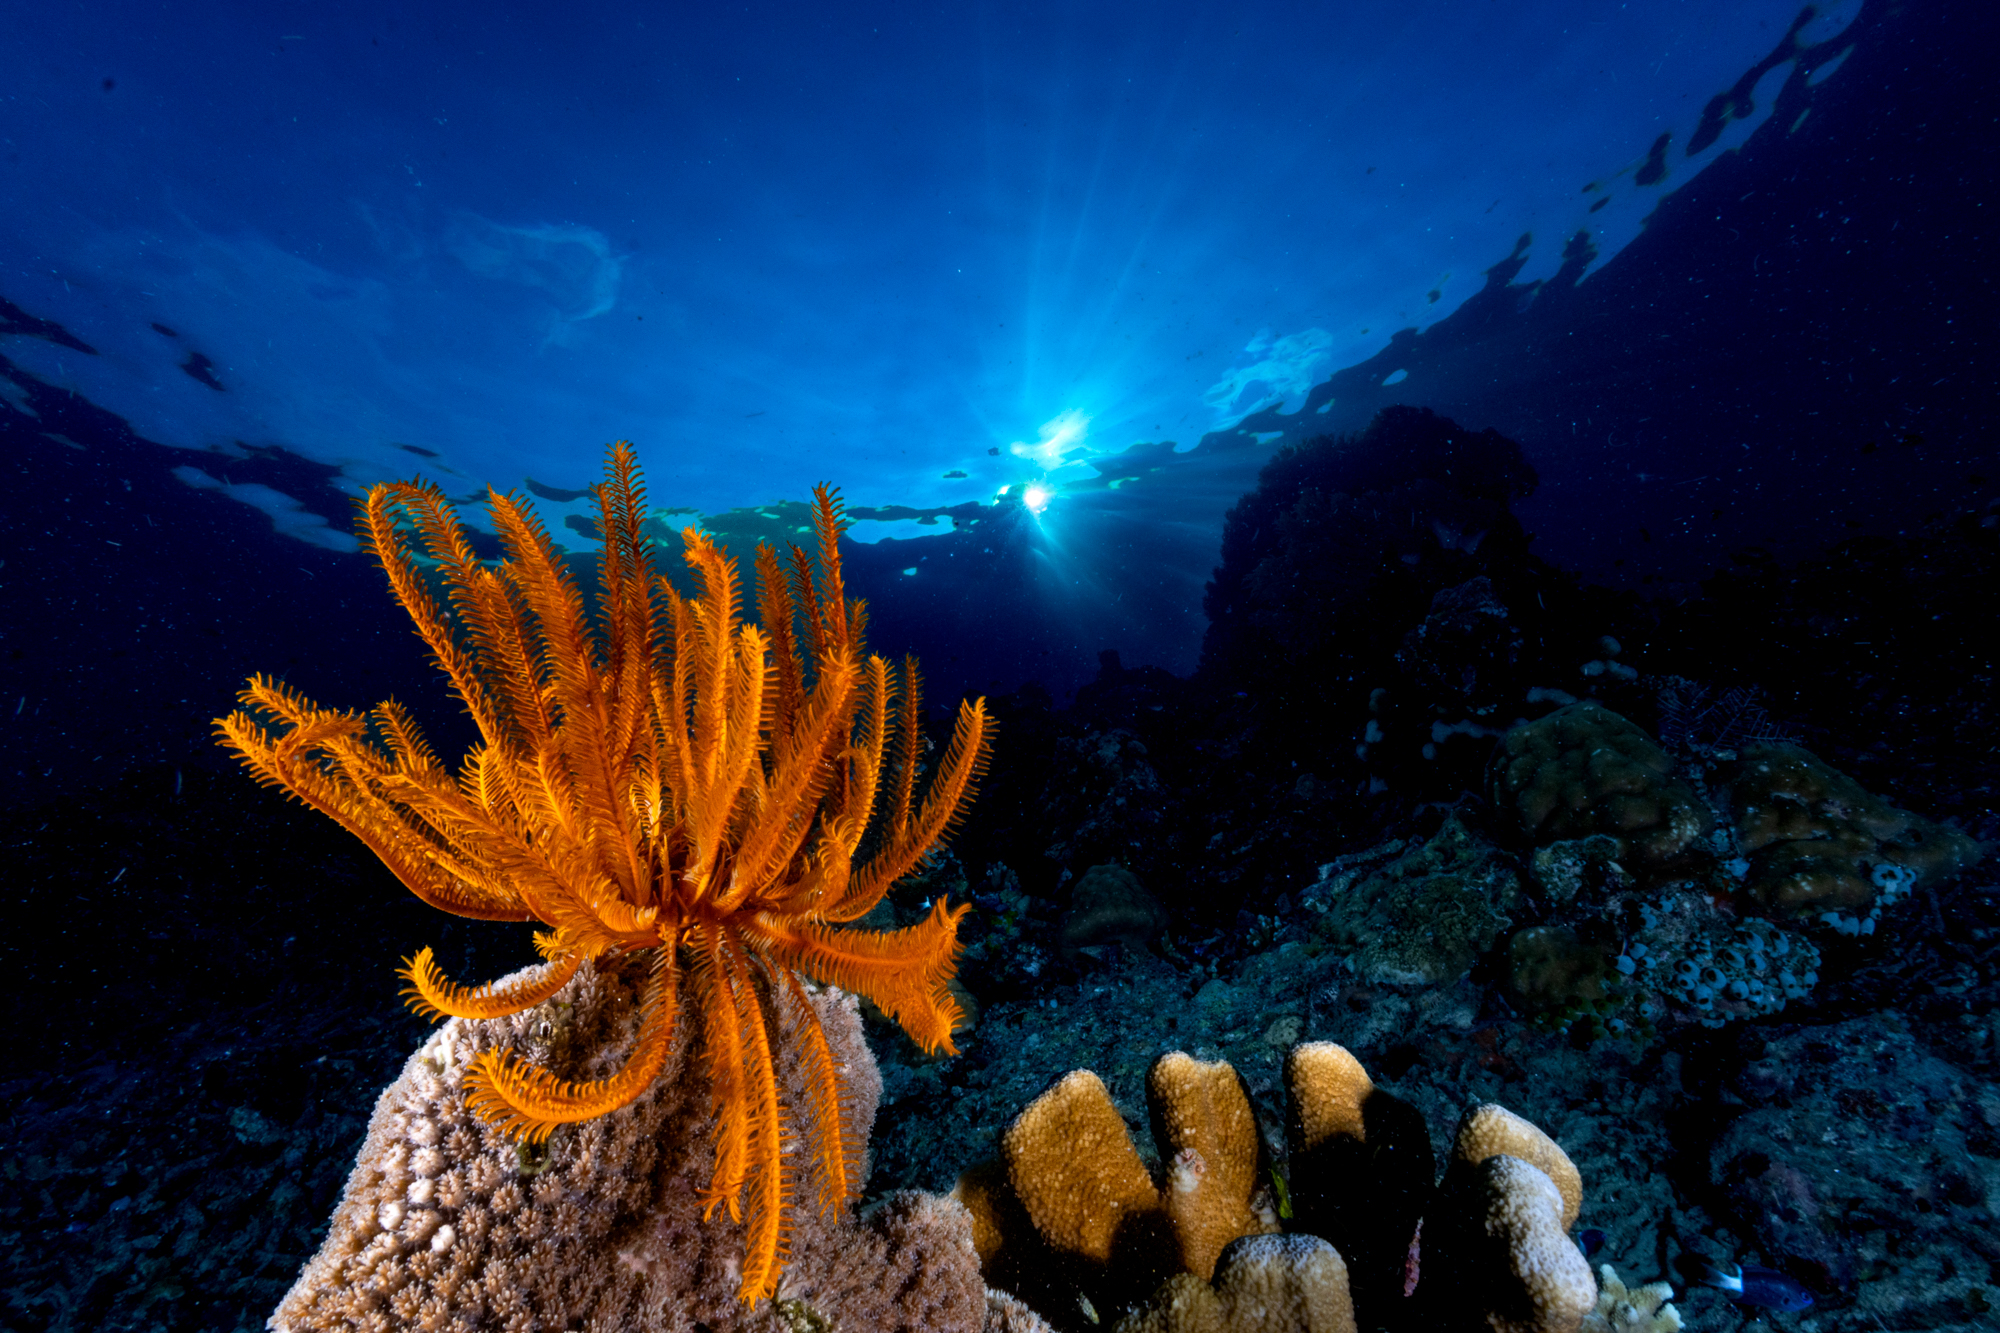
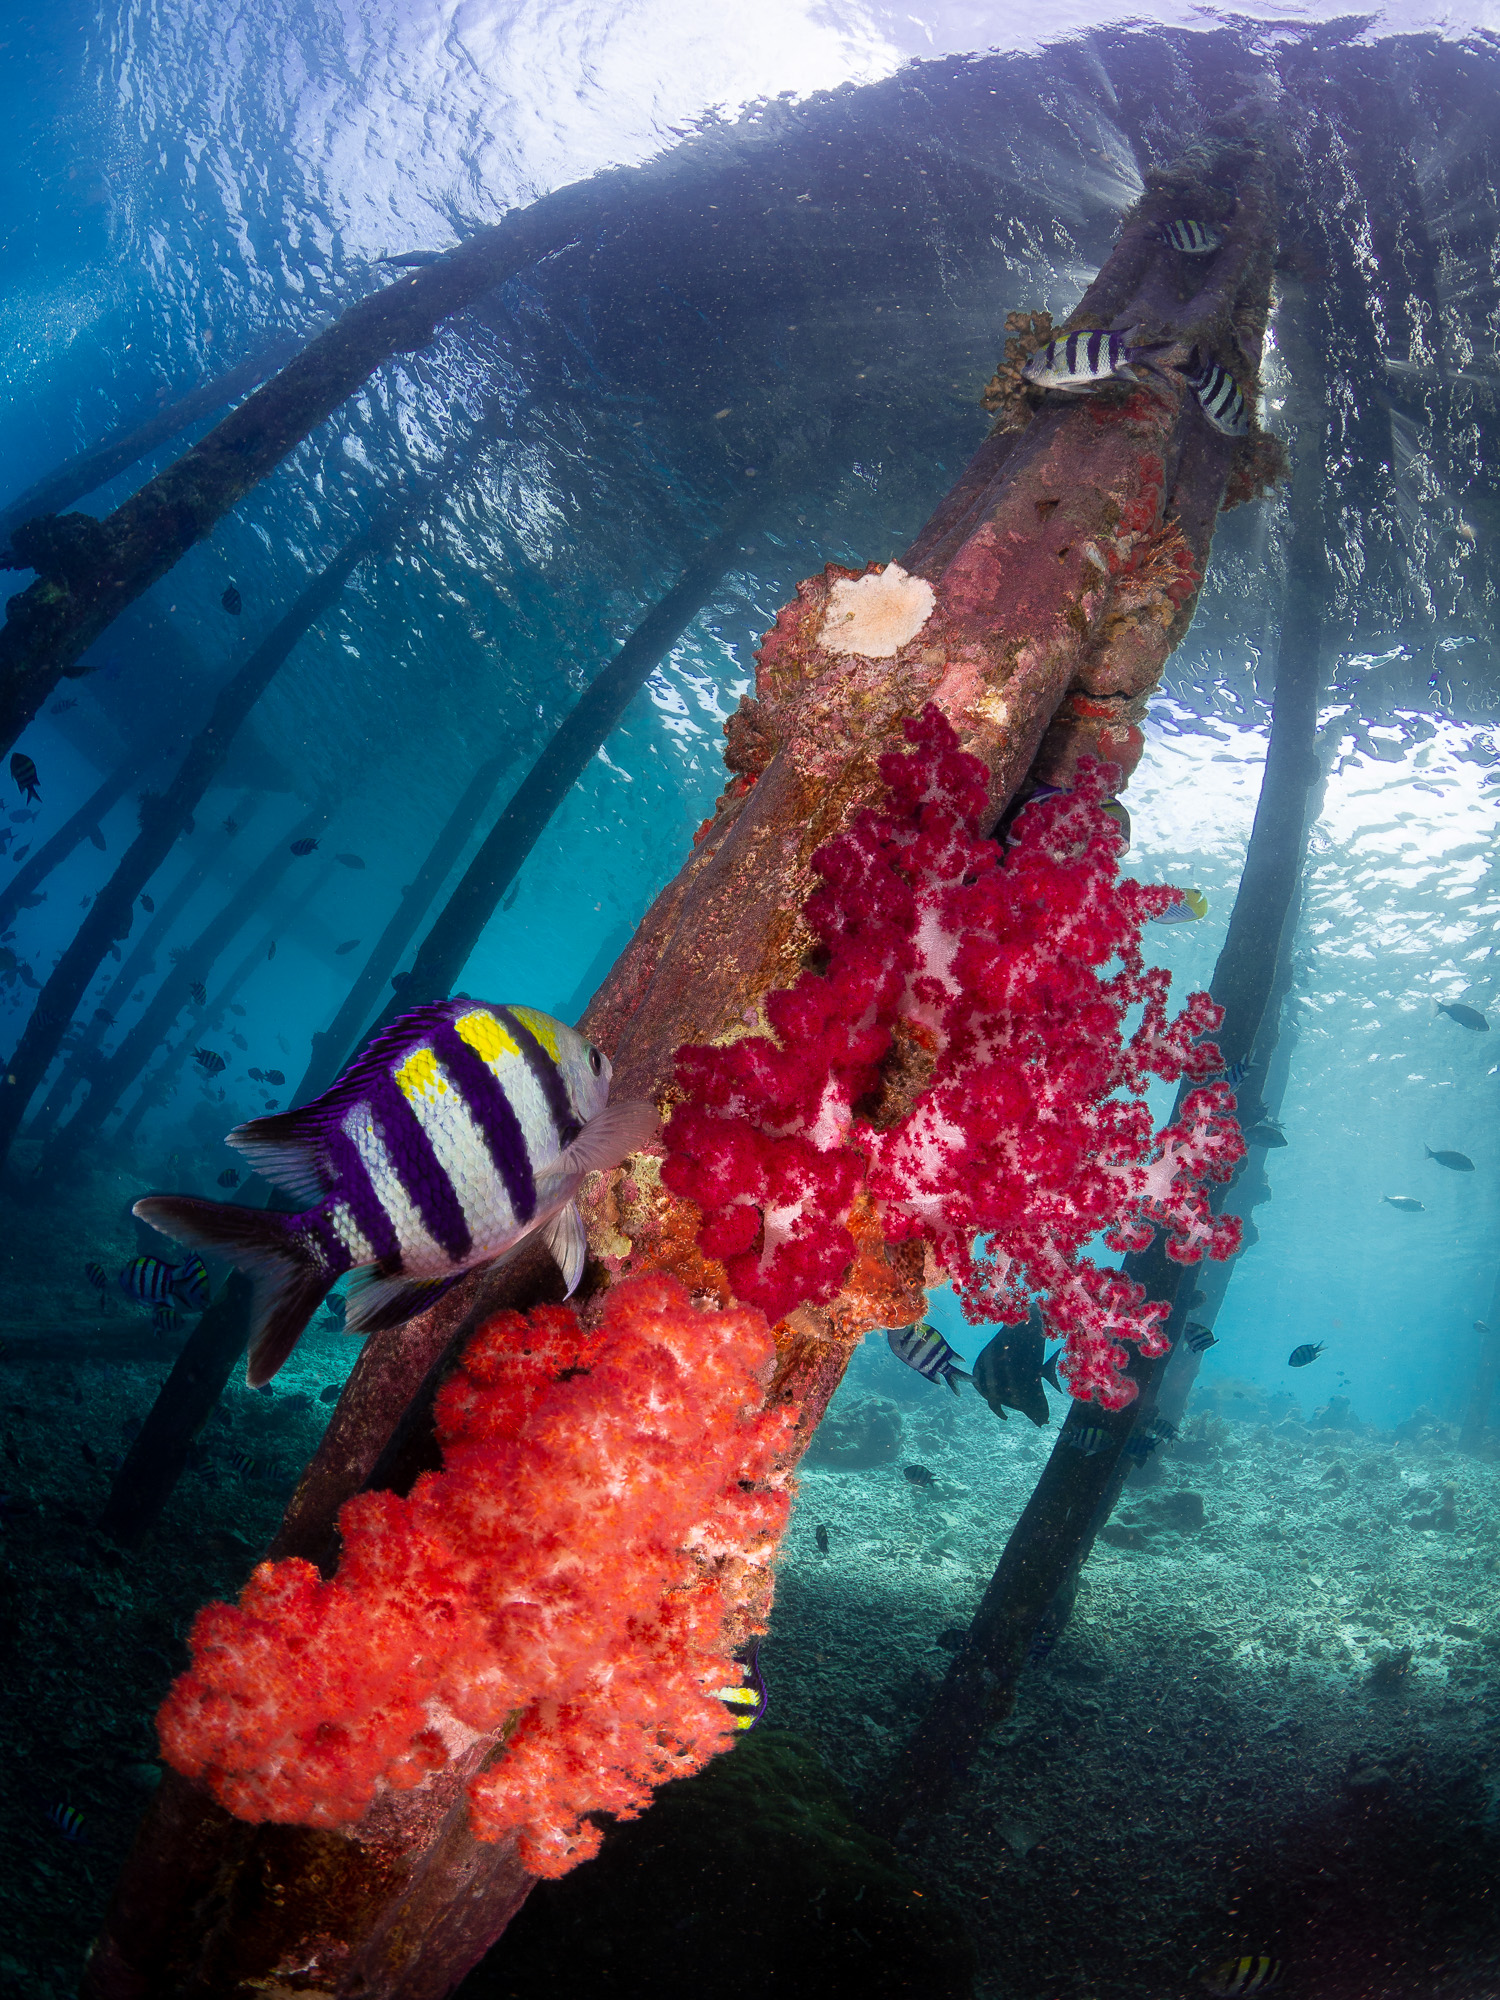 Shots like this require a high powered strobe, to compensate for the strong backlight
2). Angle of coverage: This is probably more important than trying to get the most powerful strobe out there, and this is where cheaper strobes tap out. Two strobes may have the same guide number but one puts out a beam that is 85 degrees across while another that is 120 degrees – the latter is a lot more powerful in terms of total light emitted, and that coverage is more useful as well.
So much coverage do you need? For macro, any strobe will provide enough coverage. For wide angle, you want ideally 2 strobes, each offering 70-80 degrees of coverage, to handle a typical compact camera. If you add wet lenses to increase the field of view of your camera, you’ll probably want 110-120 degrees of coverage per strobe as well – that, paired will judicious use of strobe positioning, will carry over well to ultra wide angle angle usage as well.
You will note that I am talking about two strobes here. And that is because to have true flexibility for lighting a scene with strobes, you really do need two, so as to provide even lighting across the scene without harsh shadows or light fall off. With a single strobe, you are almost always going to face the issue of uneven lighting, unless you have a real monster of a light with a GN of 44 or something. You CAN shoot with a single strobe, but you have to be very careful in how you compose your scene and where you aim the strobe – and ideally, you should plan on getting 2 strobes eventually.
 Two strobes made it fairly easy to light this turtle evenly, even in backlight
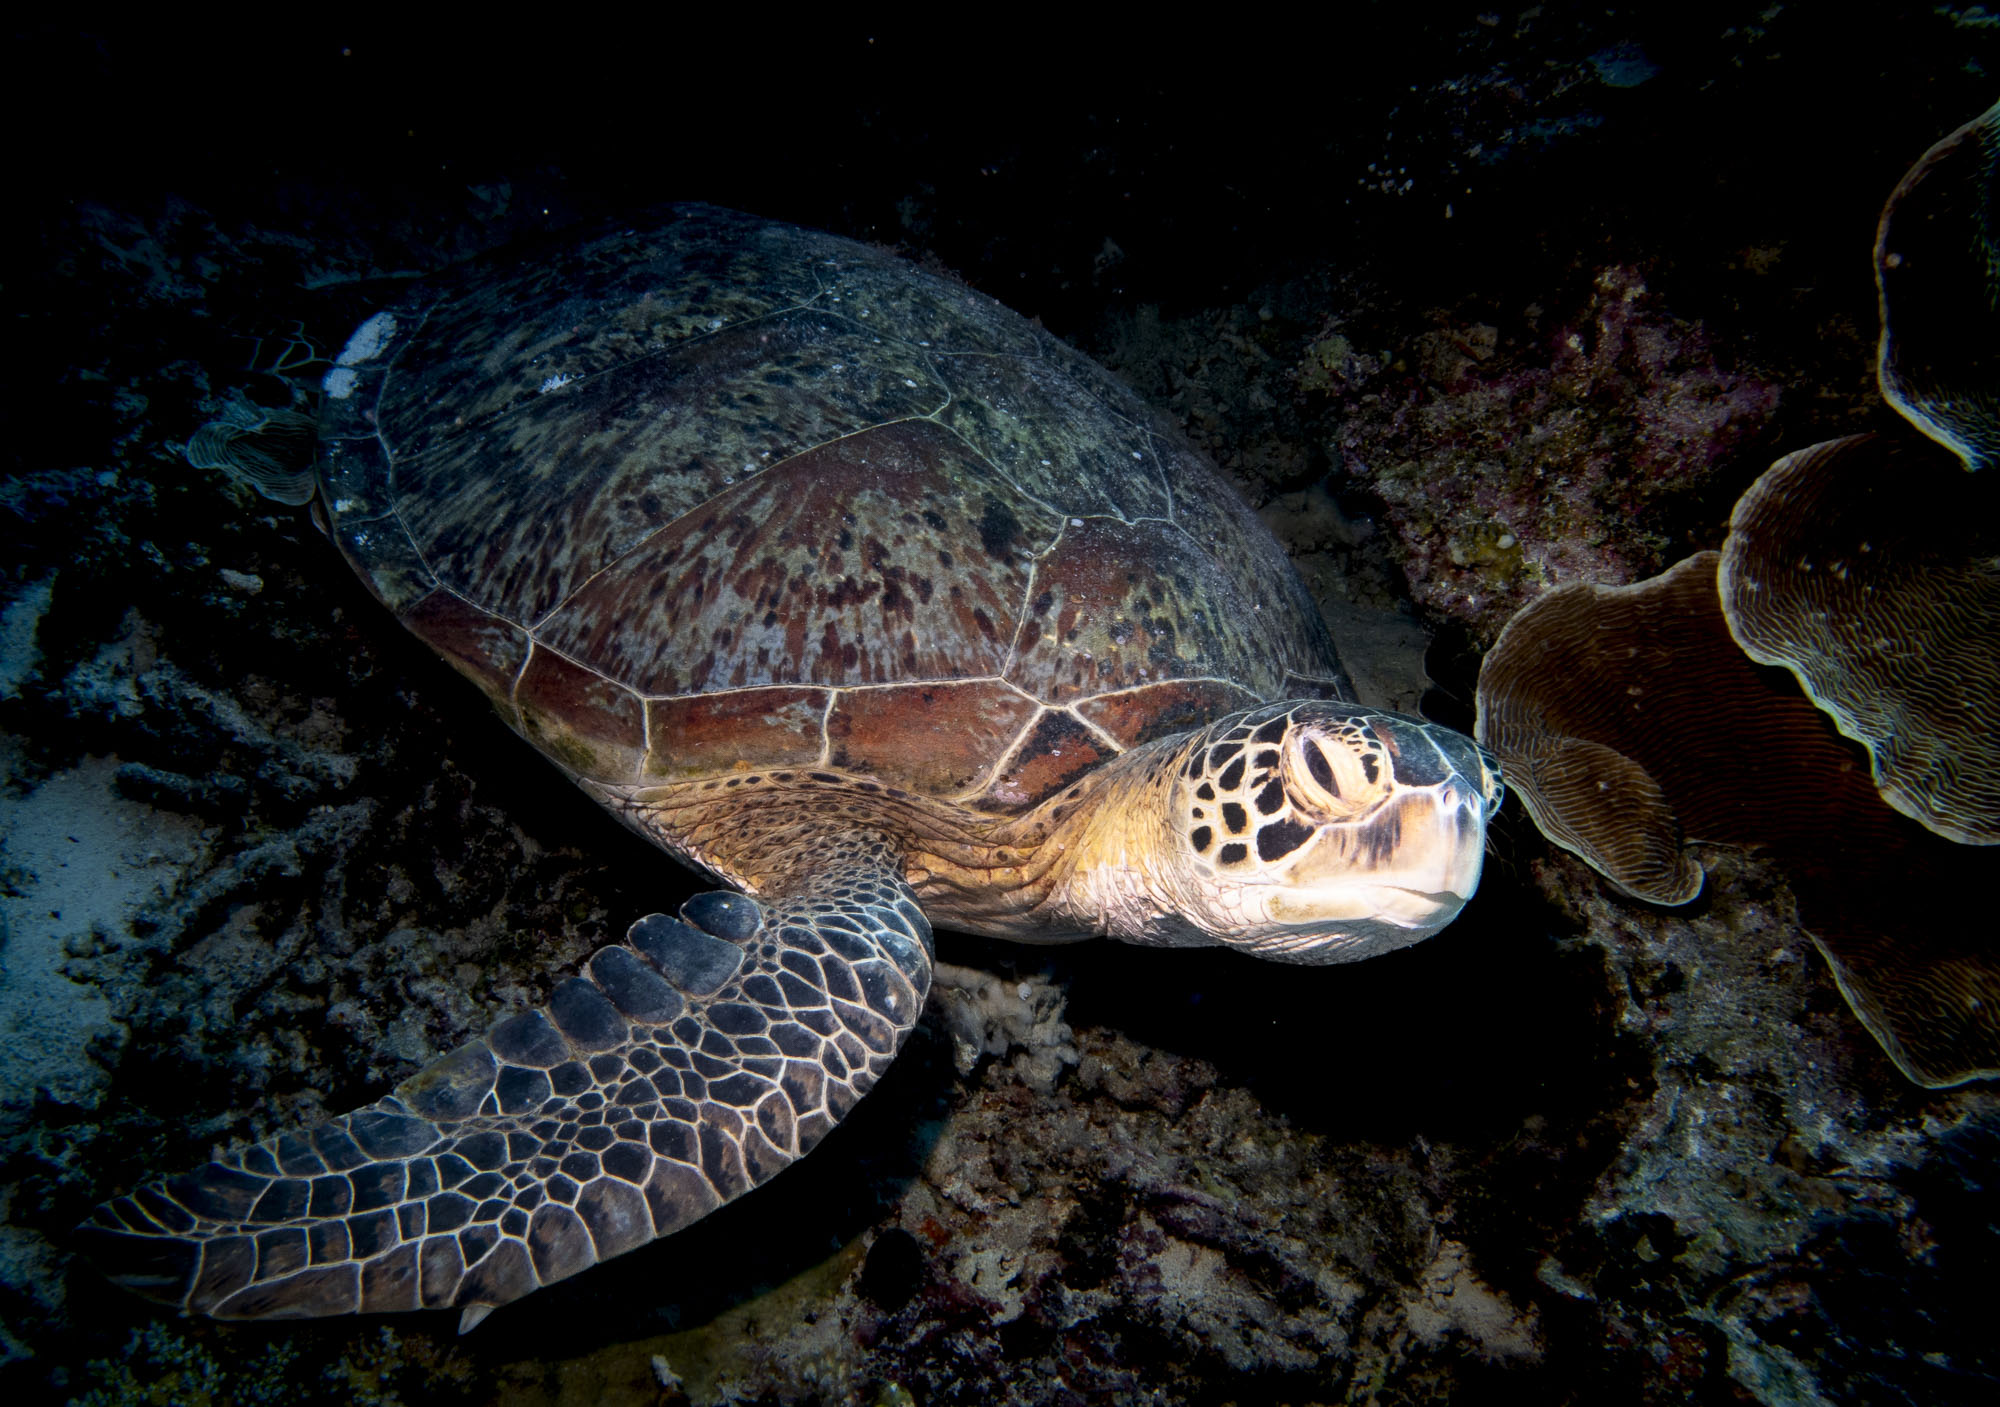 A small strobe required careful aiming by me – what do you think of the result?
3). Uniformity of lighting: Honestly, I am probably in the minority here but I really dont think this matters too much (within reason). Unless you have a really poor quality strobe with noticeable central hotspots, a mild dropoff or small variation in light intensity across the coverage of the beam don’t matter too much in real world imagery. This is one of things like corner sharpness that people love to debate over online – but which rarely makes a difference in the real world.
4). Ability to add diffusers and snoots: Diffusers soften the light of the strobe and also increase angle of coverage – at the expense of some loss of brightness. That’s a tradeoff I almost always make, as soft, uniform lighting (quality) is more important that sheer quantity of lumens emitted (quantity) – within reason, of course.
Snoots basically narrow the beam from the strobe to something that is only a handful of degrees in diameter. This is great for macro, and lets you illuminate just the subject, making it stand out.
You may not think much of this right now, but it is something you will find yourself getting further down your photography journey.
5). Color temperature of the light: Most strobes will put out a light that approximates daylight – varying a bit in tonality. Getting the color temperture right is critical for product photography – for nature photography, not as much, atleast not for me: I am not particularly fussed about full accuracy of the light’s color balance – that is always something that can be tweaking in post-processing as needed.
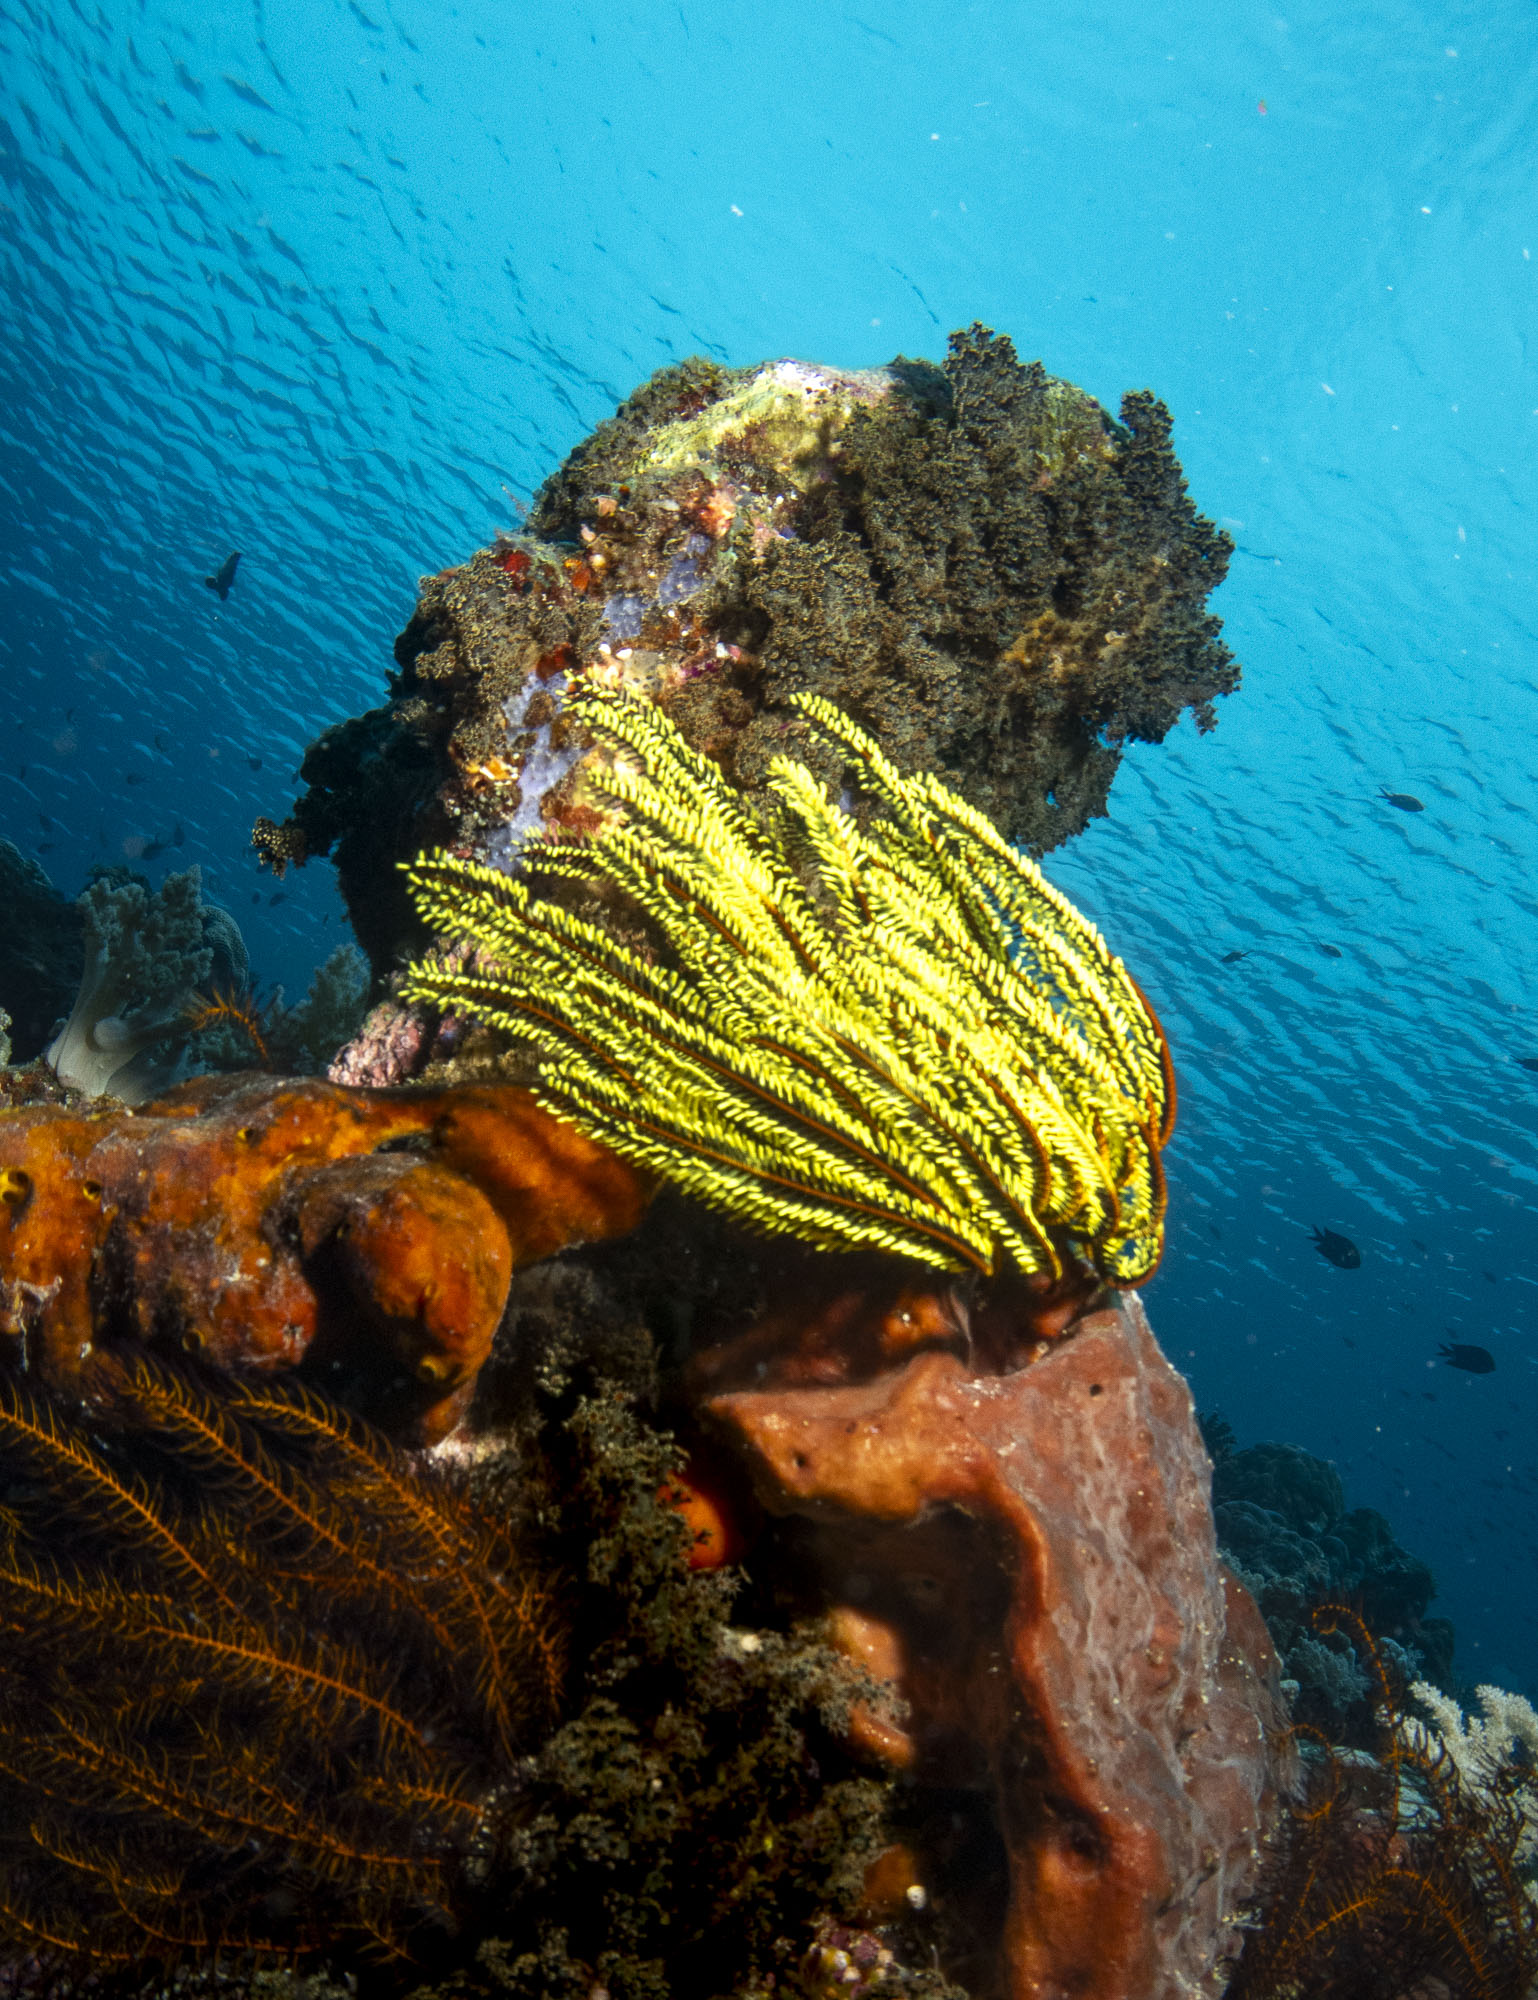 What is the “correct” color for these corals? That depends on your artistic vision.
6). Exposure Modes (TTL vs manual): There are 2 main ways to expose the strobe: the simplest is manual mode, where you physically set the strobe’s output. The other is TTL, where the camera controls the flash output. Well, there is also a third mode (auto), where the strobe automatically controls the camera output. This one is becoming very hard to find of late, so I am not going to spend too much time on this.
TTL is convenient, especially with fast moving subjects where it is harder to control flash output as you shoot. But it also requires the strobe to understand the signal coming from the camera – and not all strobes have their capability built in. You can buy a TTL converter unit that acts as a bridge between your housing and the strobe – these run around Rs 40,000-45,000. Or you can just shoot manual – I have always shot using manual strobes and I can count on one hand the number of shots I have missed because I didnt have TTL. It actually is surprisingly easy and you very soon learn how to adjust the power of the strobe based on how far the subject it.
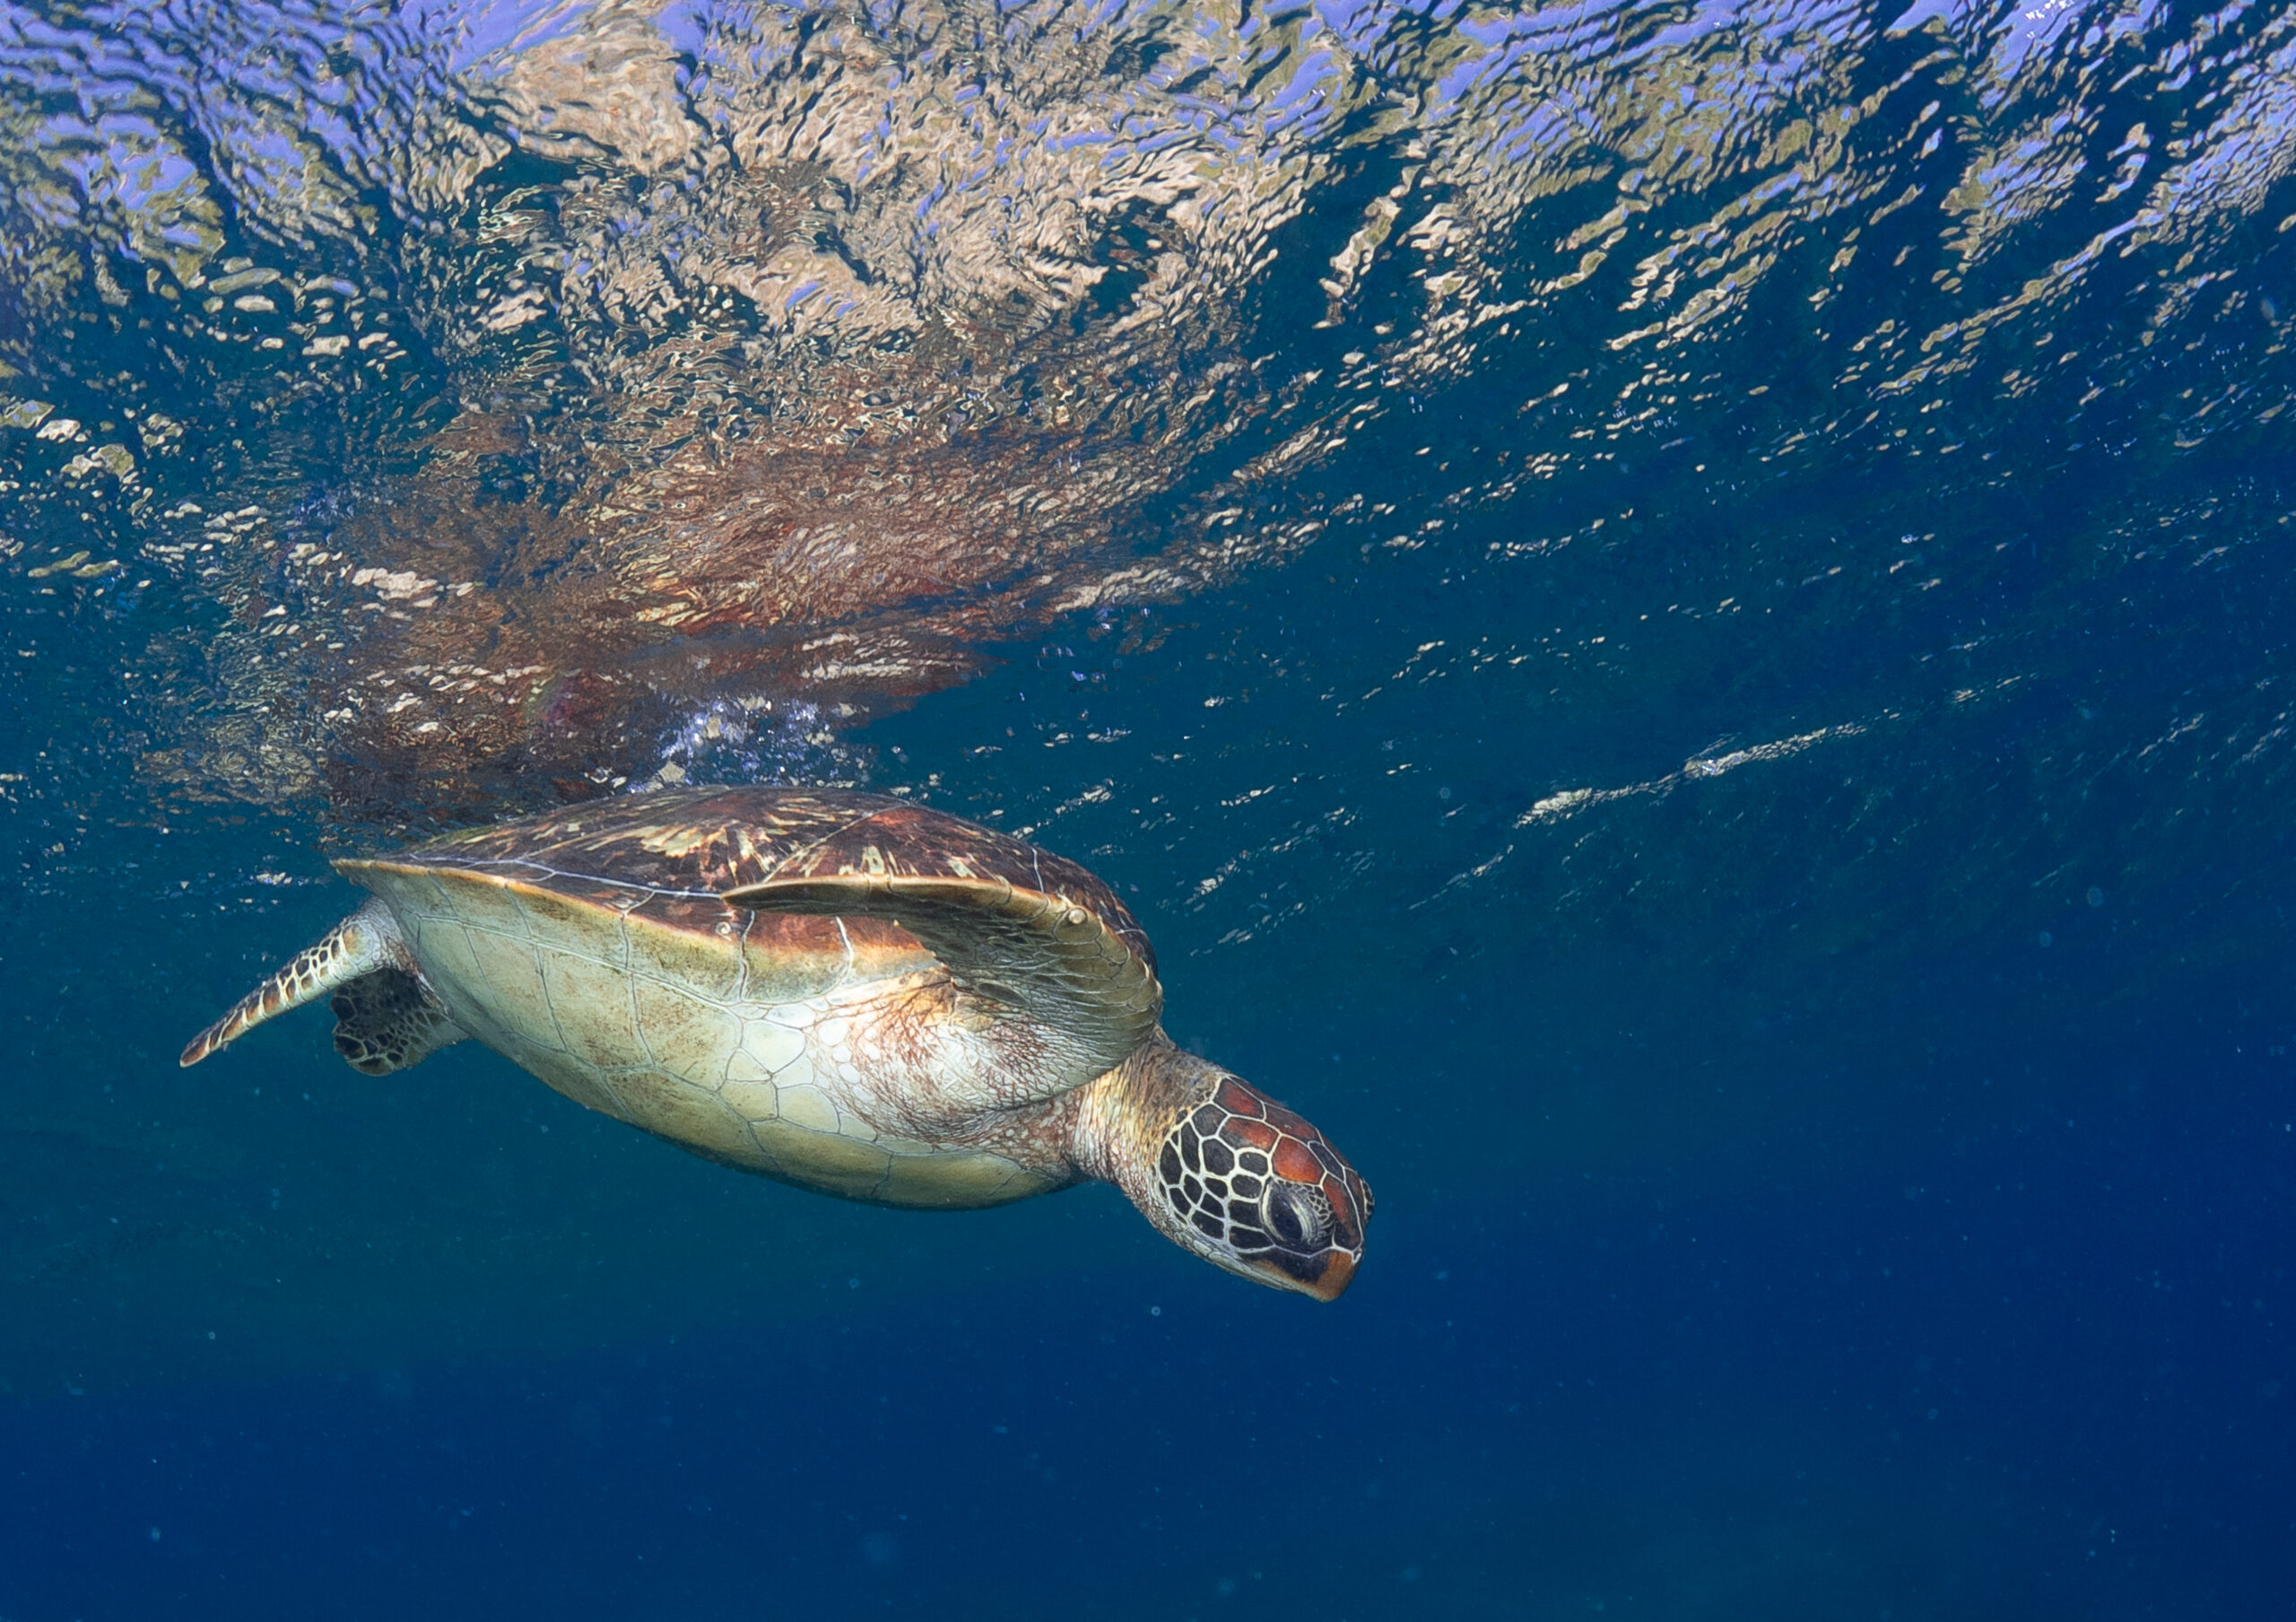
 A subject moving towards you is where TTL comes handy, as you don’t always have time to keep adjusting the strobe power.
So long and short – I consider TTL a nice to have but not essential feature
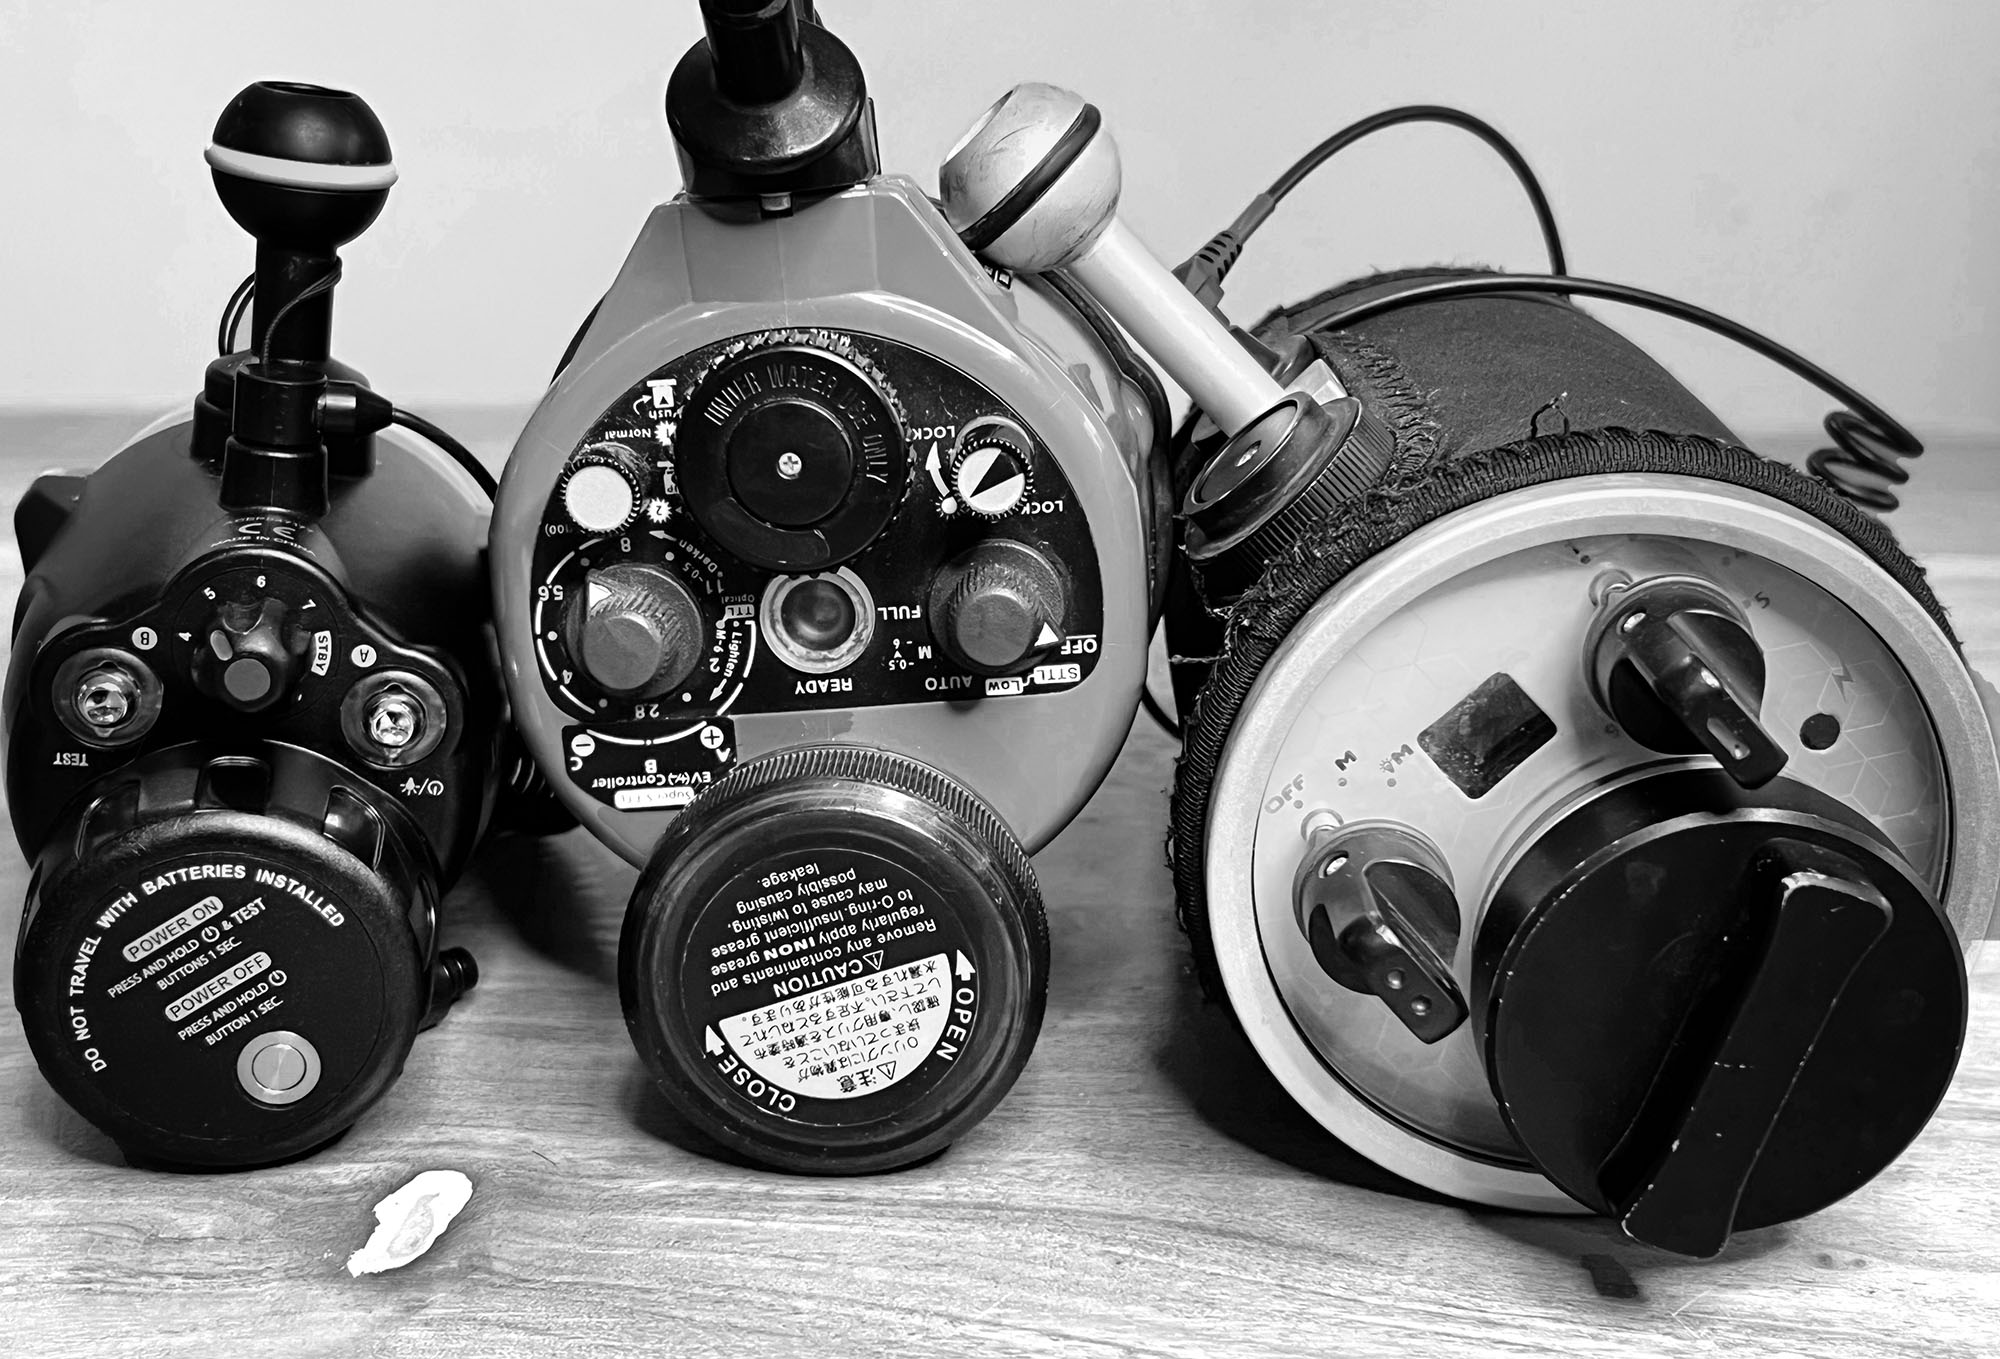
7). Battery considerations (battery life, recycle time): Earlier, I had a strong preference for AA batteries. Cheap, easy to carry and easy to find at a pinch. But then I had to change batteries on my strobe daily – and sometimes, the strobe wouldn’t last even a full day, especially if I had found some action and fired off a lot of shots trying to capture it. And also, the recharge time was a bit longer – it would take a second or so for the flash to recharge after firing.
Then I tried strobes running Li Ion batteries… and wow. 3-4 days without needing to recharge, super fast recycle time (ability to shoot up to 8-10 frames a second). Count me a convert. So make sure you get a strobe that will last atleast a day or longer of extensive use and has a fast recycle time.
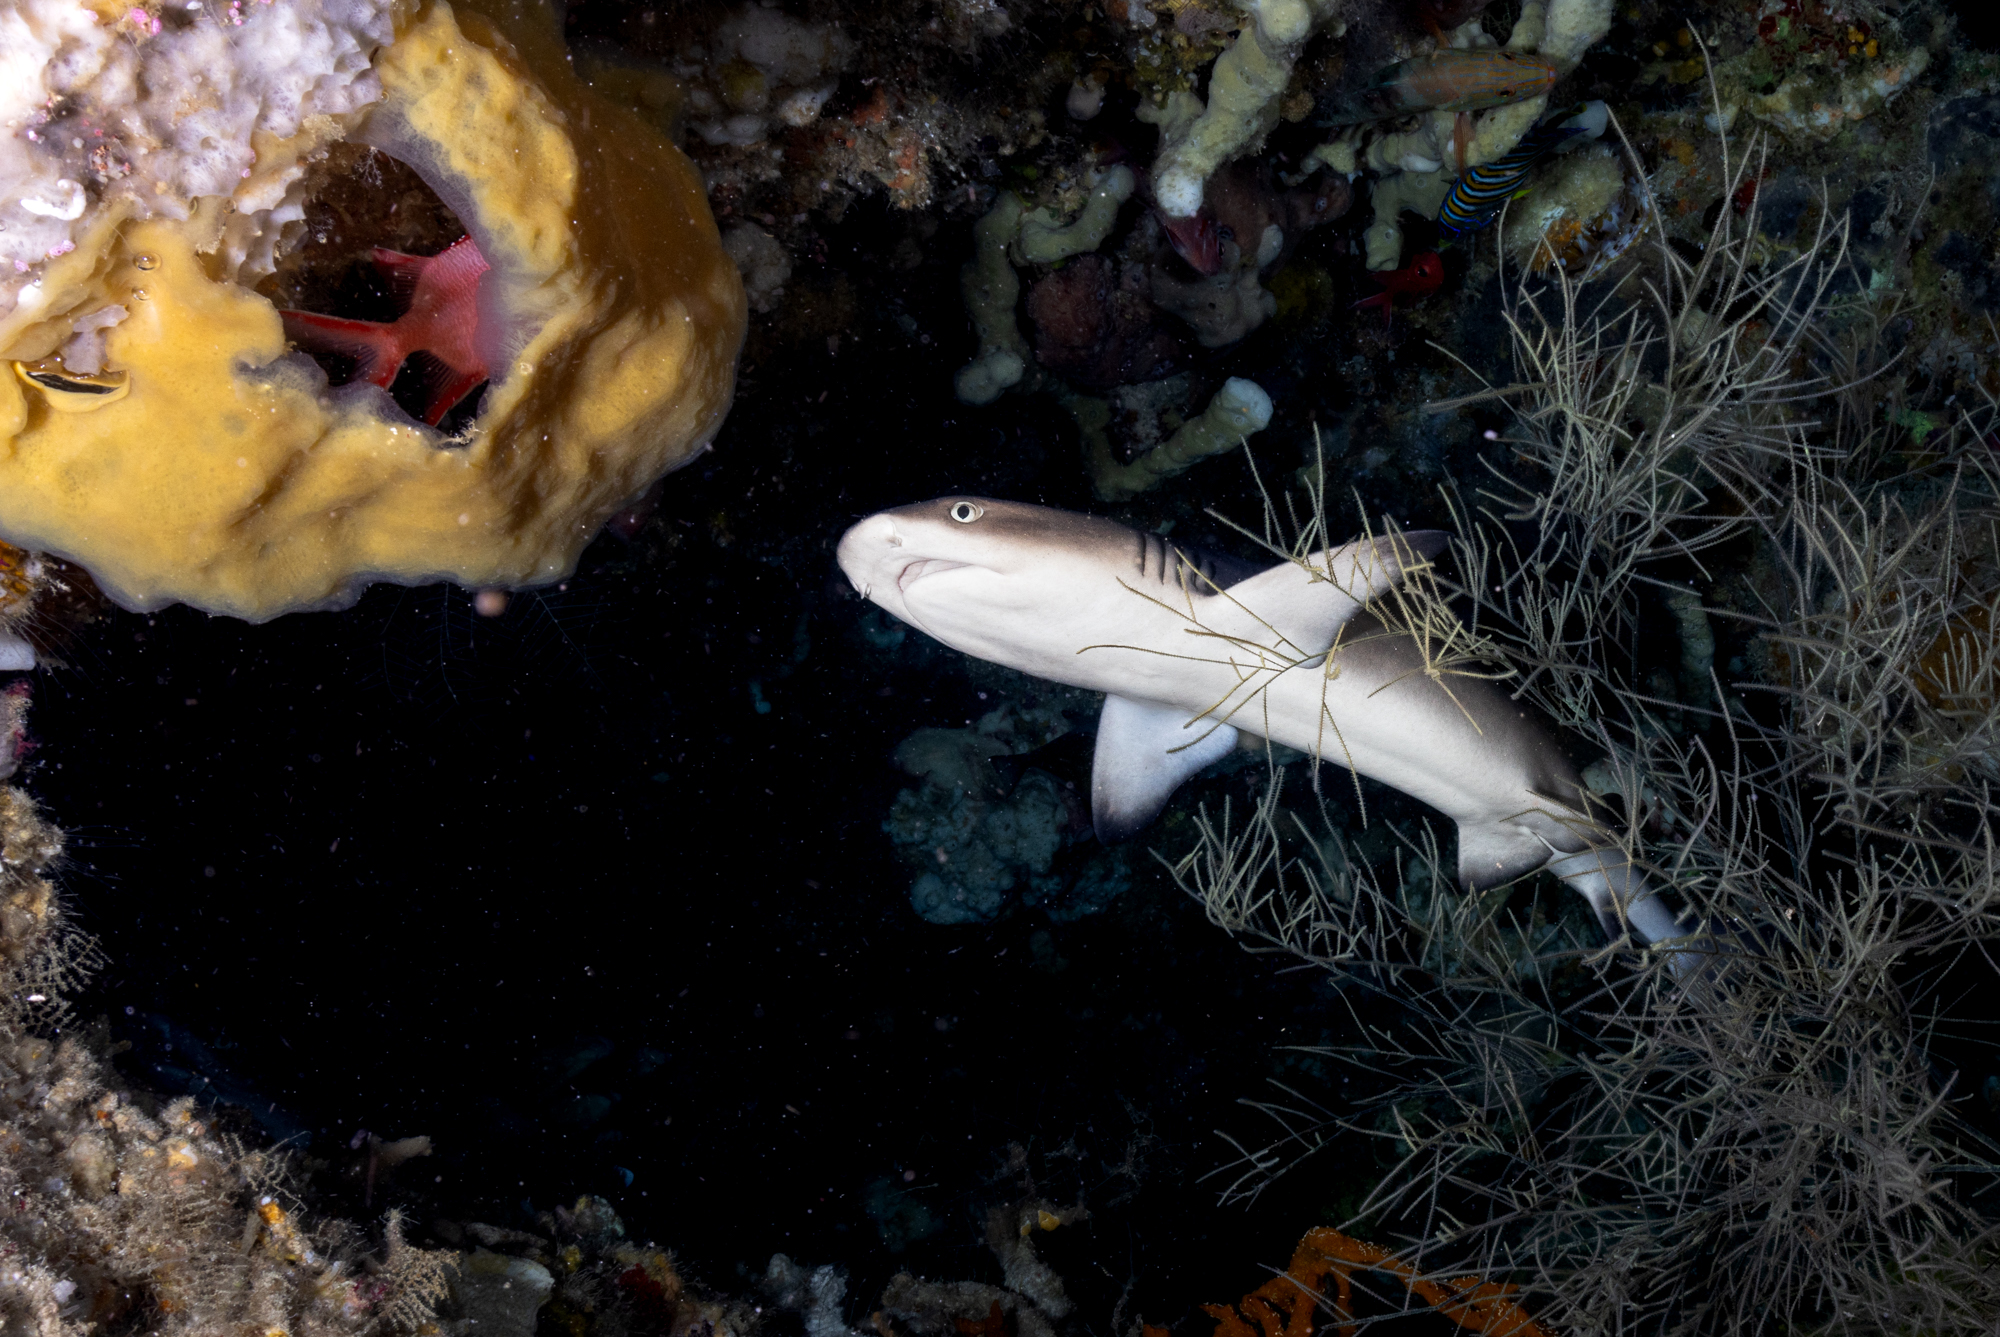 This shark was circling inside the cave – getting the perfect framing did require rapid shooting, and having a flash that could keep up was key!
There is also something called HSS (high speed shutter) capability, which lets you sync the strobe with a much faster shutter speed, but that is getting into the realm of specialized/advanced applications, and isn’t something that someone new should be worried about right now.
The last thing to remember is that ideally, you want 2 lights. As mentioned above, you can get by with one but it is going to limit the sort of scenes you can photograph. Two lights really open up the photo ops you get. You don’t necessarily have to get both at once – it is perfectly ok to start with one, learn its limitations and then get the second. But if your goal is to take the best photographs possible, your end game should be 2 strobes.
CONNECTORS
So now that you have the essentials – a camera, a housing and a light – you still need to find a way to connect all this stuff together. And here is what you need for this:
1). A Tray: A tray is nothing but a mounting base for your camera. You can get one with a single handle or a double handle – a single handle is more compact and easier to carry, a double handle lets you attach 2 lights (and as I mentioned above, you want to get your system to a stage with 2 lights). Also, you will want a tray which has 1″ ball mounts for adding arms – that is the industry standard for u/w photography components and your strobe likely comes with this as well.
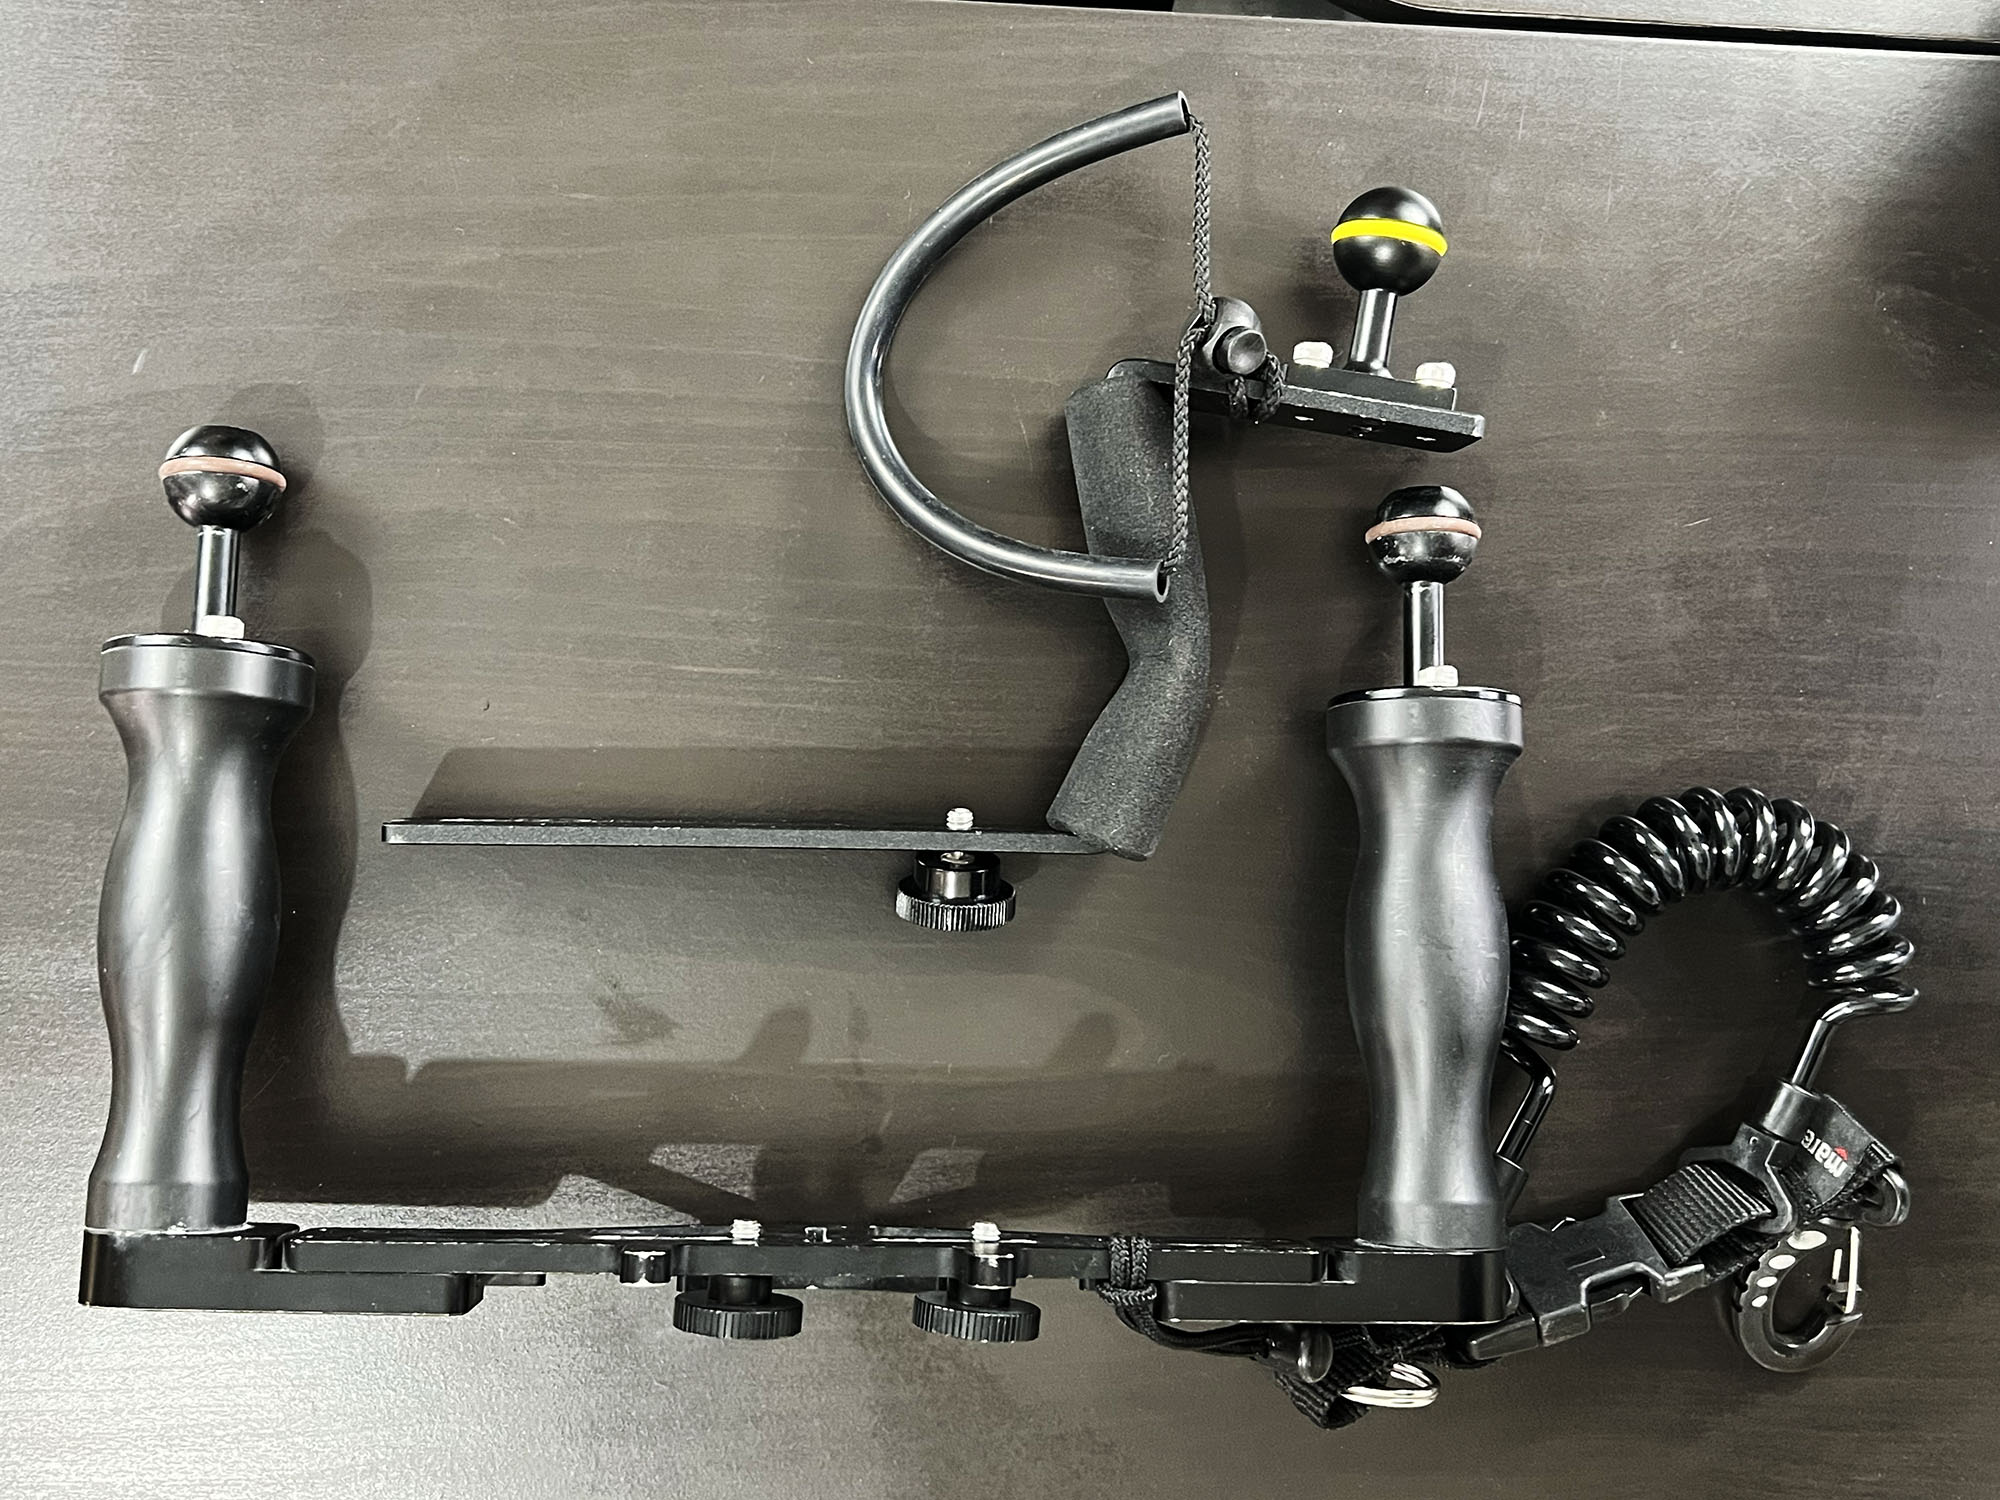
2). Arms: Arms are critical for helping you position your strobes in a way that lets you get them further away from your camera (to avoid backscatter) but still light the image properly.
Arms are available as rigid arms or flexible arms. Flexi arms are great for building very compact systems around a GoPro or something – but they don’t scale up too well. If you are building a scalable system, get rigid arms. These usually come with the same 1″ ball head that I refer to above, and allow for the use of standardised connectors.
In terms of arm lengths, if at some point down the road, you plan to get a mirrorless system or a wide angle adapter that gives you an ultra wide field of view, go for 8-12″ arms. For macro, short stubby 4″ arms work very well and provide for a low profile system which makes it easy to bring the strobes close in. That said, as a starting point, you can just get 6-8″ arms to begin with.
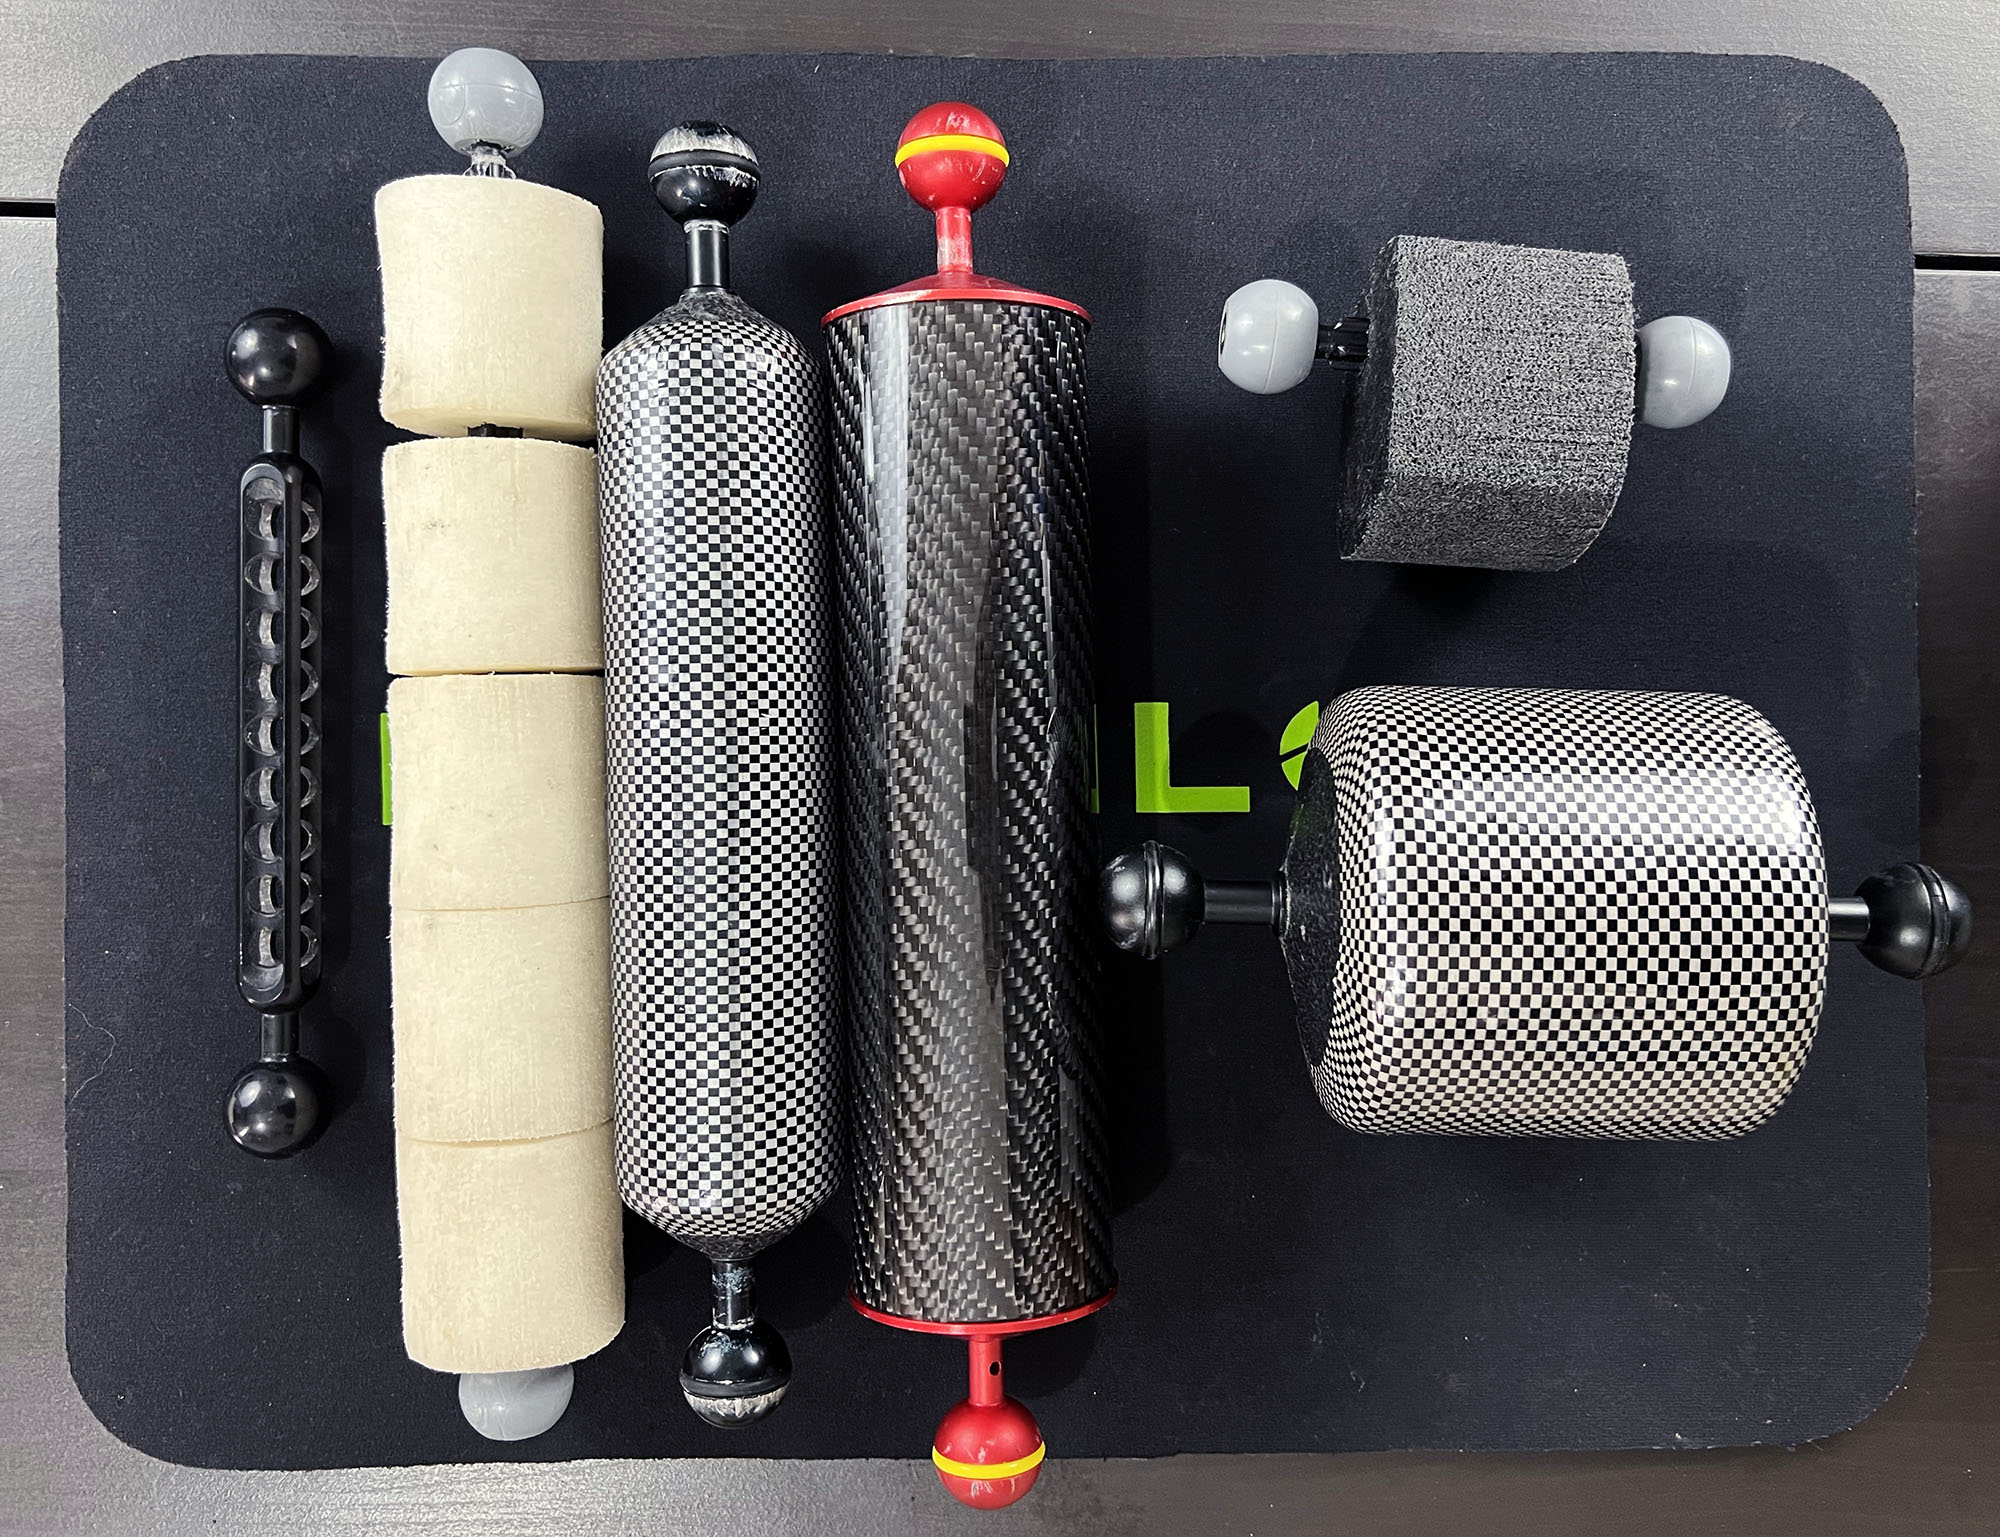
Depending on the accessories you add, at some point, your system will get fairly heavy in the water. The best way to offset that is to use float arms, which provide positive buoyancy. Float arms come with fixed flotation or with the ability to vary the flotation by adding collars. I recommend the latter for now, as your system grows and evolves.
And remember, you will need 2 arms per strobe, to provide reticulation and flexibility with positioning. 2 smaller arms are better than 1 longer arm.
3). Clamps: Clamps connect your arms to your tray, to each other and to your strobes. They are very simply products and it hurts me inside at having to pay Rs 2000-5000 for something that probably cost less than Rs 200 to produce. But that’s how things are. These are fairly fungible products – I’d avoid the cheapest no-name stuff you may find online as they often lack precision in machining, making them ineffective at holding your arms and strobes in place, but beyond that, get whatever cheapest product you can find with a known brand on it.
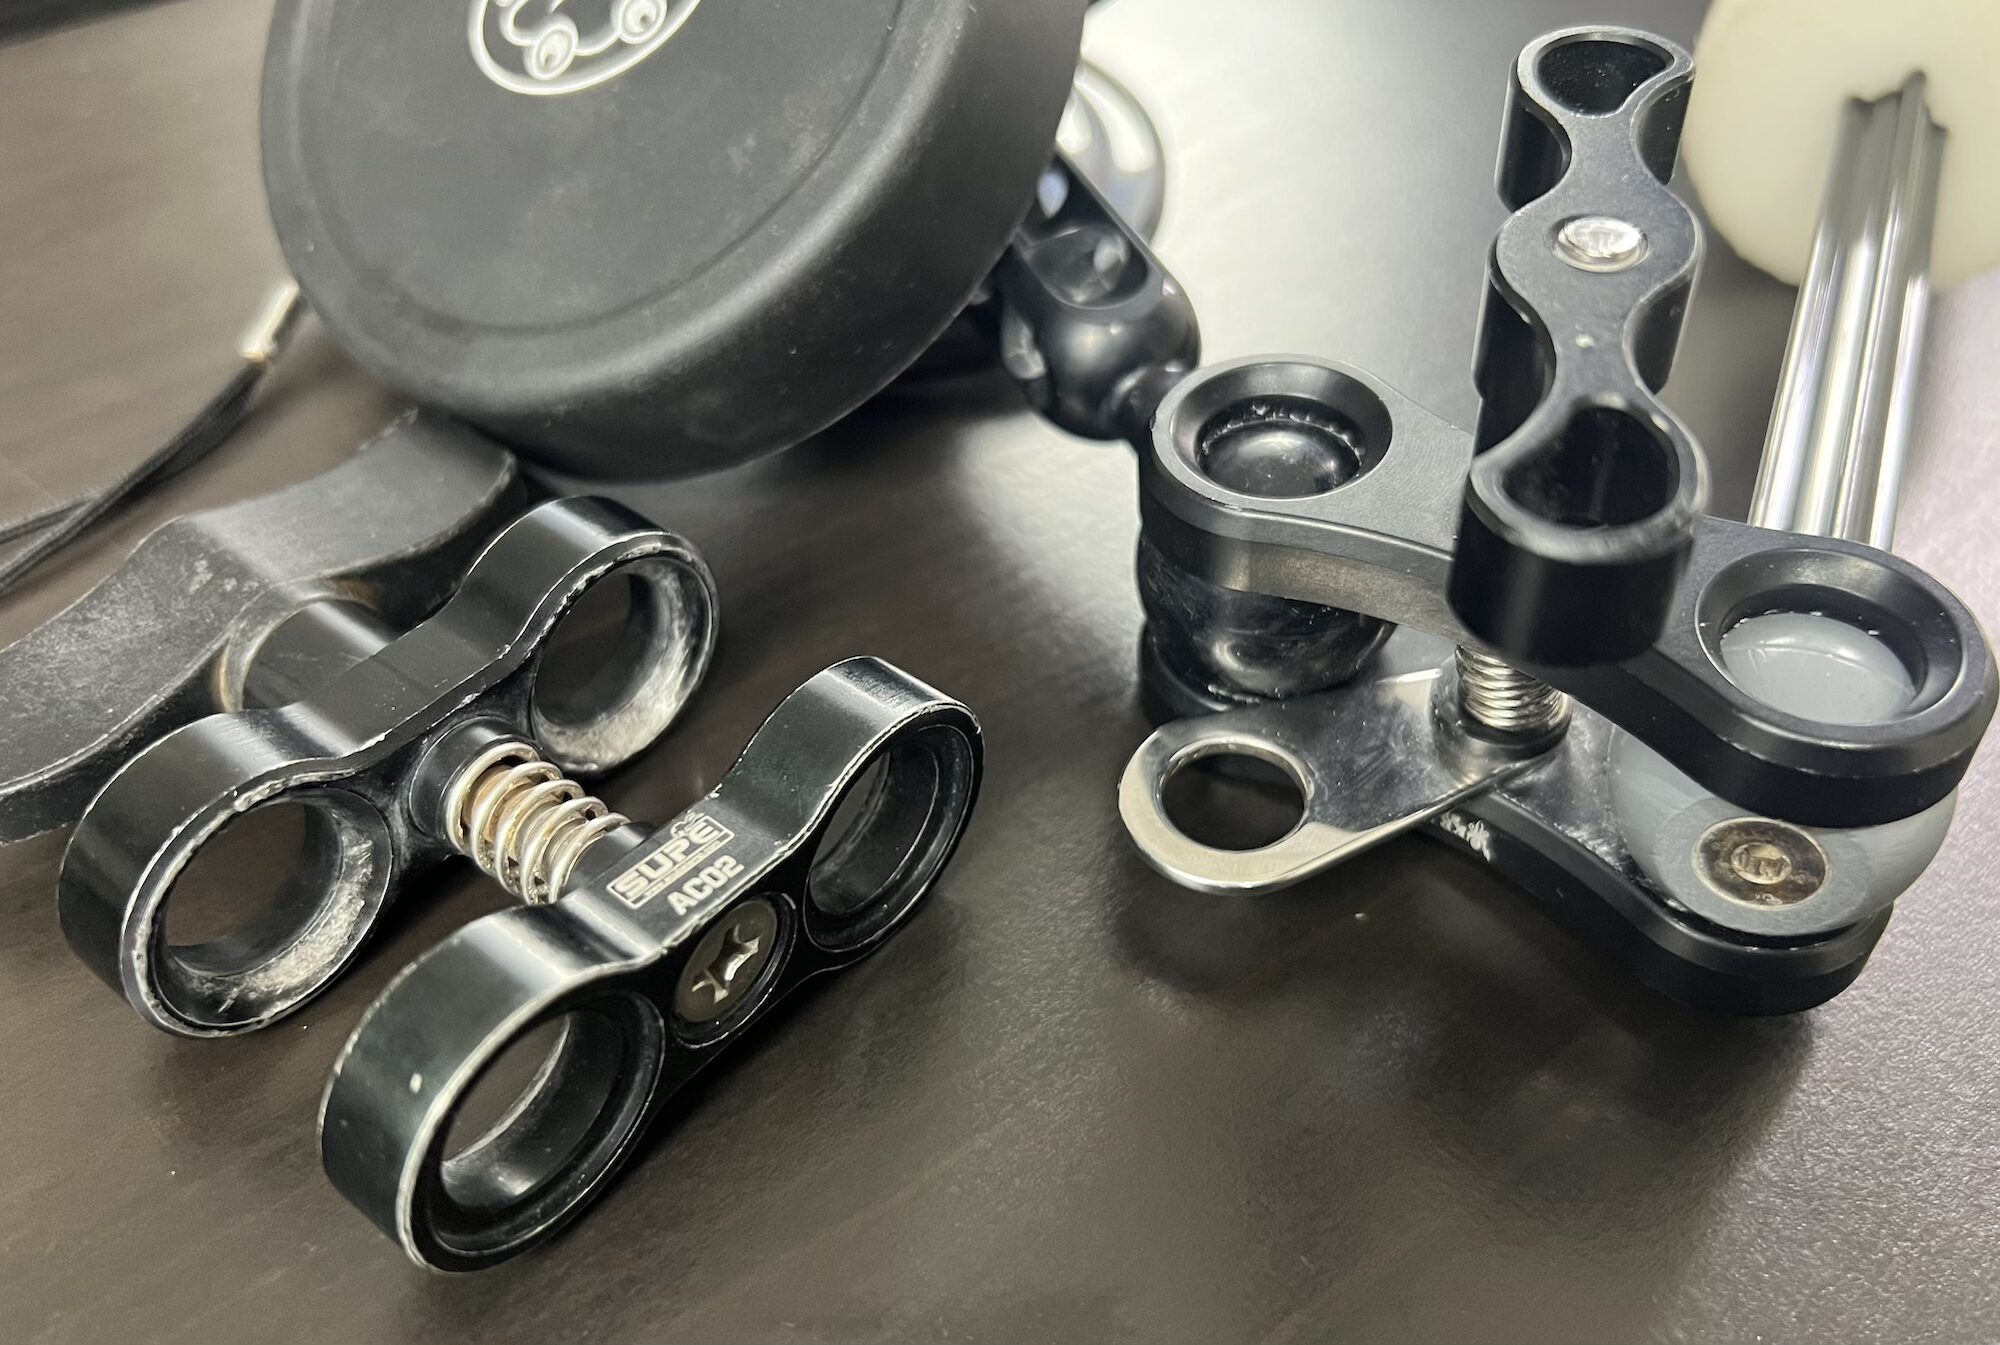
You will need 3 clamps per light – one to connect the arms to the housing, one to connect one arm to the other and one to connect the strobes to the housing.
4). Fiber Optic Cable: This is the cable that transmits the signal from your camera’s flash to your strobe, telling it to fire. There are 2 things to keep in mind with FOCs: one is the termination – most underwater photography products use what is called the standard “Sea & Sea” termination. Some Inon strobes use a proprietary connector. And some housings – eg the Olympus PT-series housings for the TG series – require a flat connector if you plan to use a wide angle wet lens. So make sure you match the cable termination type to your setup.
The second thing to consider with finer optic cables is the number of cores. Single core cables are relatively cheap (Rs 3000 or so) but have lower light termination – they work well enough with cameras with onboard flash, but if you upgrade to a system where you have a camera without an onboard flash and so have to use a converter, they may not work. At that point, you will need multi-core cables, which are significantly more (Rs 7000 onwards). For now, you can just get inexpensive single core cables, though.
In addition, a carrying lanyard – usually attached to the ball heads on the tray – makes it easy to carry your camera housing to/from the boat.
ACCESSORIES – SCALING UP
Now comes the fun part – well fun for everyone except your wallet: accessories.
The stuff we have talked about so far is sufficient to you get started, and I actually recommend you do so with just that. However, once you take photographs for a while, you will eventually start coming across limitations of your system. Perhaps you can’t focus close enough to shoot really small stuff. Or you have to back up too far to photography big stuff or sweeping reef vistas. Or you can’t see the screen too well when shooting macro. Or maybe you want to shoot some video and photo as well.
That is the point at which you start scaling your system up. Here are a few things that you can consider, which will improve the flexibility of your system:
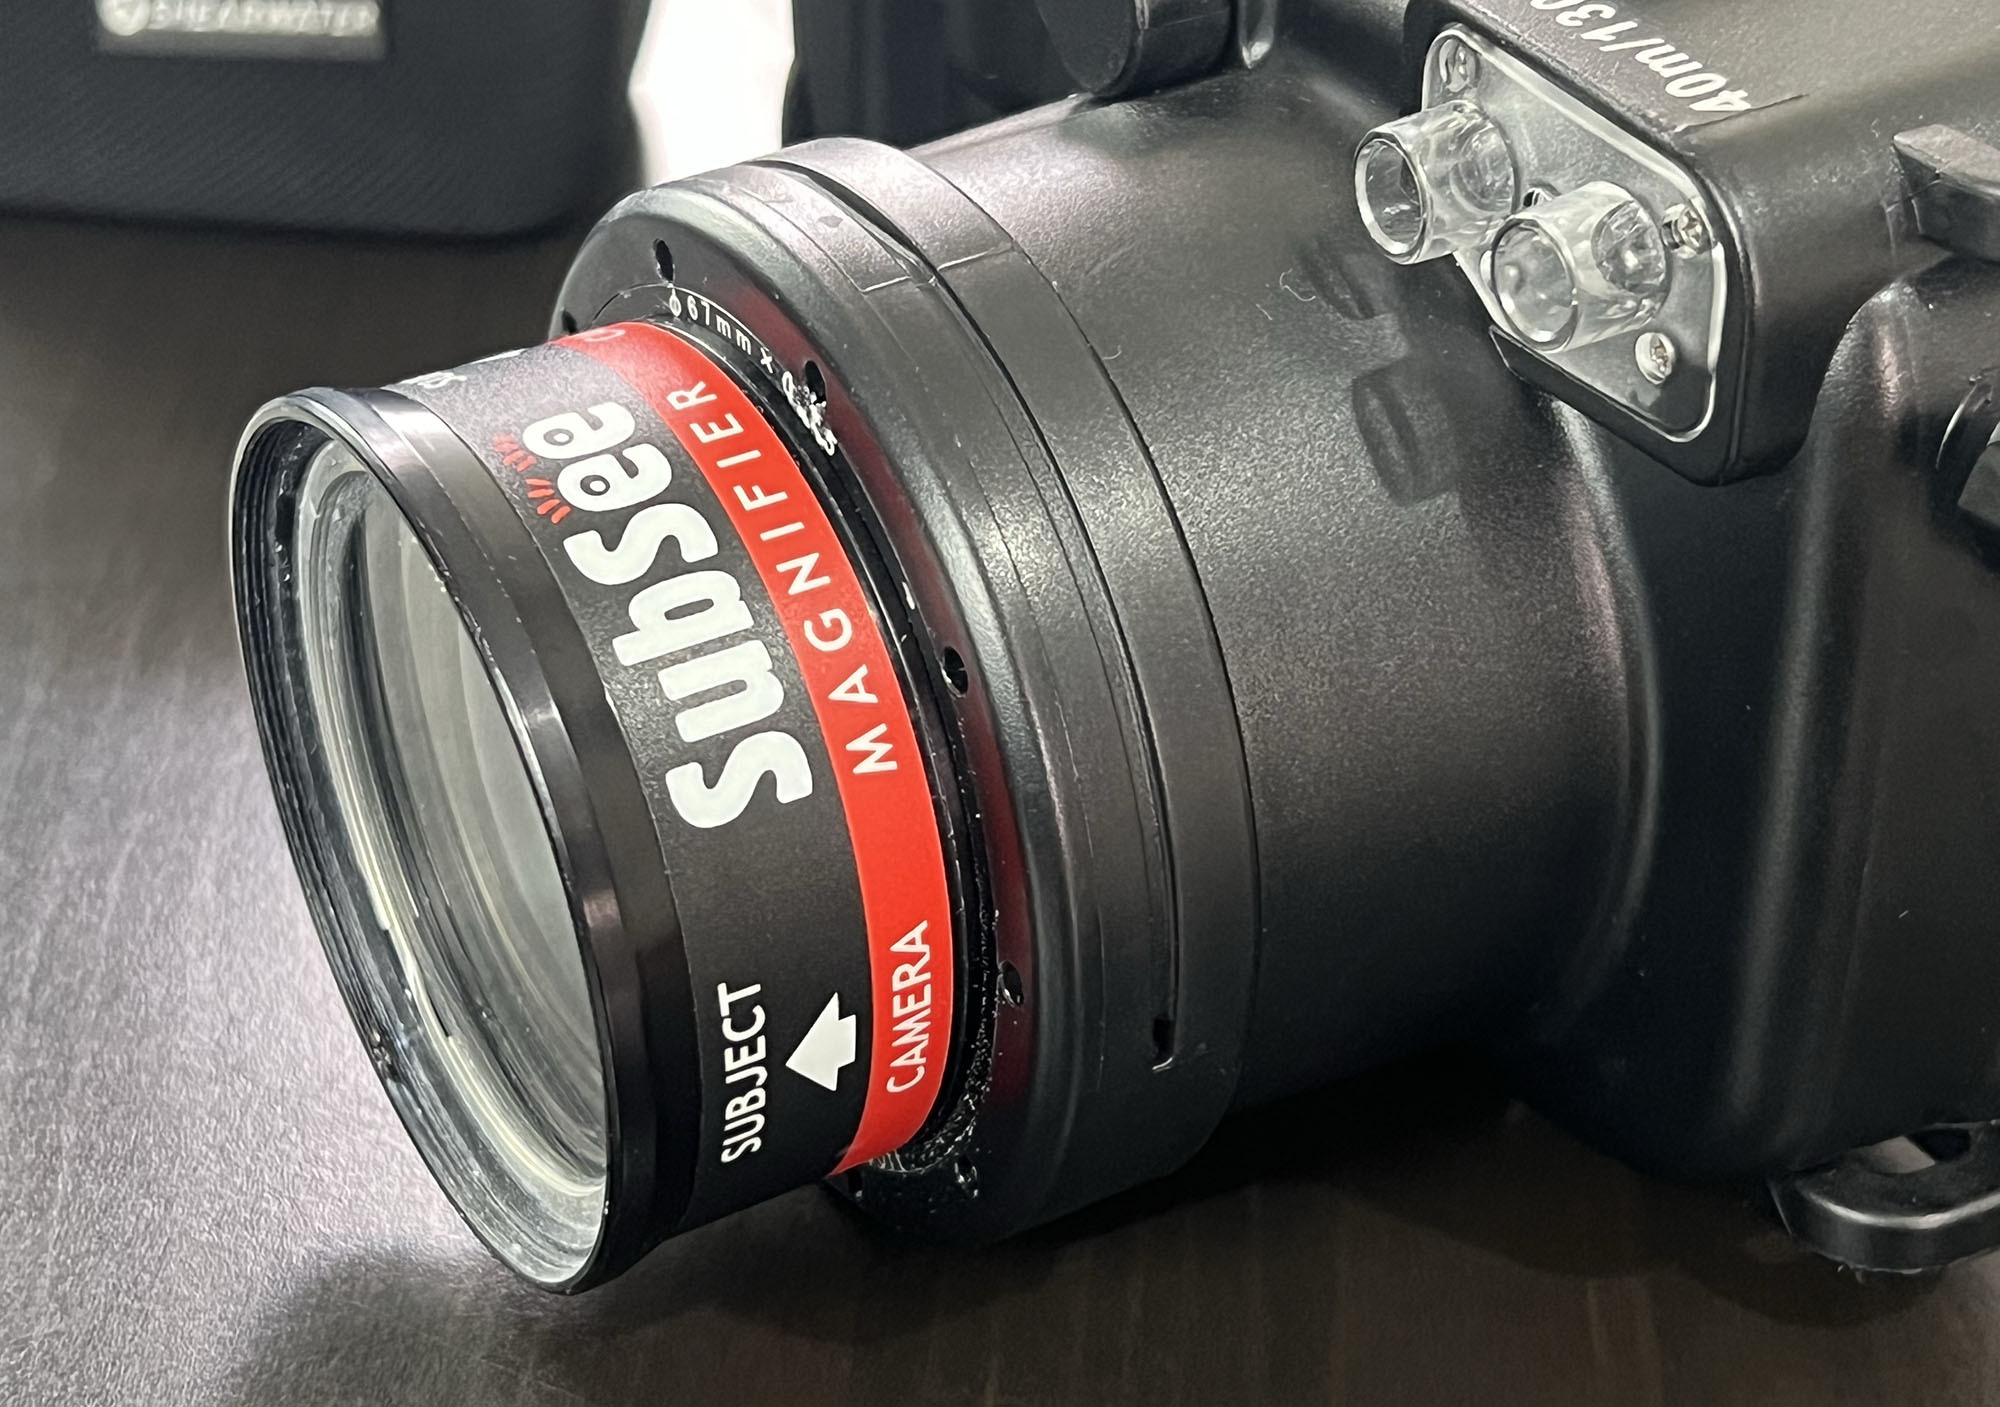
1). Add a close-up lens: Unless you have a camera with a really good macro mode, most close-up modes let you get close but not into the realm of true macro. Close-up lenses are accessories that screw on to the front of your housing’s port (or flip down, if you have a flip mount) and let you take photos of those really small critters. Close-up lenses come in various powers, called diopters, ranging from +5 to +15, with higher diopters providing more magnification but also having a slightly steeper learning curve. +5 is a good starting point.
2). Add a wide angle adapter: Wide angle adapters come in many flavours. The cheapest ones are those that offset the effect of refraction and restore the angle of coverage of the camera to what it would be on land (from 70 to 80 degrees, give or take). More expensive ones – at around the Rs 35,000 mark – give you an angle of coverage that goes from 120-140 degrees, thus letting you shoot true wide angle. And really expensive ones – clocking in at Rs 80,000 or higher – give you a field of view of 160 degrees: getting into ILC camera territory!
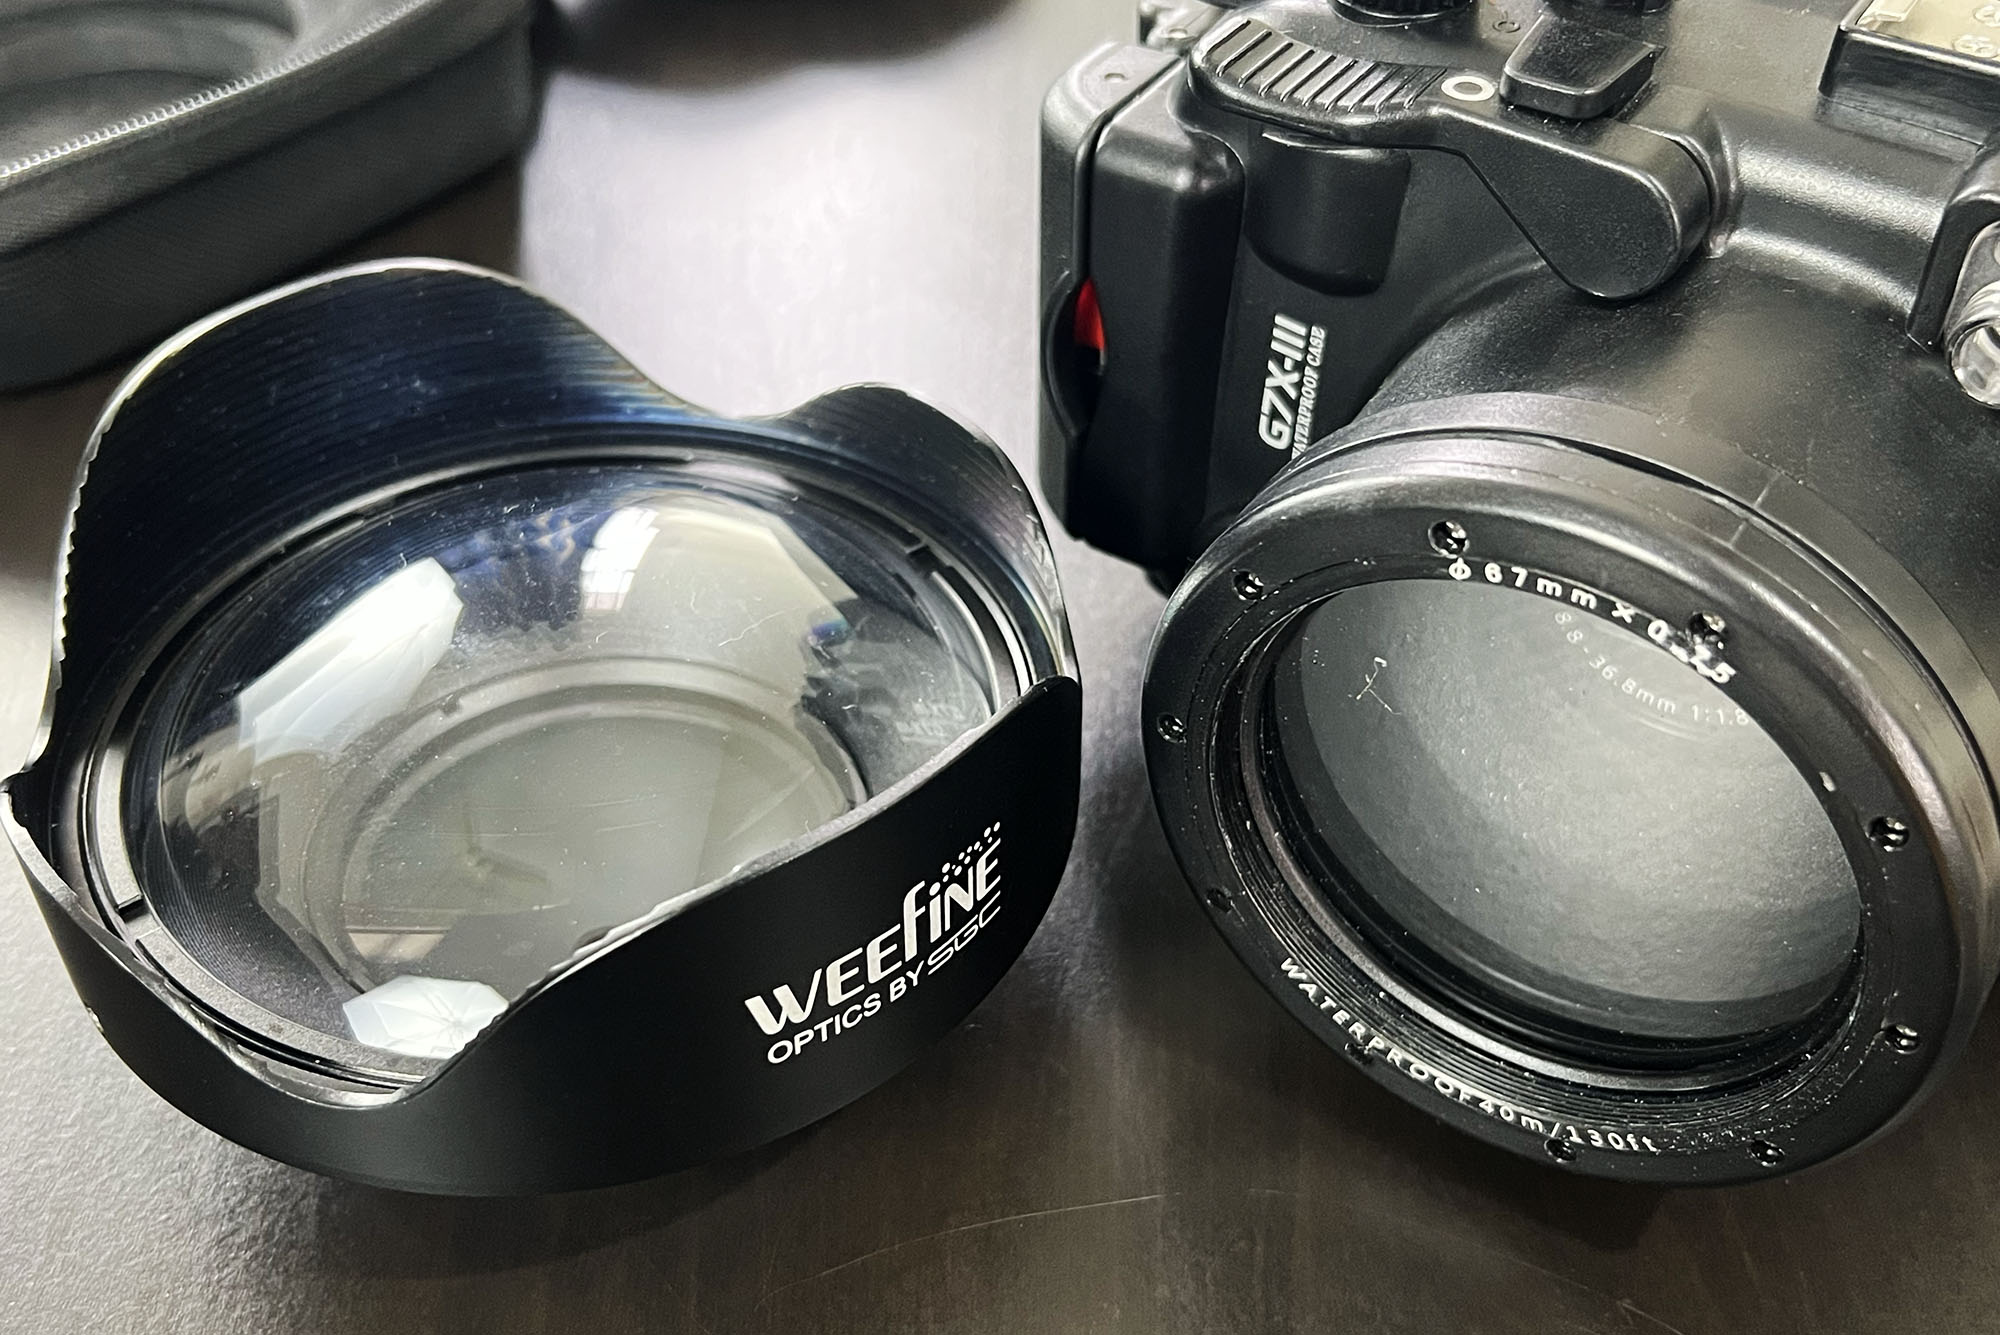
Of course, before getting the wide angle adapter, make sure you have a second strobe first!
3). Focus light: Really small stuff can be very hard to photograph. The low contrast makes it hard for your camera to acquire focus, and for you to see what’s going on, on the LCD screen of your camera. Focus lights make this a lot easier. Typically, people mount them on top of the housing, using the cold shoe mount and a ball adapter. If your housing doesn’t have a cold shoe mount, you can use a top tray to provide a mounting point for the light, or even attach it to your tray handle using a triple clamp
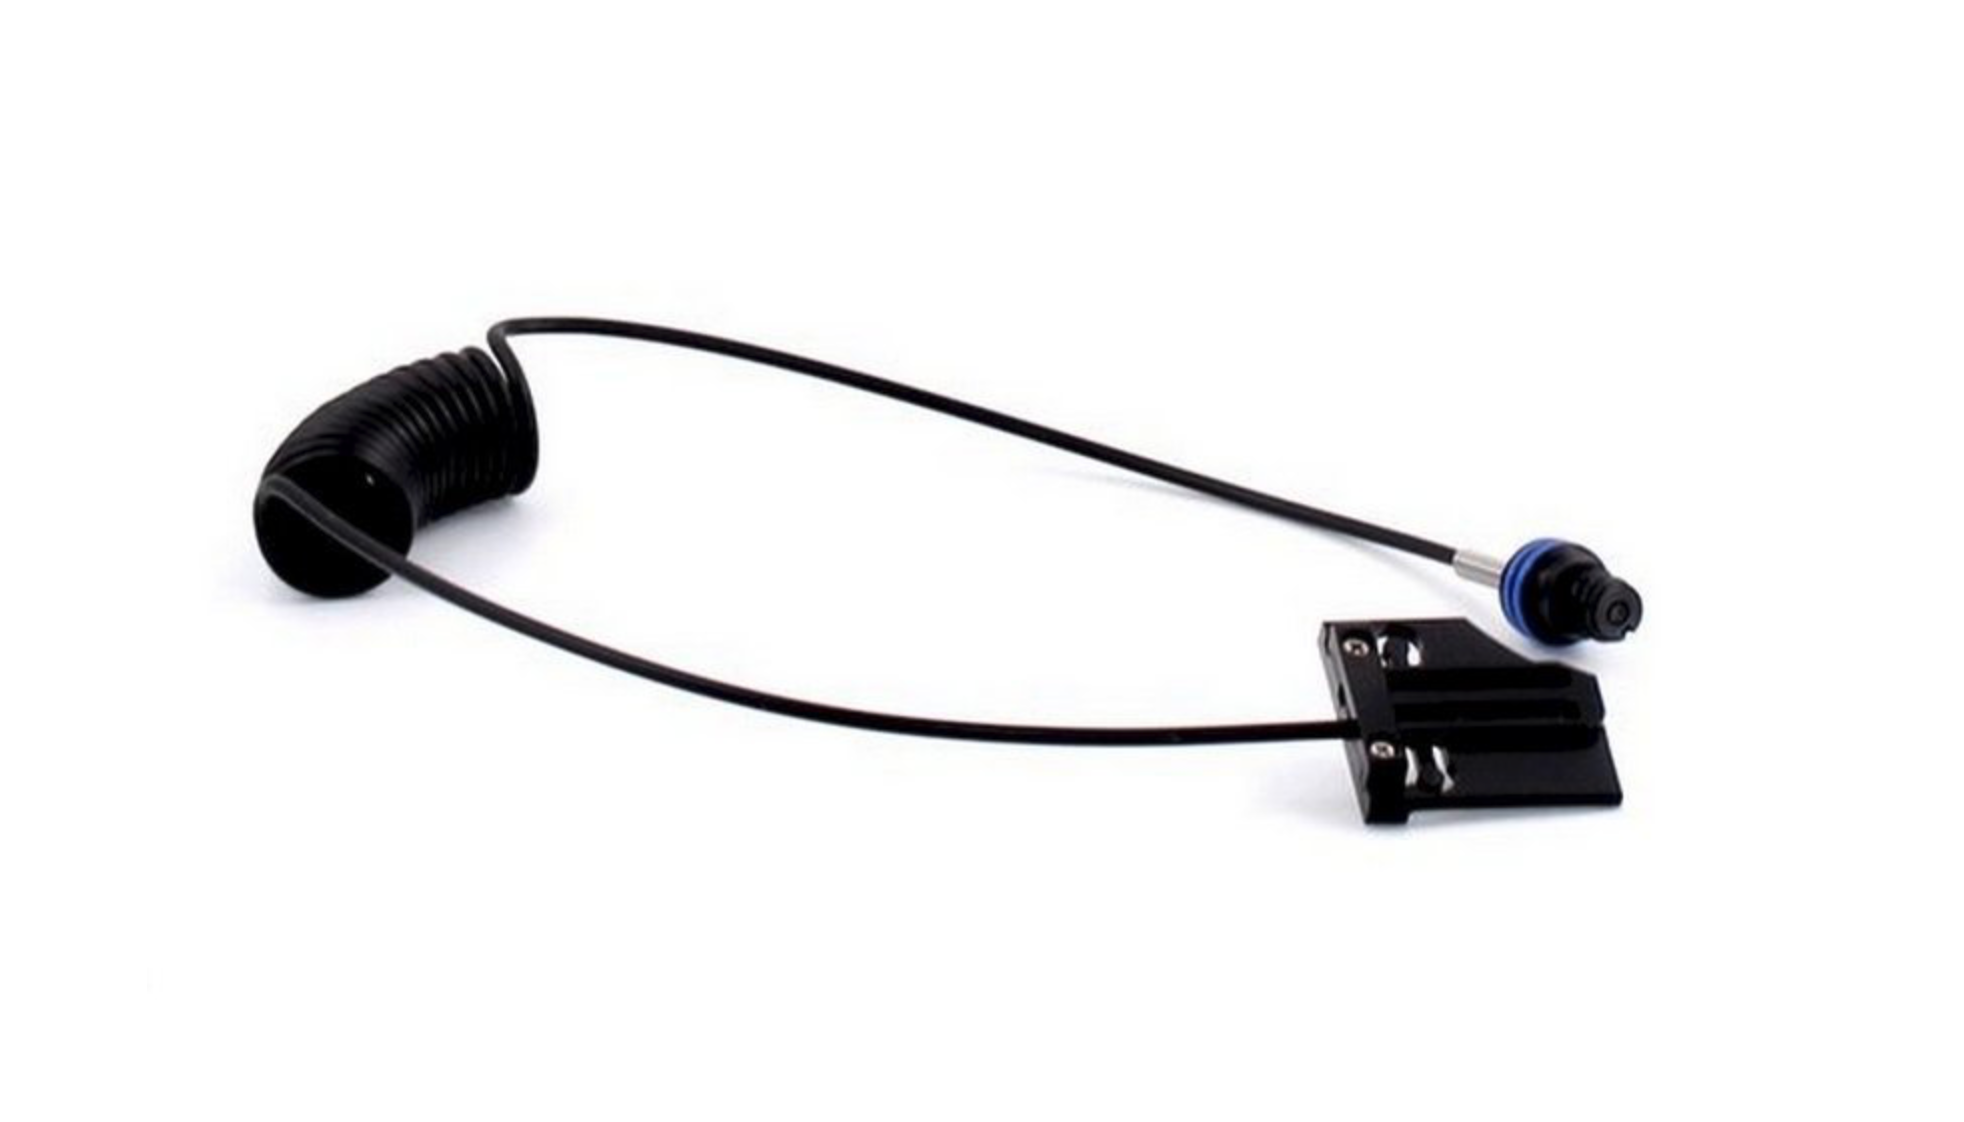
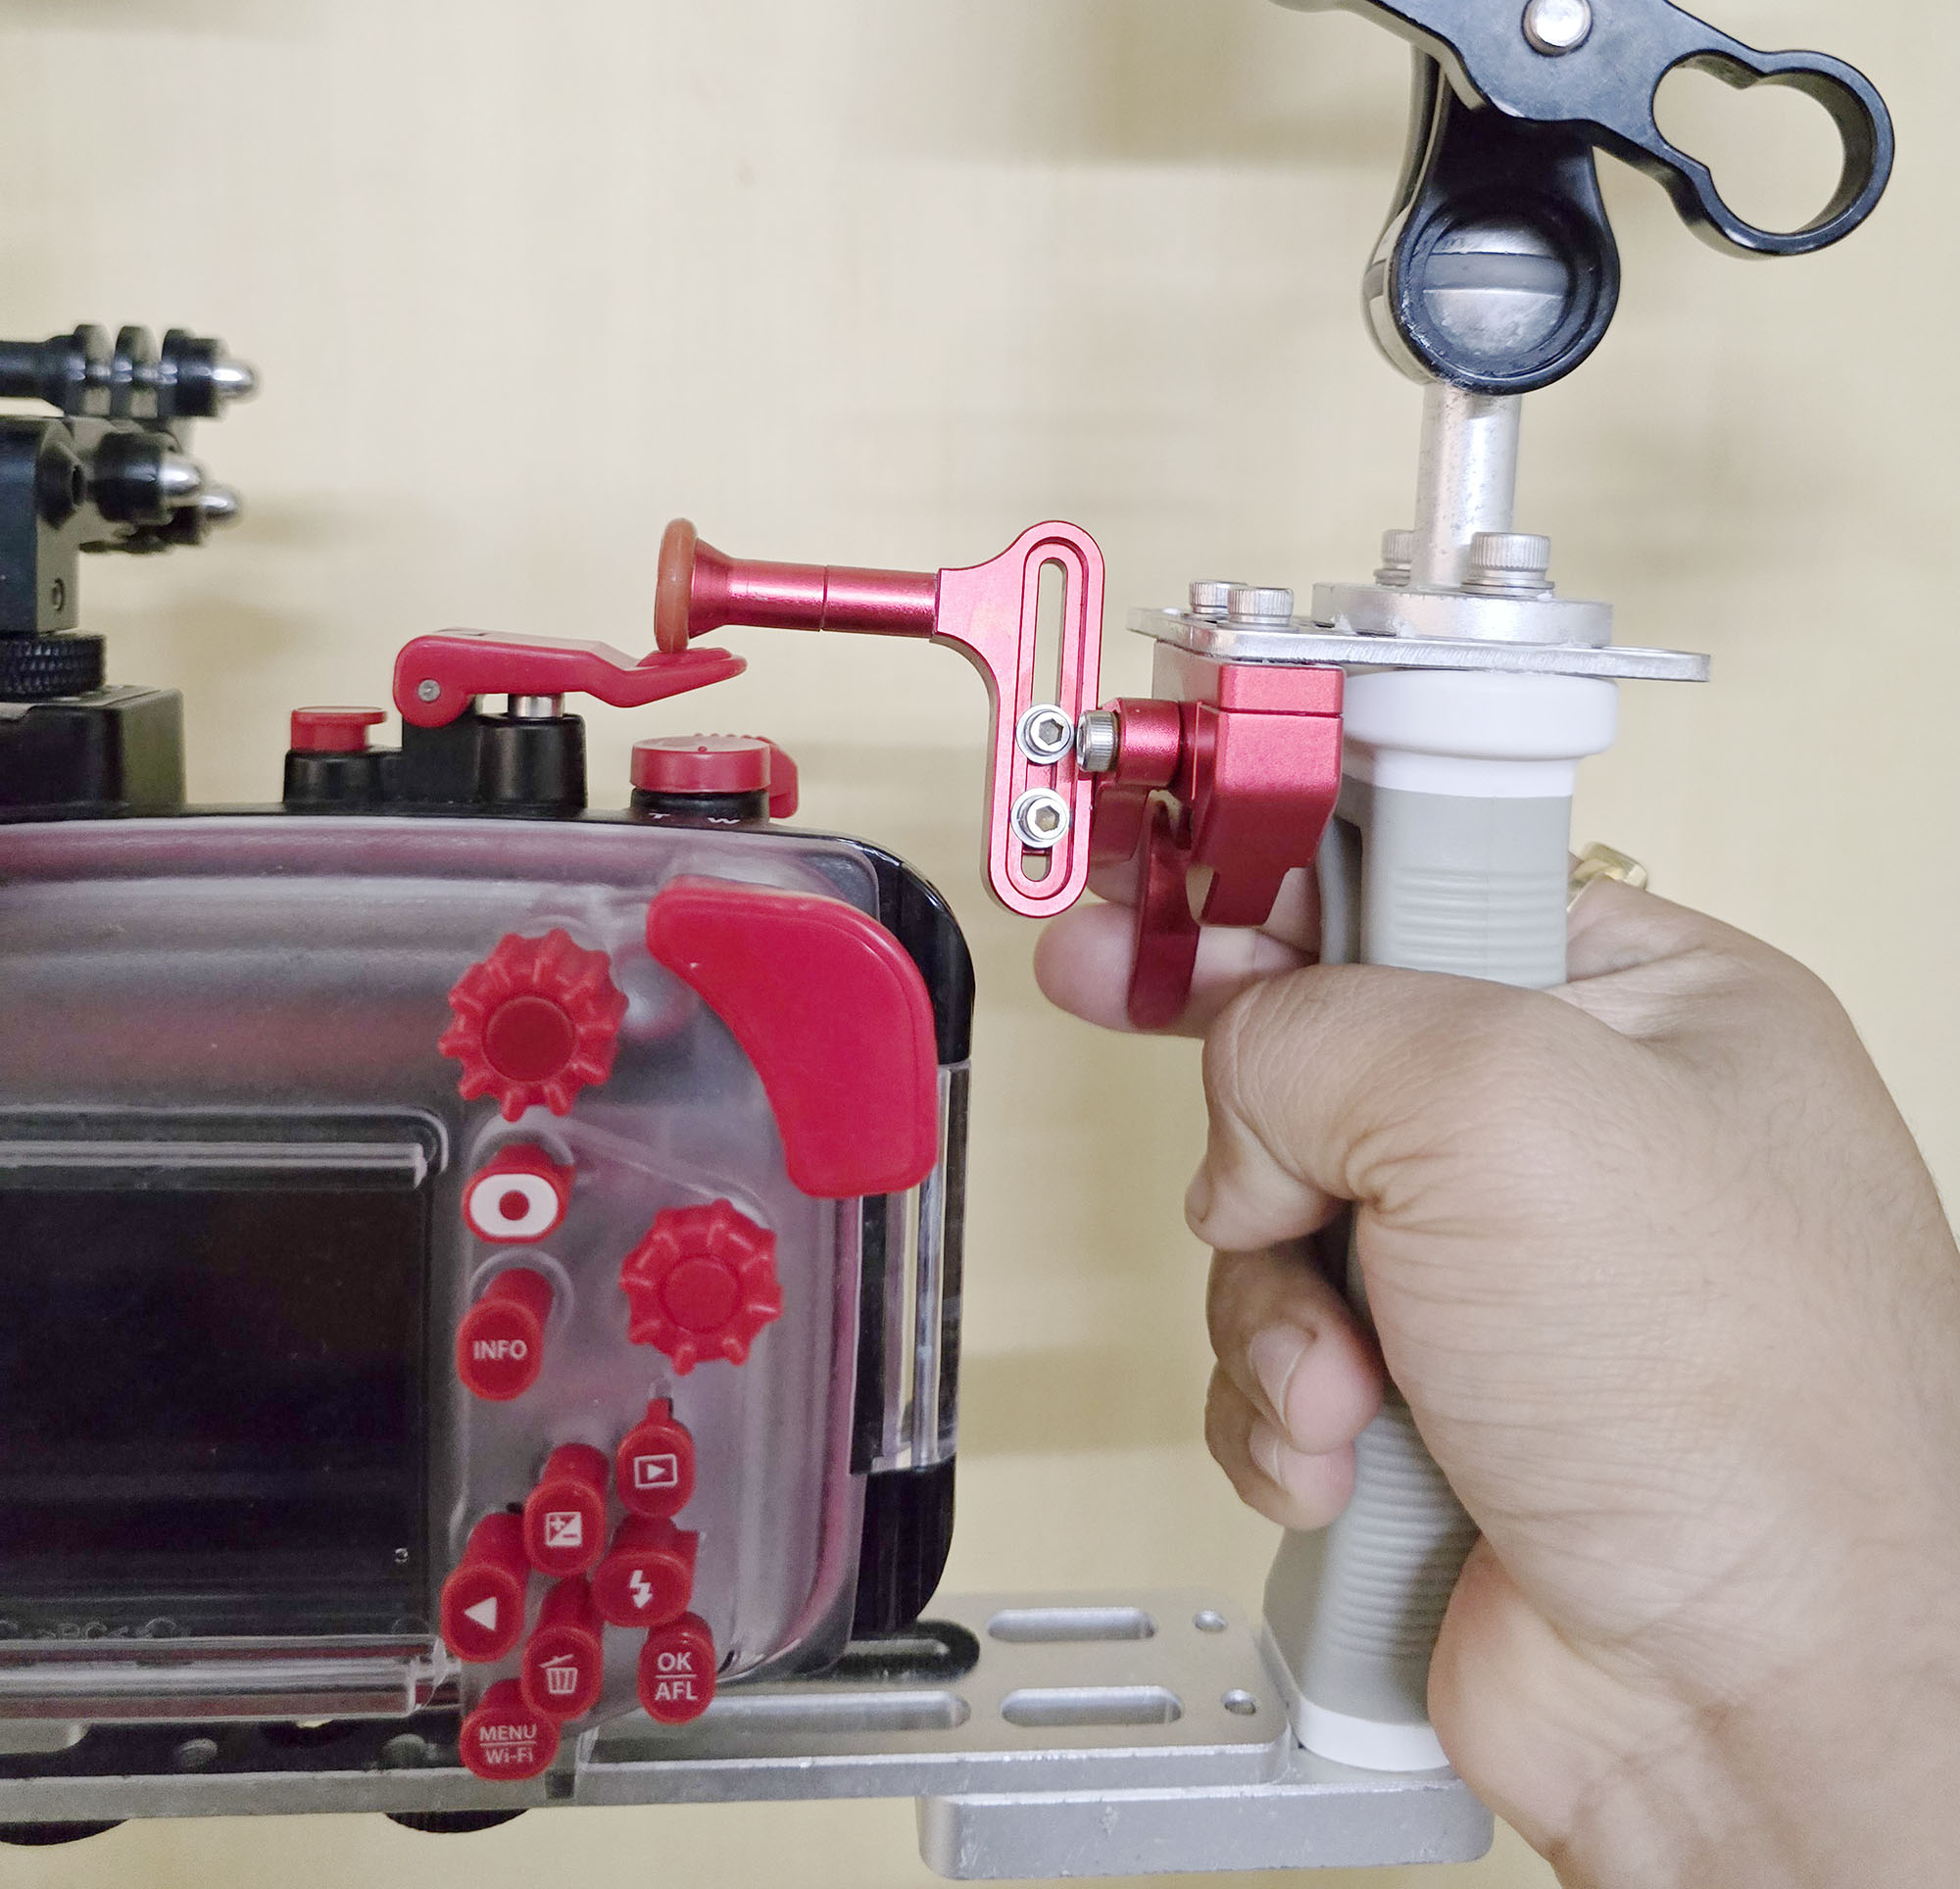
4). Shutter trigger: for a lot of people, it can be uncomfortable to hold the camera tray AND press the trigger with the same hand – I have fairly long fingers and even I find it awkward. You can get a shutter trigger that attaches to your housing and lets you press your housing’s shutter button a lot more easily. A very small but under-rated add-on!
There are a lot of other options than the above – this rabbit hole goes very, very deep and there are solutions to problems that you didn’t even know existed (kinda like recreational sidemount? I kid, I kid). By the time you exhaust the limits of the above – IF you do – you will have a good enough idea to figure this out by yourself.
Honestly, with the range of accessories available these days, I think 90% of photographers won’t exhaust the capabilities of this system or NEED (‘want’ is a different story) to upgrade to a full ILC (Interchangeable Lens Camera) system.
PUTTING IT ALL TOGETHER / WHAT TO GET
If you have read all the above, great. If you have just skipped to the bottom, you have missed out on some great humour, intense drama and scintillating political insights. But here we are, and so lets talk about how to put all of this together.
To start with, you need the essentials: a camera, a housing, a strobe and suitable connectors. This is what I recommend:
CAMERA: There are 2 main options for a camera body at present: the OM Systems (formerly Olympus) TG7, which offers ILC-level macro capabilities, is waterproof to begin with and has a very large ecosystem of accessories designed for it. The other option is the Sony RX100 MkV, which is a better camera in every respect except price and macro capabilities. The Olympus is a staggeringly popular camera for underwater use and in skilled hands, can produce spectacular images, especially of macro. But the bigger sensor (1″ vs 1/2.3″), super fast AF and 4k video capabilities, it provides a much better platform for scaling up.
HOUSING: For the OM Systems, your choices are the OEM housing (actually made by AOI), Ikelite or Nauticam. My recommendation would be to go with the OM Systems OEM housing – it is good enough to get the job done, and cheap enough. For the Sony, you can get a Fantasea housing (which I suspect is the same as the SeaFrogs), or splurge for a metal housing by RecSea: yes, it is a lot more expensive but you can add a vacuum seal and make sure your expensive camera stays safe.
ARMS: There are plenty of inexpensive arms from Asian brands like Weefine, Kraken, X-Adventurer, Stix and more. Get those and get a few float collars to go with it. No need to spend for expensive arms from Nauticam, ULCS, etc.
TRAY: Tray, you can buy the cheapest tray you find. These are about as simple as it gets. I have used Rs 3000 jobbies from Ali Express and they have worked very well. If you are undecided between single or double handle trays, get one where the arms detach: you can use it as a single handle to begin with and add the second handle later
CLAMPS: Here, I will not recommend getting the cheapest ones. I have tried those, and have had issues with them holding the arms firmly. Get branded ones, but from the Asian brands I have listed above.
FIBER OPTIC CABLE: You know what I am going to say – Asian brands for the win again. Single core is fine for the time being. Make sure you dont get an absolutely unbranded unit unless it comes with a decent warranty – you dont want the cable to fail on holiday! And spring for a spare.
STROBE: The cheapest all-round strobe I will suggest is the AOI UCS-Q1. It isn’t the most powerful and you need to add the diffuser to get the 85 degree coverage, but you can buy 2 of these for the price of a heftier strobe, and it will do an excellent job. If you are pairing it with an OM Systems camera, it is worth getting the RC variant to get TTL and other advanced features.
A more full-featured strobe – and one you are less likely to outgrow – is the Marelux Apollo S, as well as the upcoming Y. A lot more power and wider coverage could possibly make them end game strobes for most photographers.
I personally would avoid Sea&Sea like the plague. I bought 2 new S&S strobes in 2019, did one trip with them and then one stopped worked, S&S refused warranty, saying that some inside O-ring needed to be changed annually (meanwhile, my Inon has been going strong for 17 years). They are supposedly under new management right now but with so many other options, I refuse to give them my money or recommend them.
FOCUS LIGHTS: You dont need anything super bright or super expensive. Orca, Big Blue, Weefine all make reasonably priced torches that would get the job done.
WET LENSES: There are a staggering amount of options out there for wet lenses – both closeup and wide-angle. The market leader is Nauticam – they have a vast range of options for different focal lengths, ranging from around Rs 32,000 all the way to Rs 2L plus. Inon has also been a long presence in the segment and Weefine & Kraken are bringing some good, lower-cost options to the market as well.
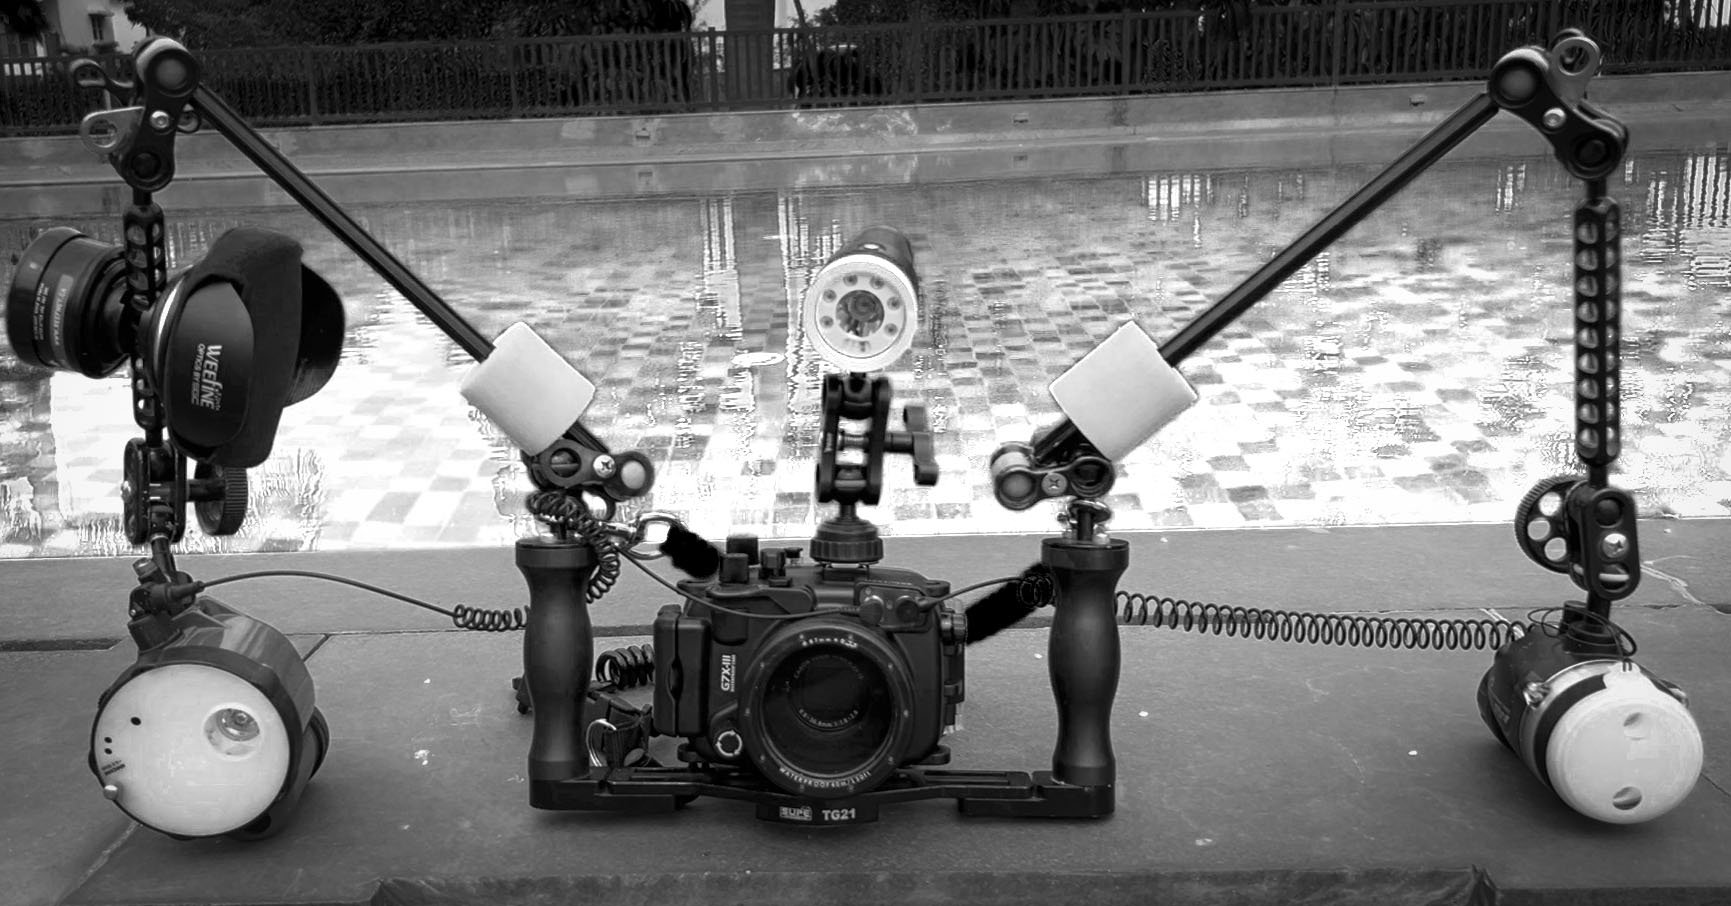
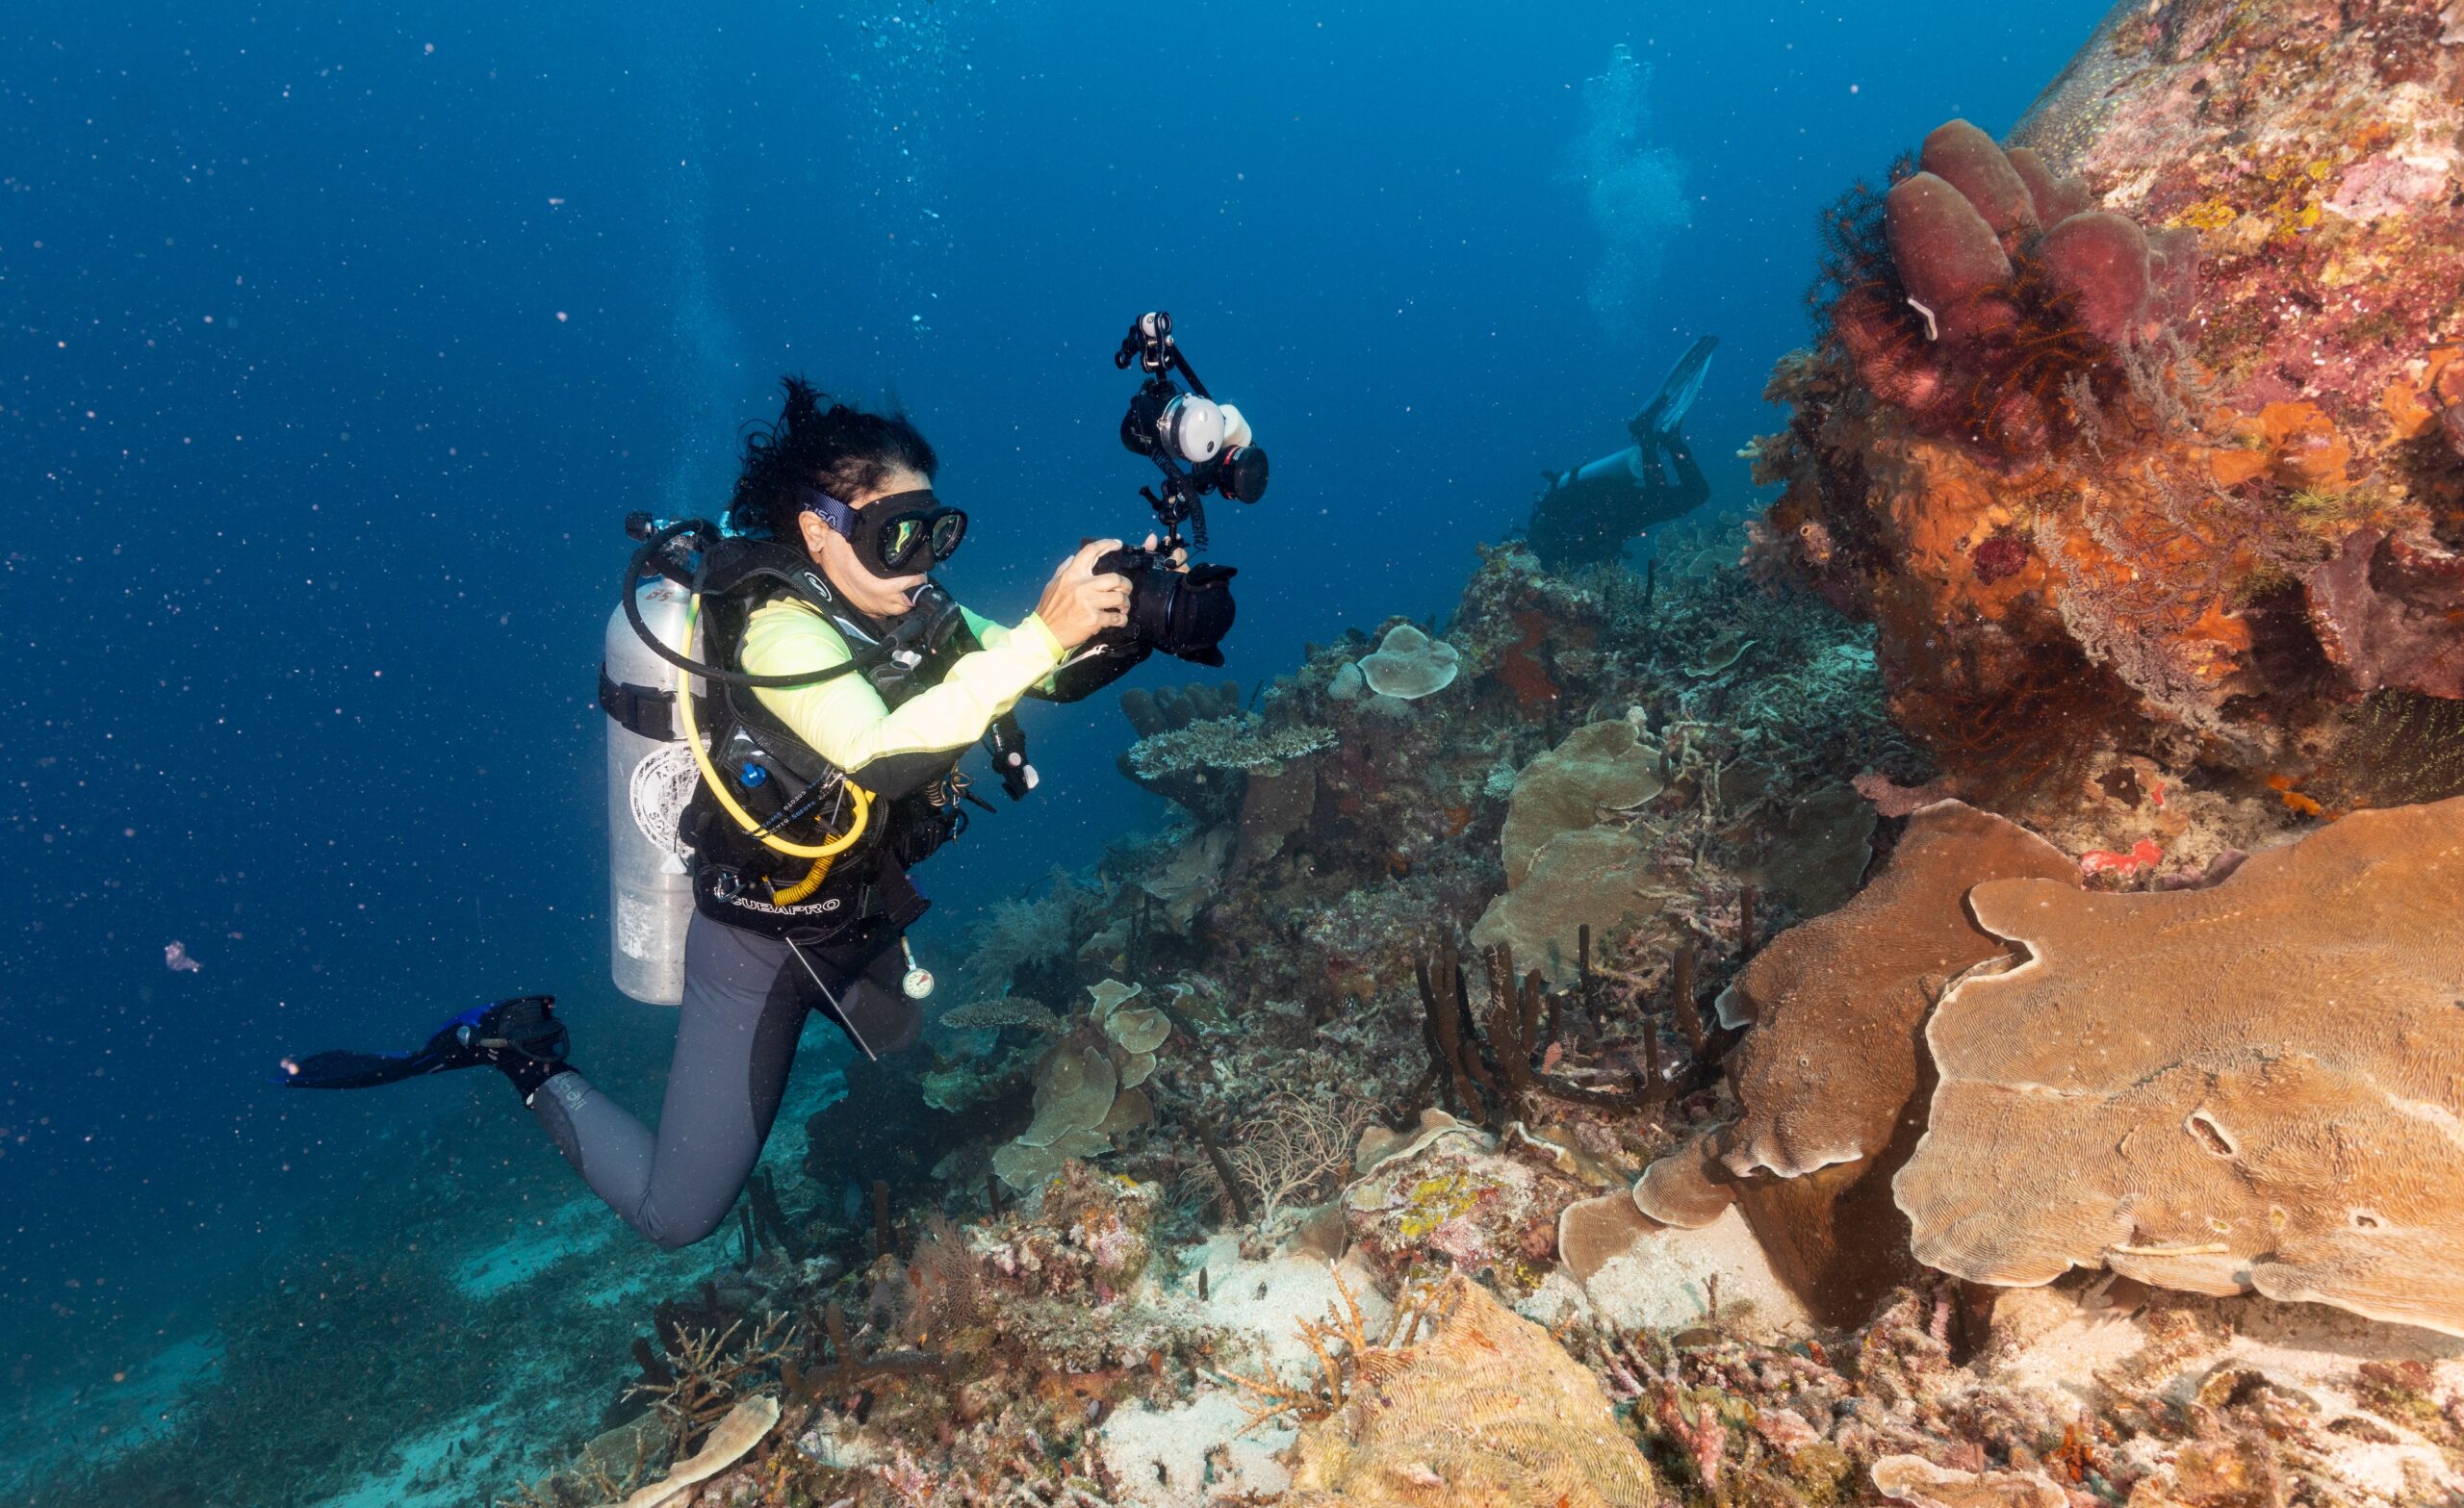 Go out and shoot – that’s how you get better. Not by buying more and more gear
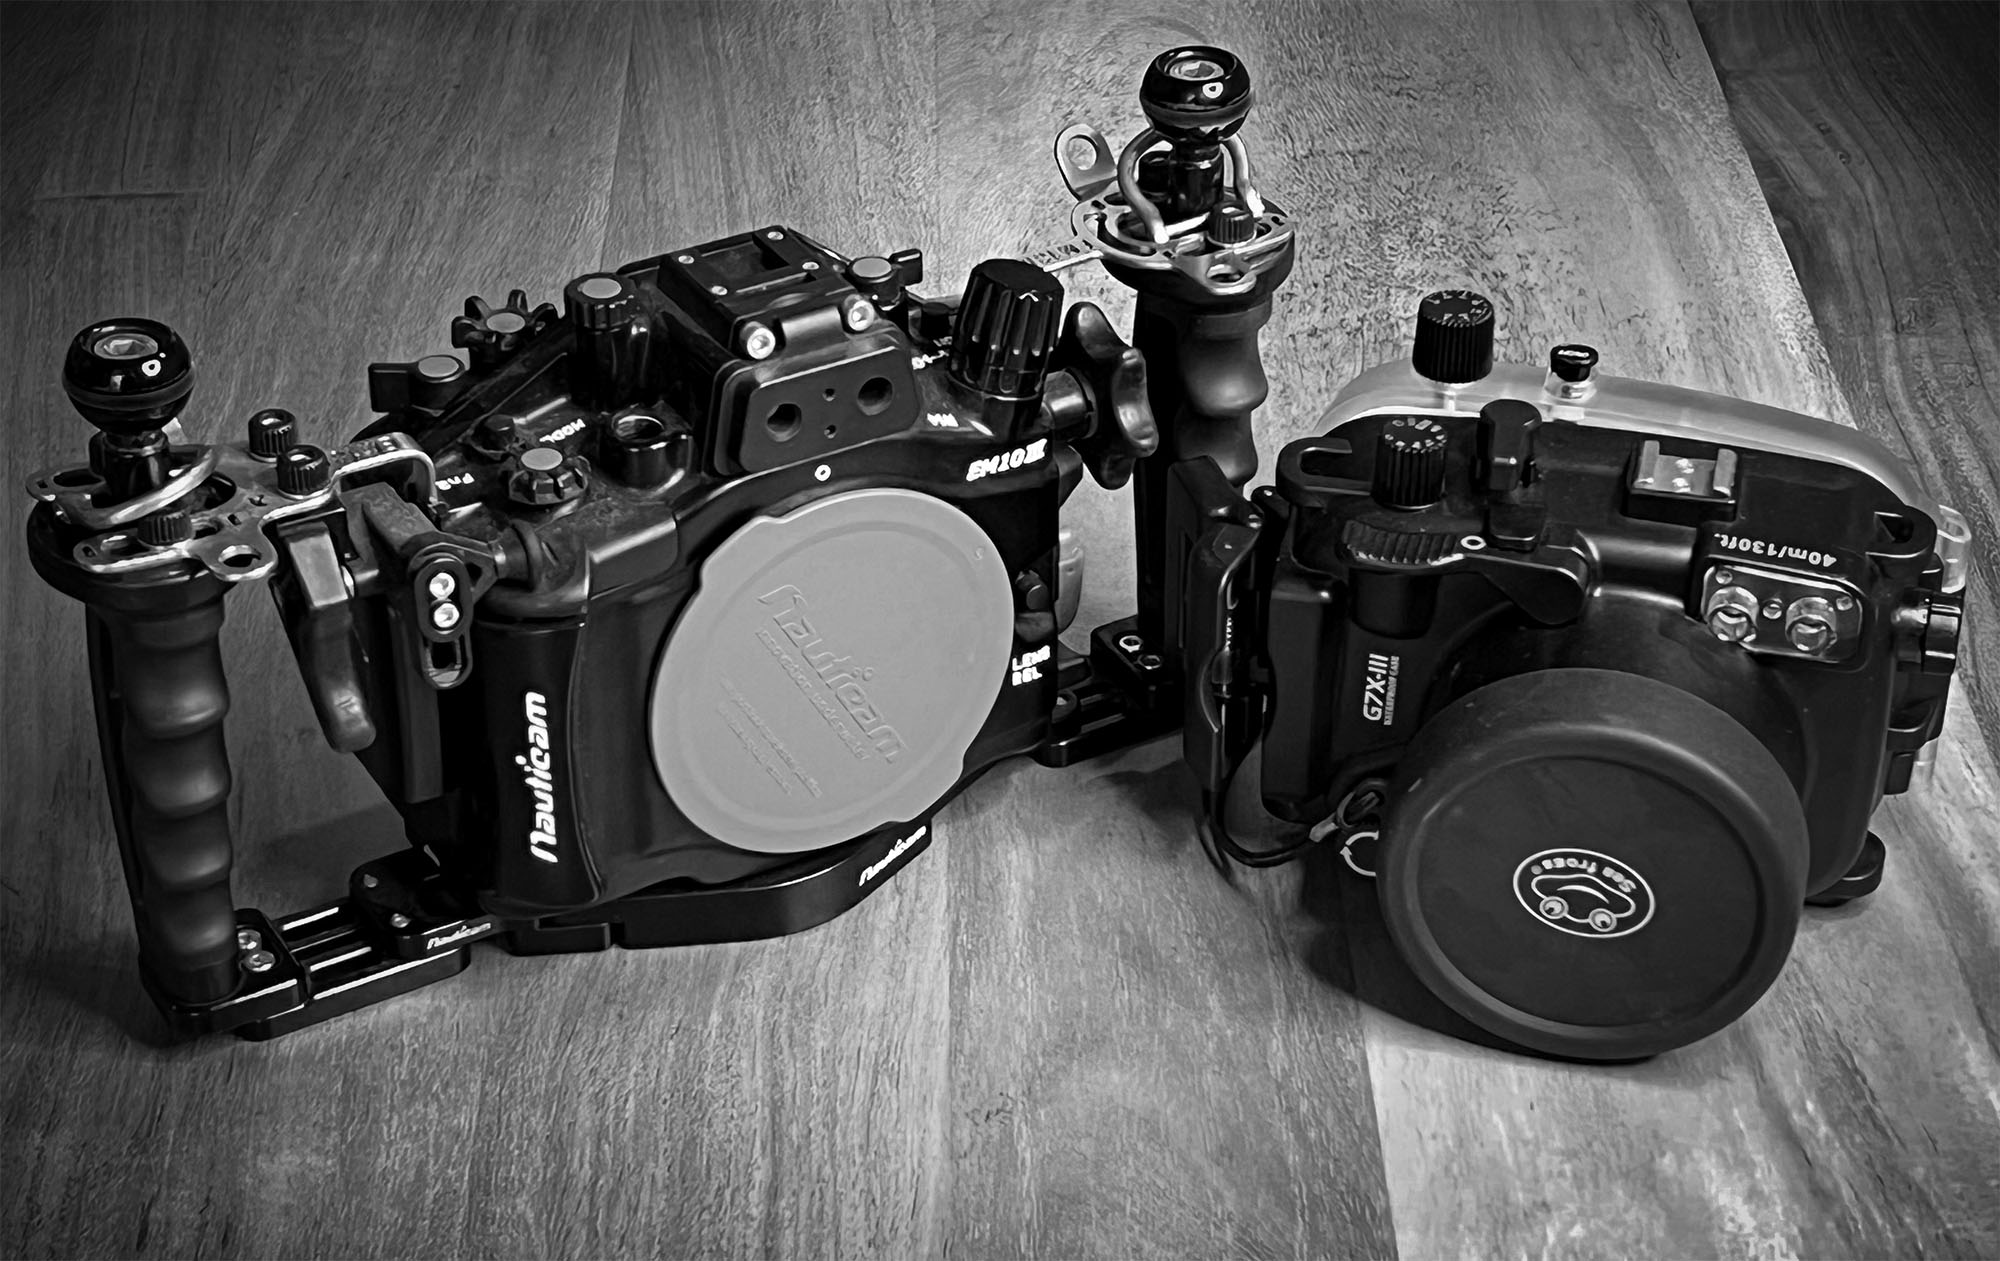
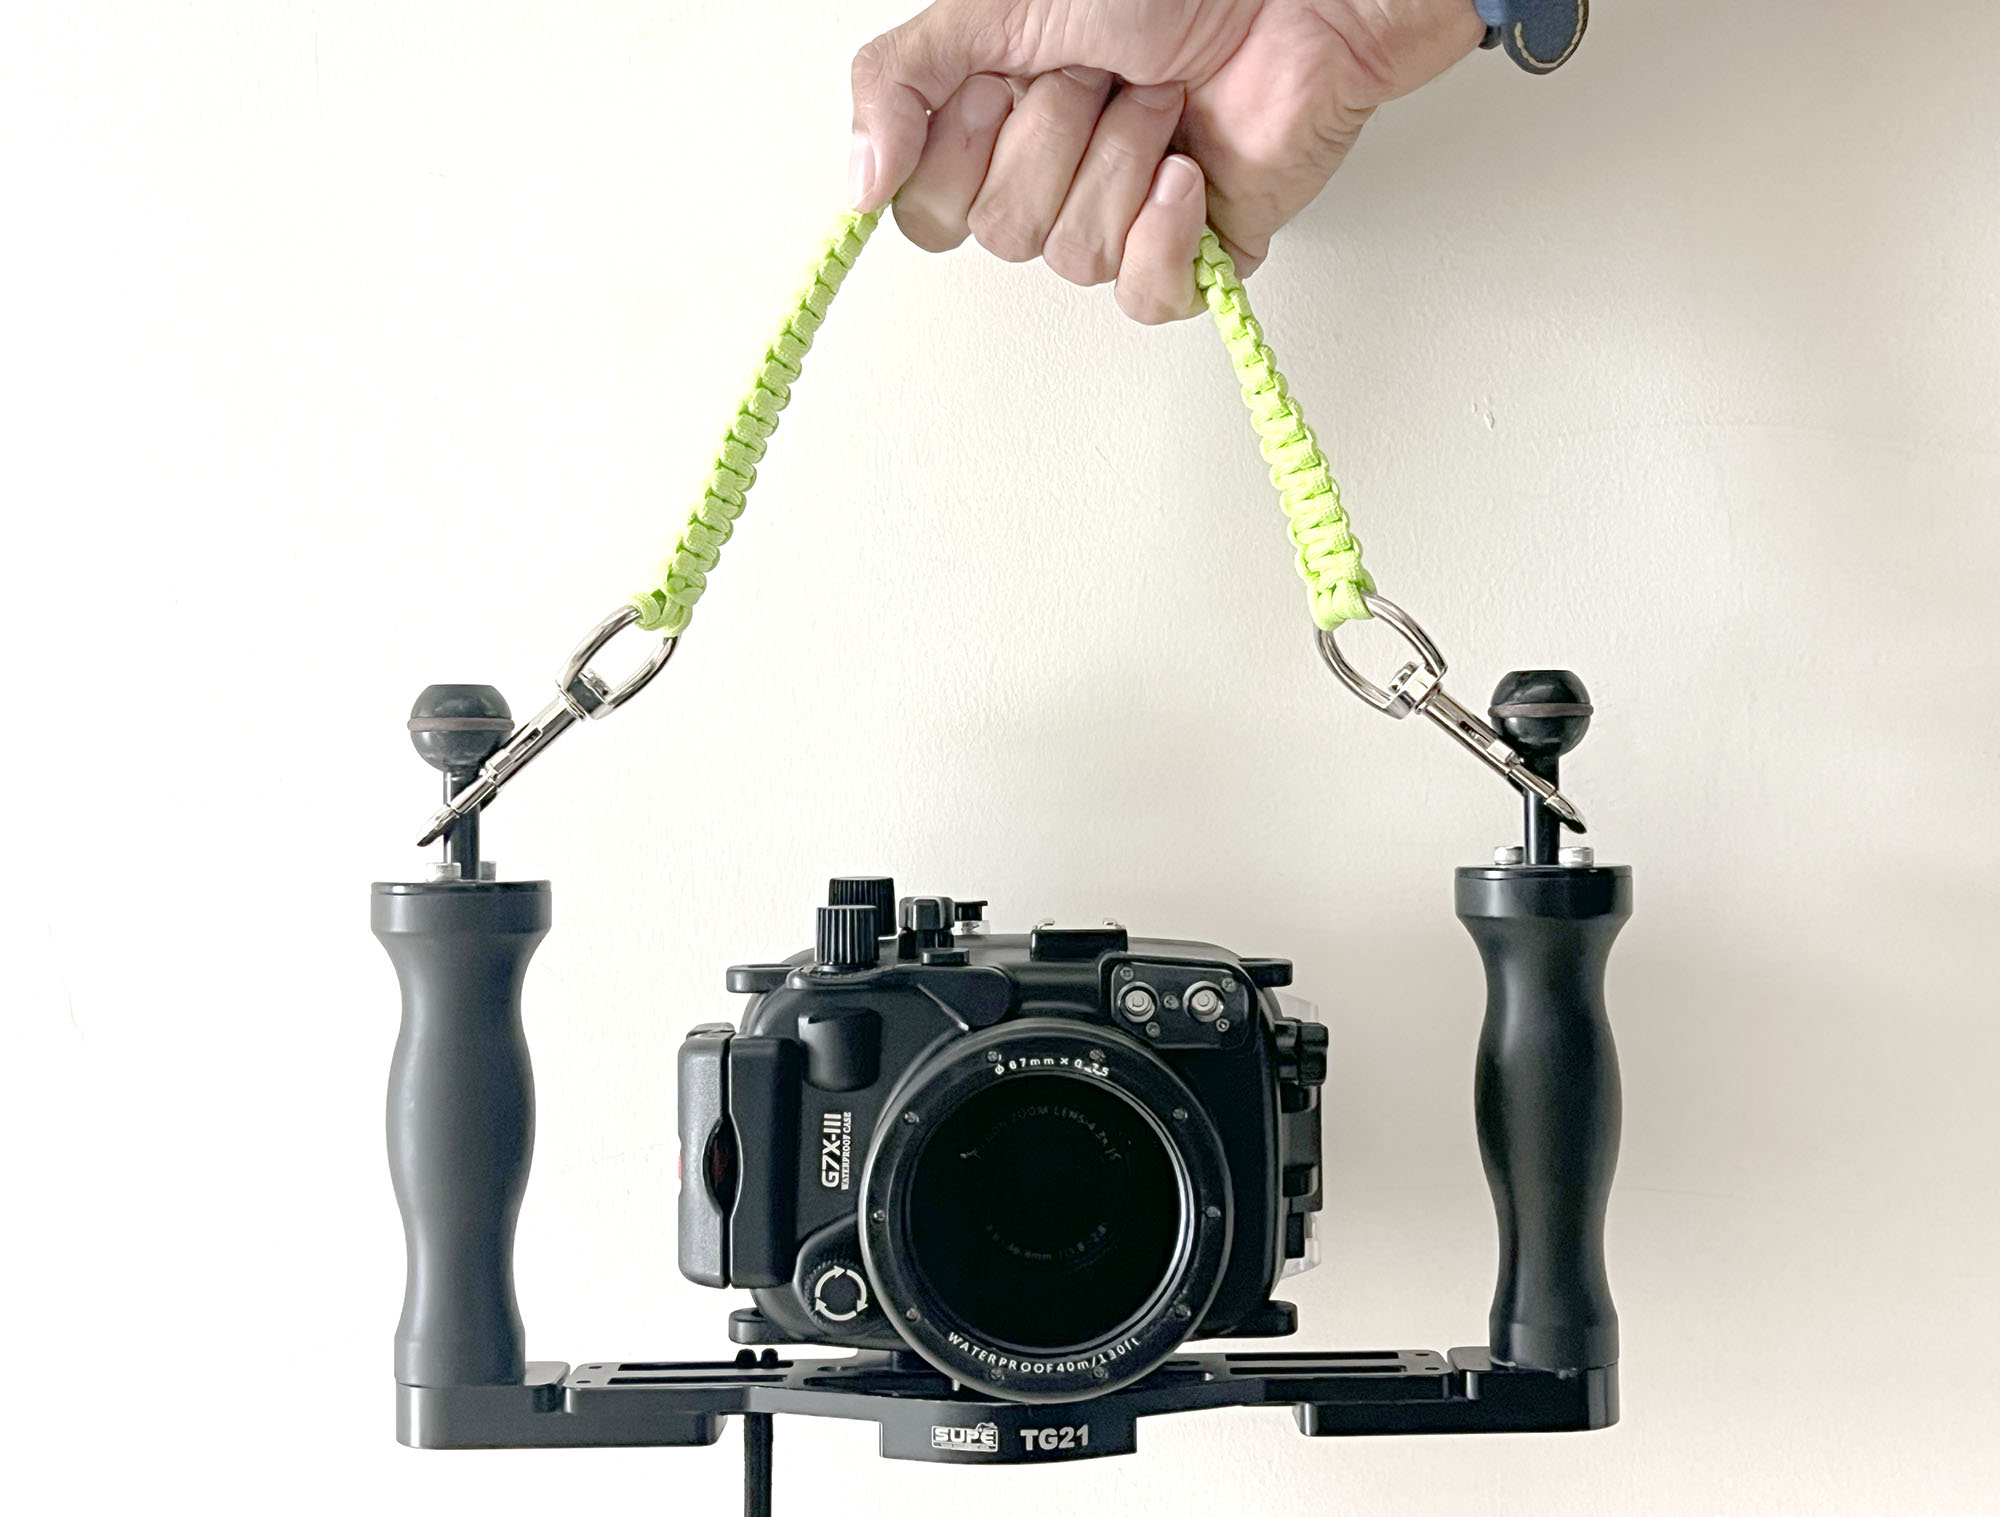
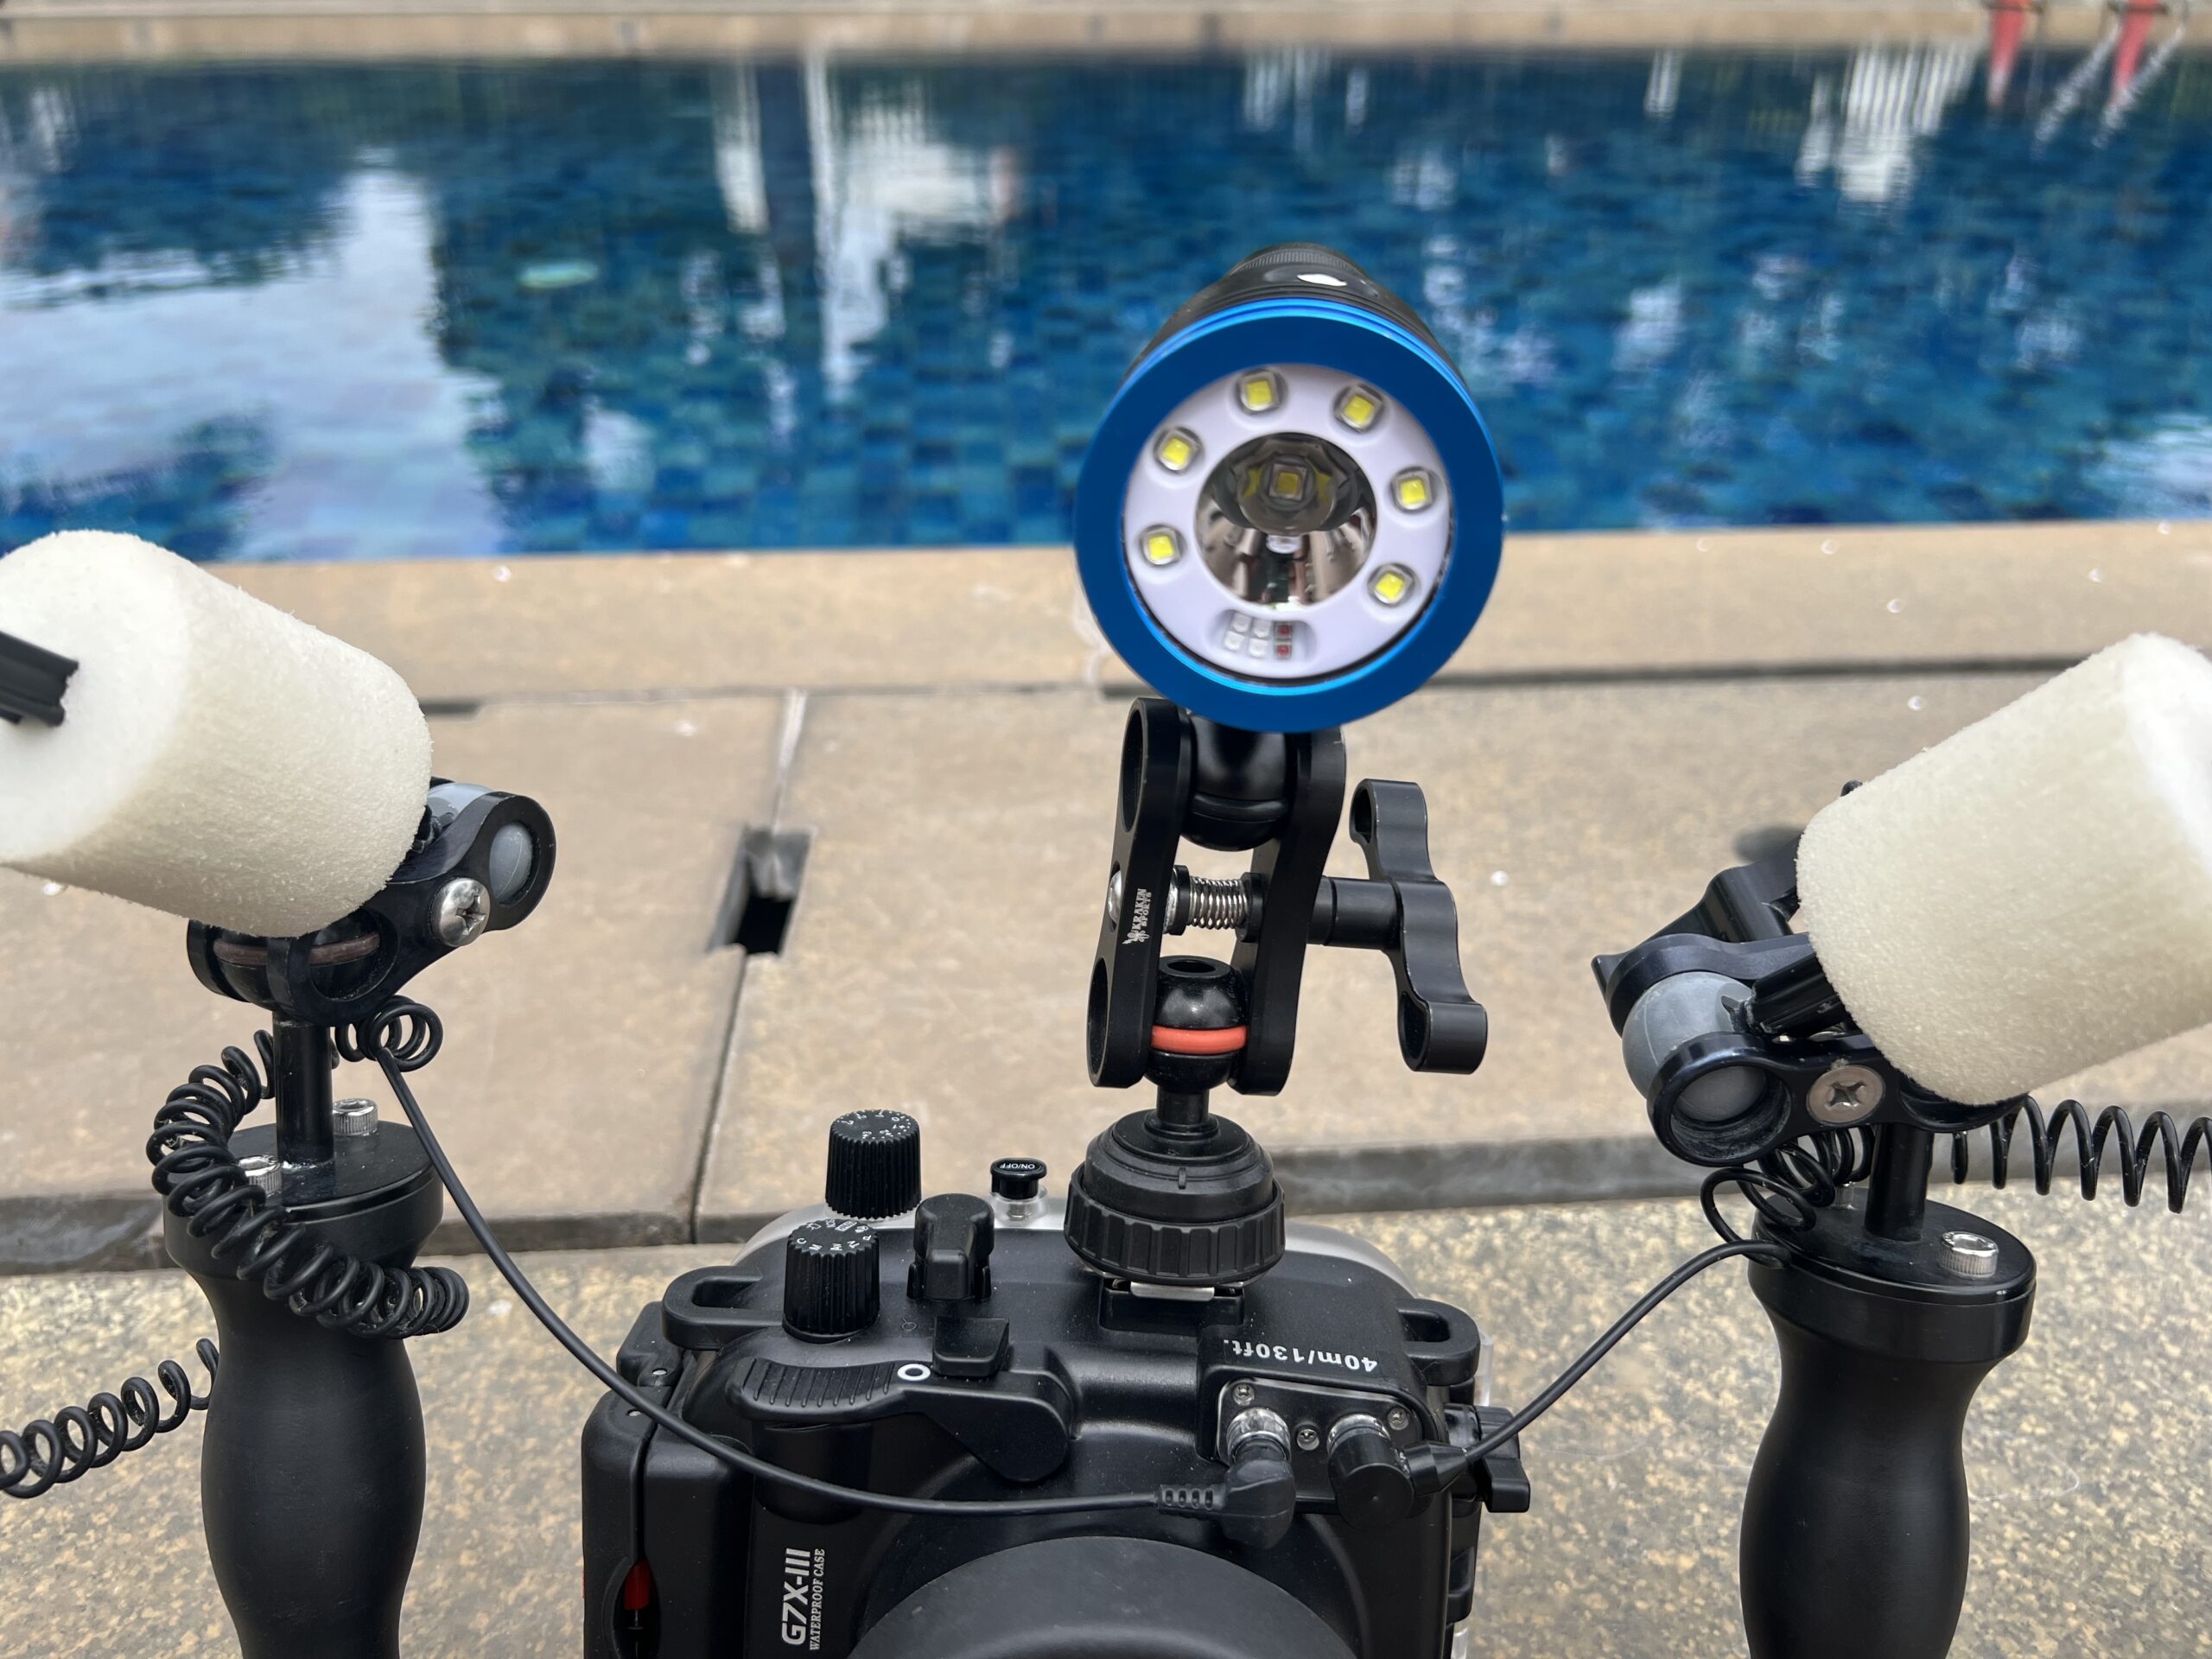
My compact camera system, which you can see being used above, is based around a Canon G7X III, a Seafrogs housing and a compact AOI Q1 strobe, along with a +5 macro diopter and a wide angle wet lens and a Big Blue focus/video light.
Here is some some sample costing for putting together a basic system (pricing is approximate):
- OM Systems TG7 – Rs 45,000
- OM Systems Housing – Rs 35,000
- AOI QI RC Strobe – Rs 35,000
- Big Blue Tray – Rs 8,000
- 2 arms and clamps – Rs 10,000
- Fiber optic cable – Rs 3,000
TOTAL: approximately Rs 1.4L. Current price of an Iphone 17 Pro: Rs 1.5L
Told you!
 Picture by Joydeep Sarkar, @theflyingbaba
